The Coziest Apple Pie Bars Recipe for Sweet Fall Comfort
Sweet memories of grandma’s kitchen dance through my apple pie bars, promising a nostalgic dessert that captures comfort in every delectable bite.
Buttery pastry crumbles alongside tender fruit, creating a harmonious blend of warmth and tradition.
Cinnamon whispers childhood stories across layers of golden crust and soft apples.
Homemade goodness emerges from simple ingredients, transforming ordinary moments into extraordinary experiences.
Baking becomes an art form when passion meets precision in this delightful treat.
Friends will marvel at your culinary skills and request seconds before finishing their first slice.
Grab a fork and indulge in pure happiness.
Apple Pie Bars: What Makes Them a Year-Round Favorite
Gathering Ingredients for Delectable Apple Pie Bars
Crust Base:Fruit Filling:Optional Toppings:How to Assemble and Bake Perfect Apple Pie Bars
Step 1: Prepare the Baking Station
Grab a 9×13 inch baking pan and line it completely with parchment paper, ensuring the paper hangs over the sides for easy removal.
Preheat the oven to a toasty 350F (175C).
Step 2: Create the Magical Crust
In a large mixing bowl, combine:Use a pastry cutter or your fingertips to work cold butter into the dry ingredients until the mixture looks like coarse breadcrumbs.
Crack in a fresh egg and mix until the dough just comes together, being careful not to overmix.
Step 3: Spice Up the Apple Filling
In a separate bowl, toss:Gently mix the ingredients so each apple piece gets coated with the zesty flavors.
Step 4: Build the Pie Bar Foundation
Press about half of the crust mixture firmly into the bottom of the prepared pan, creating an even base layer.
Spread the spiced apple mixture evenly over the crust, making sure to distribute the apples completely.
Step 5: Add the Crumbly Topping
Sprinkle the remaining crust mixture over the apple layer, creating a rustic, bumpy top that will turn golden and crispy while baking.
Step 6: Bake to Perfection
Slide the pan into the preheated oven and bake for 25-30 minutes.
Look for a beautiful golden-brown color across the top and edges.
The aroma of warm cinnamon and baked apples will fill your kitchen.
Step 7: Cool and Slice
Remove the pan from the oven and let it cool completely on a wire rack.
Using the parchment paper overhang, lift the entire batch out of the pan.
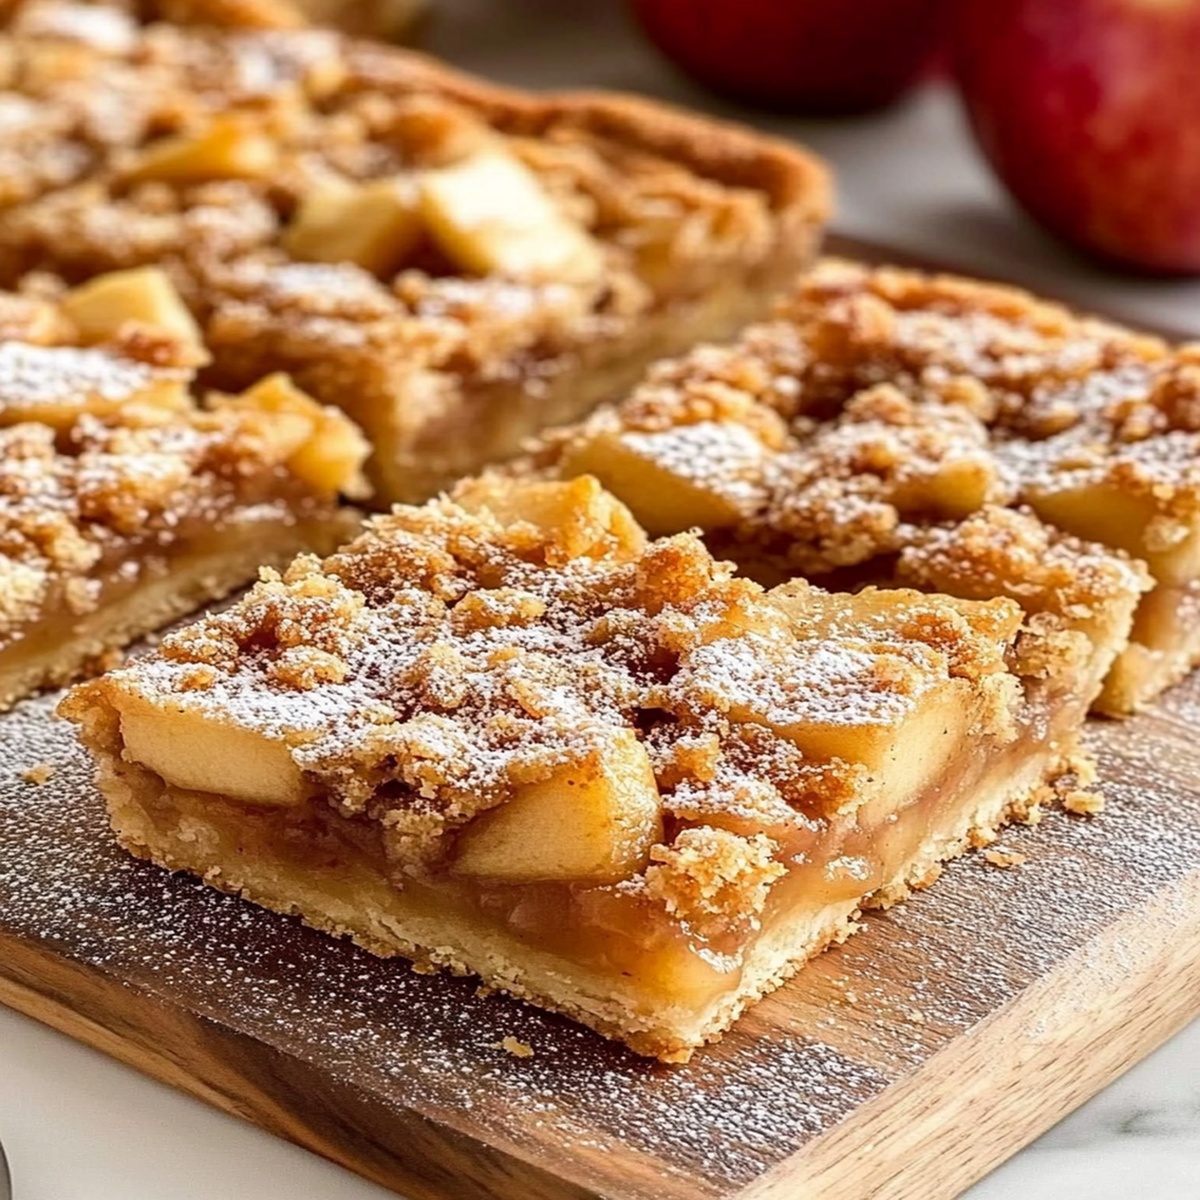
Slice into squares or rectangles, creating perfect handheld treats that capture the essence of fall.
Tips to Achieve the Right Texture in Every Apple Pie Bar
Storing Apple Pie Bars for Long-Lasting Freshness
Beverage and Snack Pairings for Apple Pie Bars
Flavor Upgrades for Your Apple Pie Bars Experience
FAQs
Yes, you can use various apple varieties like Honeycrisp, Granny Smith, or Fuji. Choose apples that are firm and slightly tart for the best flavor and texture in your pie bars.
While not mandatory, parchment paper makes removing and cutting the bars much easier. It prevents sticking and helps you lift the entire batch out of the pan cleanly without breaking.
Look for a golden-brown top and edges that are slightly pulling away from the sides of the pan. The crust should look set and dry, not wet or doughy. A light golden color indicates the bars are done.
Absolutely! You can prepare the bars a day in advance and store them at room temperature. They actually taste great when the flavors have had time to meld together overnight.
Print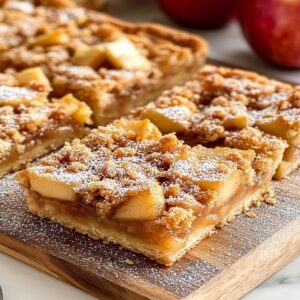
Apple Pie Bars Recipe
- Total Time: 45 minutes
- Yield: 12 1x
Description
Sweet homemade Apple Pie Bars bring classic American dessert comfort to your kitchen. Crisp pastry layers, fragrant cinnamon, and juicy apples create a delightful treat you’ll savor with pure baking joy.
Ingredients
Main Ingredients:
- 4 cups fresh apples (e.g., Granny Smith or Honeycrisp), peeled and diced
- 3/4 cup unsalted butter, cold and cubed
- 2 cups all-purpose flour
- 1 cup granulated sugar
- 1 large egg
Spices and Seasonings:
- 1 teaspoon ground cinnamon
- 1 teaspoon baking powder
- 1/2 teaspoon salt
Flavor Enhancer:
- 1 tablespoon lemon juice
Instructions
- Warm the oven to 350F (175C) and prepare a rectangular baking pan with parchment paper, ensuring complete coverage for easy removal.
- Combine dry ingredients including flour, sugar, baking powder, and salt in a mixing bowl, creating a uniform base mixture.
- Incorporate cold butter into the dry ingredients using a pastry cutter or fingertips until the texture resembles coarse breadcrumbs.
- Fold the egg into the crumbly mixture, gently blending until a cohesive dough forms without overmixing.
- Dice apples into uniform small cubes and immediately toss with fresh lemon juice to prevent browning.
- Sprinkle ground cinnamon over the apple pieces, thoroughly coating each cube for consistent flavor distribution.
- Transfer half the crust mixture into the prepared pan, pressing firmly and evenly to create a compact foundation.
- Spread the seasoned apple mixture uniformly across the first crust layer, ensuring complete coverage.
- Crumble the remaining crust dough over the apple layer, creating a rustic, textured topping.
- Place in the preheated oven and bake for 25-30 minutes until the surface turns golden brown and edges become crisp.
- Remove from oven and allow to cool completely at room temperature for at least 1 hour before cutting into elegant squares.
Notes
- Chill butter beforehand to ensure a flakier, more tender crust that crumbles perfectly when mixed.
- Use tart apples like Granny Smith or Honeycrisp for a balanced sweetness and firmer texture that holds up during baking.
- Sprinkle a bit of nutmeg or cardamom with cinnamon for a deeper, more complex flavor profile that elevates the classic apple pie taste.
- For gluten-free option, swap regular flour with almond or gluten-free blend, maintaining the same measurements and mixing technique.
- Prep Time: 15 minutes
- Cook Time: 30 minutes
- Category: Desserts, Snacks
- Method: Baking
- Cuisine: American
Nutrition
- Serving Size: 12
- Calories: 215
- Sugar: 12 g
- Sodium: 85 mg
- Fat: 10 g
- Saturated Fat: 6 g
- Unsaturated Fat: 4 g
- Trans Fat: 0 g
- Carbohydrates: 31 g
- Fiber: 2 g
- Protein: 2 g
- Cholesterol: 30 mg
Jack Sullivan
Founder & Culinary Storyteller
Expertise
Single-recipe development with a narrative approach, Culinary storytelling and food history, Seasonal and regional ingredient utilization, Home cooking techniques adapted for modern kitchens
Education
New England Culinary Institute (Montpelier, VT)
Certificate in Culinary Arts
Focused on farm-to-table cooking, sustainable practices, and modern plating techniques.
Asheville-Buncombe Technical Community College
Associate Degree in Culinary Arts
Emphasized Southern Appalachian cuisine and local ingredient sourcing.
Jack grew up surrounded by smoky skillets and handwritten recipes in the mountains of North Carolina. His roots in Appalachian cooking shaped the way he sees food – as something that connects people, tells a story, and holds meaning.
With hands-on training and a background in sustainable, regional cooking, Jack started Boil And Broil to make meaningful meals more accessible. He’s all about one-dish recipes that are simple to follow but rich with flavor and history.