Secrets to Perfect Buckeye Brownie Cookies Recipe
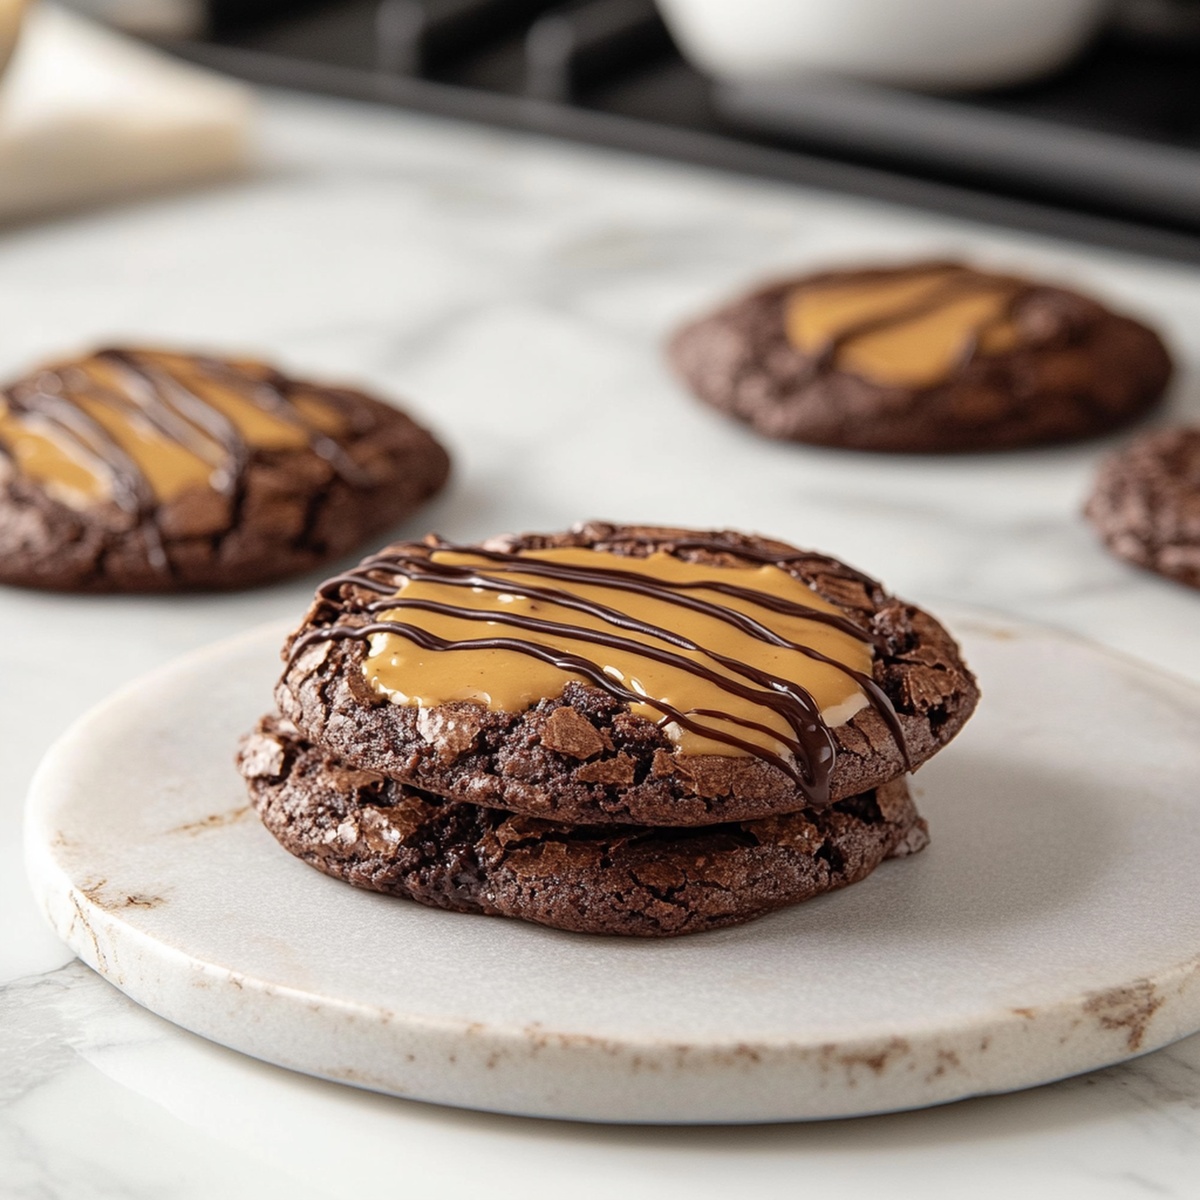
Munching on a delectable buckeye brownie cookie satisfies the deepest chocolate cravings imaginable.
Sweet magic happens when peanut butter meets rich chocolate in this irresistible treat.
Chocolate lovers understand the pure bliss of combining two classic flavors into one incredible dessert.
Decadent layers of fudgy brownie and creamy peanut butter create a mouthwatering experience that surprises and delights.
Each bite promises a perfect balance of intense chocolate and smooth peanut butter that melts on your tongue.
These cookies deliver a nostalgic twist on traditional buckeye candies, transforming them into an addictive bakery-style indulgence.
Prepare to fall in love with a dessert that promises pure, unapologetic deliciousness in every single bite.
Recipe Spins on Buckeye Brownie Cookies
FAQs
Natural peanut butter can be tricky. Stick with creamy, processed peanut butter like Jif or Skippy for best results. These have stabilizers that help maintain the right consistency for the filling.
Chill the peanut butter balls for 15-20 minutes before assembling the cookies. Cold balls hold their shape better and are less likely to break or leak during baking.
The vegetable oil helps create a smoother, shinier chocolate coating that sets nicely. It prevents the chocolate from becoming too thick and helps it adhere better to the cookie surface.
Yes! You can prepare the cookie dough and peanut butter balls up to 2 days in advance. Store them separately in the refrigerator and assemble just before baking for best texture and freshness.
Buckeye Brownie Cookies at a Glance
What Goes Into Buckeye Brownie Cookies
Cookie Base Ingredients:Dry Ingredients:Peanut Butter Filling Ingredients:Chocolate Coating Ingredients:Steps to Make Buckeye Brownie Cookies
Step 1: Warm Up the Oven
Set your oven to 175C (350F).
Cover a baking sheet with parchment paper or a silicone mat for perfect non-stick baking.
Step 2: Whip Up Cookie Dough
In a large mixing bowl, blend together:Beat until the mixture looks fluffy and light.
Add eggs one at a time, mixing thoroughly after each addition.
Pour in vanilla extract and stir.
In a separate bowl, combine:Slowly incorporate dry ingredients into the butter mixture.
Mix until just combined.
Gently fold in chocolate chips.
Step 3: Craft Peanut Butter Centers
In a medium bowl, blend:Mix until smooth and creamy.
Roll small balls of peanut butter mixture, about one teaspoon each.
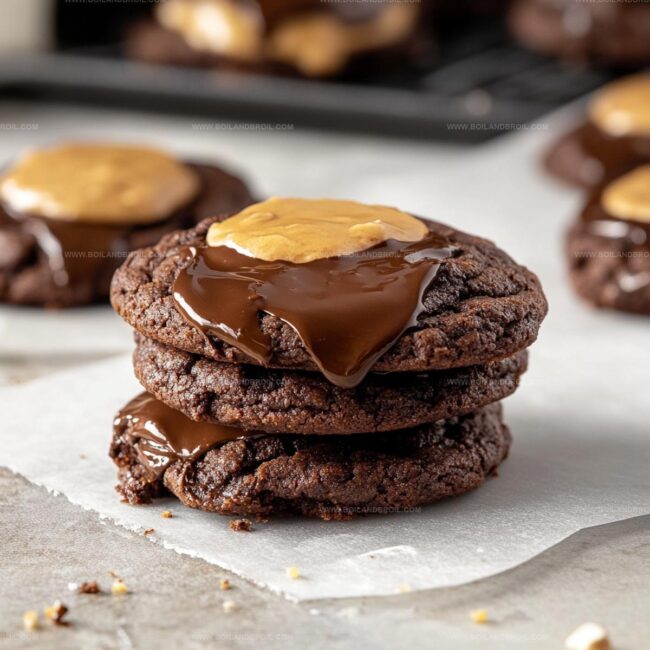
Step 4: Build Cookie Layers
Drop cookie dough onto prepared baking sheet.
Press a peanut butter ball into the center of each dough mound.
Cover the ball with additional cookie dough, sealing completely.
Softly flatten with fingertips.
Step 5: Bake to Perfection
Slide the baking sheet into the oven.
Bake for 10-12 minutes until edges look set but centers remain soft.
Allow cookies to rest on the baking sheet for 5 minutes.
Transfer to a wire rack for complete cooling.
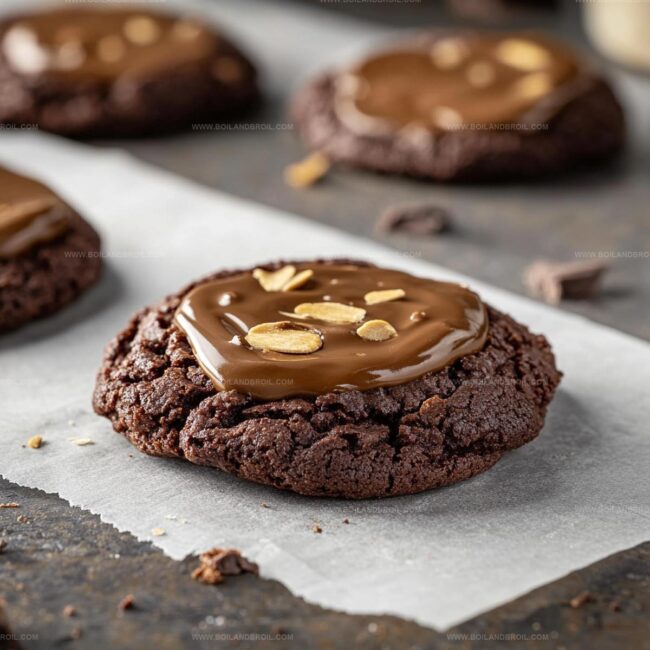
Step 6: Chocolate Drizzle Finish
Melt chocolate chips with vegetable oil in a microwave-safe bowl.
Heat in 30-second intervals, stirring between each.
Dip cookie tops into melted chocolate, letting excess drip away.
Place on parchment-lined sheet and let chocolate set.
Quick Tips for Buckeye Brownie Cookies

Reheat and Store Buckeye Brownie Cookies
Pair Buckeye Brownie Cookies with These
Print
Buckeye Brownie Cookies Recipe
- Total Time: 30 minutes
- Yield: 24 1x
Description
Indulgent Buckeye Brownie Cookies blend rich chocolate and creamy peanut butter in a delightful dessert inspired by Ohio’s classic treat. Chocolate lovers will savor each bite of these irresistible, fudgy cookies that promise pure bliss with minimal effort.
Ingredients
Main Ingredients:
- 1 cup (226 grams) unsalted butter, softened
- 1 cup (200 grams) granulated sugar
- 1 cup (220 grams) packed brown sugar
- 2 large eggs
- 1 cup (125 grams) all-purpose flour
- 1/2 cup (50 grams) unsweetened cocoa powder
- 1 cup (170 grams) semi-sweet chocolate chips
- 1 cup (250 grams) creamy peanut butter
Flavor Enhancers:
- 1 teaspoon vanilla extract
- 1/2 teaspoon baking soda
- 1/4 teaspoon salt
Topping/Finishing Ingredients:
- 1/2 cup (60 grams) powdered sugar
- 1/2 teaspoon vanilla extract
- 1 cup (170 grams) semi-sweet chocolate chips
- 2 tablespoons (30 milliliters) vegetable oil
Instructions
- Prepare the environment by heating the oven to 175C (350F) and lining a baking sheet with parchment paper or silicone mat.
- Create the cookie base by whipping butter and sugars until fluffy, then incorporating eggs and vanilla extract thoroughly.
- Develop the dry mixture separately by whisking flour, cocoa powder, baking soda, and salt until evenly combined.
- Merge wet and dry ingredients gently, ensuring minimal mixing to maintain cookie texture, then fold in chocolate chips.
- Craft the peanut butter center by blending peanut butter, powdered sugar, and vanilla extract until smooth and consistent.
- Form small peanut butter spheres, approximately one teaspoon in size, ready for cookie insertion.
- Construct each cookie by placing dough mounds on the prepared sheet, embedding a peanut butter ball in the center, and sealing with additional dough.
- Gently flatten each assembled cookie using fingertips to create uniform shape.
- Bake for 10-12 minutes, watching for set edges and soft centers, indicating perfect doneness.
- Allow cookies to rest on baking sheet for 5 minutes, then transfer to wire rack for complete cooling.
- Melt chocolate chips with vegetable oil in microwave, stirring between 30-second intervals until silky and smooth.
- Dip cooled cookie tops into melted chocolate, letting excess drip off naturally.
- Place chocolate-coated cookies on parchment-lined sheet, allowing chocolate to solidify completely.
Notes
- Adjust cookie size for consistent baking by using a cookie scoop or tablespoon for uniform measurement.
- Chill dough for 15-20 minutes before shaping to prevent spreading and maintain cookie structure.
- Use room temperature ingredients to ensure smoother mixing and better cookie texture.
- Replace peanut butter with sunflower seed butter for nut-free version, perfect for allergy-sensitive individuals.
- Reduce sugar by 25% if prefer less sweetness without compromising cookie’s overall flavor profile.
- Store cookies in airtight container between parchment layers to prevent chocolate from sticking.
- Freeze unbaked cookie dough balls for convenient future baking, extending recipe’s convenience.
- Prep Time: 20 minutes
- Cook Time: 10 minutes
- Category: Desserts, Snacks
- Method: Baking
- Cuisine: American
Nutrition
- Serving Size: 24
- Calories: 250
- Sugar: 20 g
- Sodium: 100 mg
- Fat: 14 g
- Saturated Fat: 6 g
- Unsaturated Fat: 8 g
- Trans Fat: 0 g
- Carbohydrates: 30 g
- Fiber: 1 g
- Protein: 4 g
- Cholesterol: 30 mg
Clara Thompson
Recipe Developer & Culinary Educator
Expertise
Developing accessible single-serving recipes, Food writing and content creation, Plant-based and allergen-friendly cooking, Culinary education and workshop facilitation
Education
Oregon Culinary Institute (Portland, OR)
Diploma in Culinary Arts
Specialized in plant-based cooking and sustainable kitchen practices.
Portland Community College
Certificate in Food Writing and Media
Focused on recipe writing, food photography, and digital content creation.
Clara’s food journey began with a curiosity for color, texture, and ingredients pulled straight from the garden. Her background in plant-forward cooking and creative writing gives her a unique edge – she makes healthy, flavorful food feel inviting, not intimidating.
She specializes in meals that work for busy lives and different diets, all without sacrificing taste. Clara’s voice comes through in every recipe she writes – clear, kind, and encouraging.