
Playful Bunny Tail Cake Pops Recipe That Charms Every Time
Sweet bunny tail cake pops make adorable treats that spark joy at any springtime gathering.
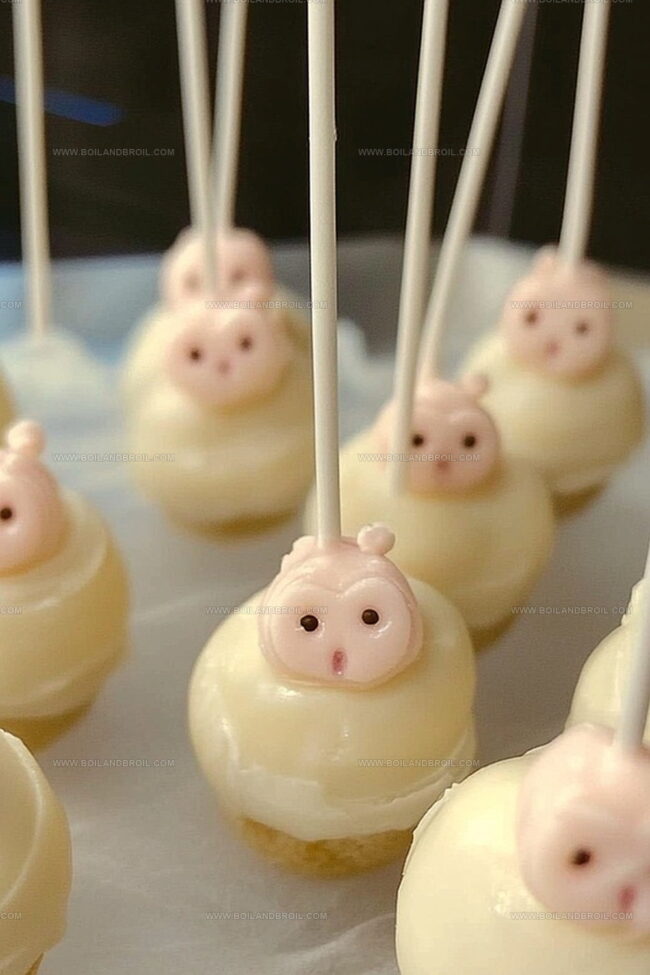
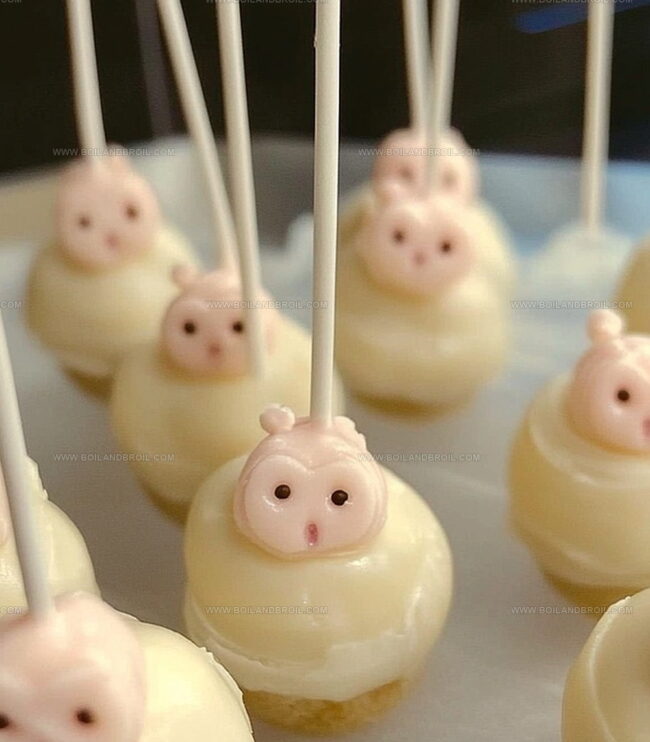
Pastel-colored spheres decorated with fluffy coconut resemble miniature cottontails hopping across your dessert plate.
Children adore these playful confections that combine whimsy with delicious flavor.
Crafting these delicate bites requires minimal baking skills and basic decorating techniques.
Soft marshmallow-like centers provide a delightful contrast to crisp candy coating.
Small hands can help roll and design these charming sweet morsels.
You will love how quickly these cute cake pops come together for festive celebrations.
Prepare to delight everyone with these irresistible bunny-inspired treats!
Bunny Tail Cake Pops: Adorable Spring Sweets
Bunny Tail Cake Pop Ingredients You’ll Need
Cake Base:Binding and Coating:Decoration:Crafting Cute Bunny Tail Cake Pops
Step 1: Bake Fluffy Cake Base
Preheat the oven following the cake mix package directions.
Grease your baking pan thoroughly and prepare the cake batter exactly as the box instructs.
Bake until the cake turns a beautiful golden brown and passes the toothpick test.
Step 2: Transform Cake Into Crumbly Goodness
Once the cake has completely cooled down, break it into super fine crumbs inside a spacious mixing bowl.
Use your hands or a fork to create soft, even cake crumbles that will form the base of your bunny tail treats.
Step 3: Create Sticky Cake Ball Mixture
Blend the frosting into the cake crumbs, mixing thoroughly until the entire mixture becomes cohesive.
Test the consistency by gently pressing the mixture – it should hold together perfectly without crumbling.
Step 4: Shape Adorable Bunny Tail Balls
Roll small portions of the cake mixture into perfectly round balls.
Each ball should be about one tablespoon in size.
Carefully place these delicate spheres onto a parchment-lined baking sheet.
Step 5: Coat With Magical White Covering
Melt white candy melts using the package instructions.
Carefully dip each cake ball halfway into the smooth, white coating.
While the coating is still wet, generously sprinkle shredded coconut to create a fluffy, tail-like texture.
Step 6: Let Bunny Tails Set
Allow the cake pops to rest and set completely.
The coconut will stick to the coating, creating a cute, fuzzy bunny tail appearance.
Serve and watch everyone smile!
Tips for Smooth, Colorful Cake Pop Coating
Storing Bunny Tail Cake Pops for Display
Pairing Drinks and Snacks with Cake Pops
Creative Flavor Ideas for Cake Pops
FAQs
You’ll need a boxed cake mix, frosting, candy melts, and shredded coconut. These simple ingredients help create the adorable bunny-themed treat.
When mixing crumbled cake with frosting, add just enough frosting so the mixture holds together when pressed. Too little frosting will make them crumbly, while too much will make them too soft.
Yes! You can prepare the cake balls and refrigerate them before dipping in candy melts. They can be stored in the refrigerator for 1-2 days before final coating and decorating.
Basic kitchen tools work fine – a baking pan, mixing bowl, parchment paper, and a spoon for dipping. Optional tools like a cake pop stand can help with drying, but aren’t necessary.
Print
Bunny Tail Cake Pops Recipe
- Total Time: 50 minutes
- Yield: 12 1x
Description
Sweet bunny tail cake pops delight springtime celebrations with playful charm. Adorable miniature treats roll creamy frosting and delicate coconut into whimsical pastel spheres perfect for Easter gatherings.
Ingredients
Cake Base:
- 1 box cake mix (any flavor)
- 2 large eggs
Coating and Decoration:
- 12 ounces (340 grams) white candy melts
- 1 cup unsweetened coconut flakes
Filling:
- 1/2 cup (120 milliliters) frosting (store-bought or homemade)
Instructions
- Prepare cake mix following package guidelines, using a greased baking pan. Bake until the cake achieves a golden-brown hue, typically 25-30 minutes at recommended temperature.
- Allow cake to cool completely, then meticulously crumble into fine, uniform texture within a spacious mixing bowl.
- Incorporate frosting gradually, blending until the mixture achieves a cohesive, moldable consistency that maintains shape when gently compressed.
- Craft uniform spherical shapes using approximately one tablespoon of mixture, positioning each delicately on a parchment-lined baking sheet.
- Gently melt candy coating using precise microwave intervals or double boiler method, ensuring smooth, lump-free consistency.
- Submerge each cake ball halfway into the warm coating, allowing excess to gently drip off.
- Immediately sprinkle coconut flakes over the wet coating, creating a textured, snow-like appearance that mimics fluffy bunny tails.
- Rest cake pops on parchment paper, permitting coating to solidify and coconut to adhere completely, approximately 15-20 minutes at room temperature.
Notes
- Crumble cake completely cool for best texture, avoiding any large cake chunks that might make shaping difficult.
- Use cream cheese frosting for extra moisture and binding power, creating smoother cake pop consistency.
- Chill cake balls briefly before dipping to prevent them from falling apart in melted candy coating.
- Work quickly when coating with coconut to ensure even coverage while candy melts remain wet and sticky.
- Prep Time: 20 minutes
- Cook Time: 30 minutes
- Category: Desserts, Snacks
- Method: Baking
- Cuisine: American
Nutrition
- Serving Size: 12
- Calories: 210
- Sugar: 16 g
- Sodium: 150 mg
- Fat: 9 g
- Saturated Fat: 5 g
- Unsaturated Fat: 4 g
- Trans Fat: 0 g
- Carbohydrates: 30 g
- Fiber: 1 g
- Protein: 2 g
- Cholesterol: 35 mg
Jack Sullivan
Founder & Culinary Storyteller
Expertise
Single-recipe development with a narrative approach, Culinary storytelling and food history, Seasonal and regional ingredient utilization, Home cooking techniques adapted for modern kitchens
Education
New England Culinary Institute (Montpelier, VT)
Certificate in Culinary Arts
Focused on farm-to-table cooking, sustainable practices, and modern plating techniques.
Asheville-Buncombe Technical Community College
Associate Degree in Culinary Arts
Emphasized Southern Appalachian cuisine and local ingredient sourcing.
Jack grew up surrounded by smoky skillets and handwritten recipes in the mountains of North Carolina. His roots in Appalachian cooking shaped the way he sees food – as something that connects people, tells a story, and holds meaning.
With hands-on training and a background in sustainable, regional cooking, Jack started Boil And Broil to make meaningful meals more accessible. He’s all about one-dish recipes that are simple to follow but rich with flavor and history.