
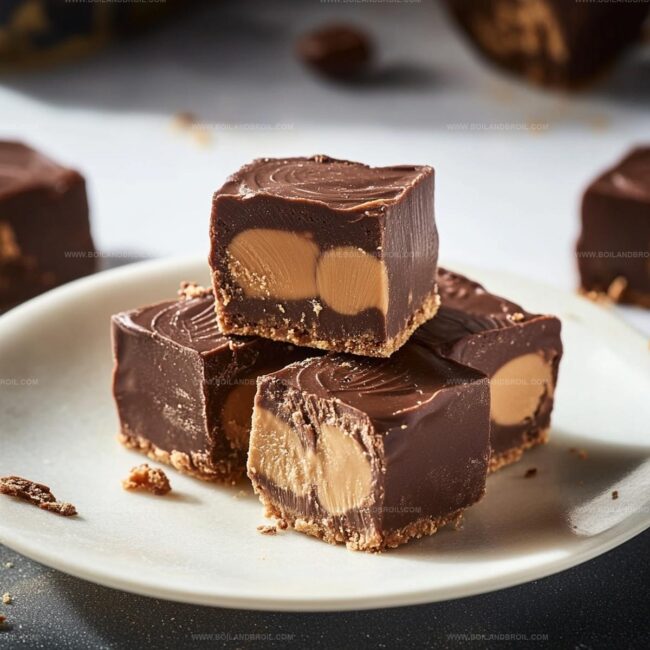
Heavenly Butterfinger Reeses Fudge Recipe: Sweet Magic Awaits
Sweet tooth warriors, this Butterfinger Reese’s fudge delivers a knockout punch of decadent chocolate magic that will make your taste buds dance.
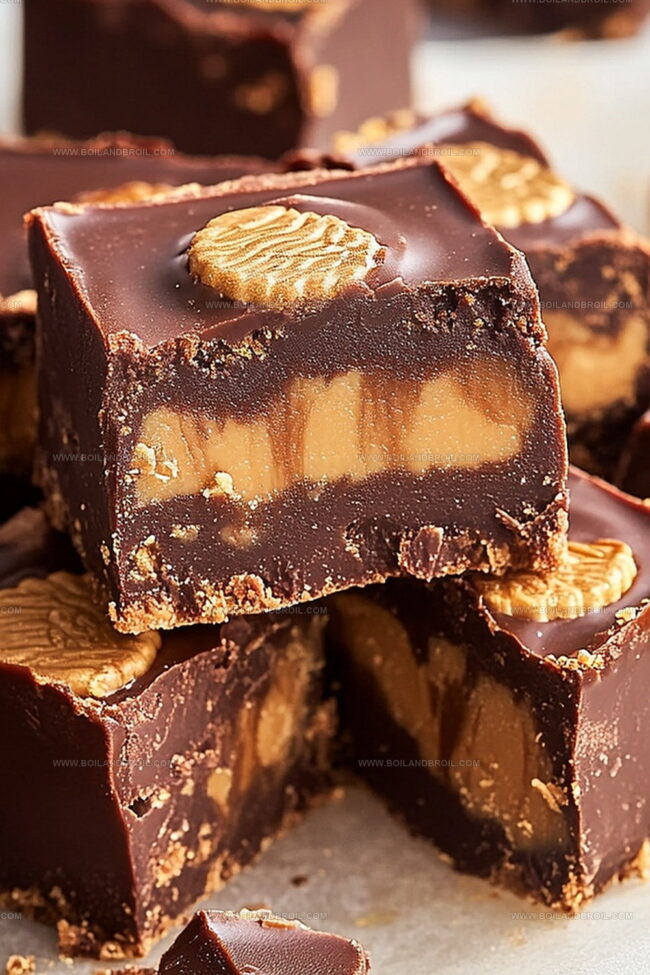
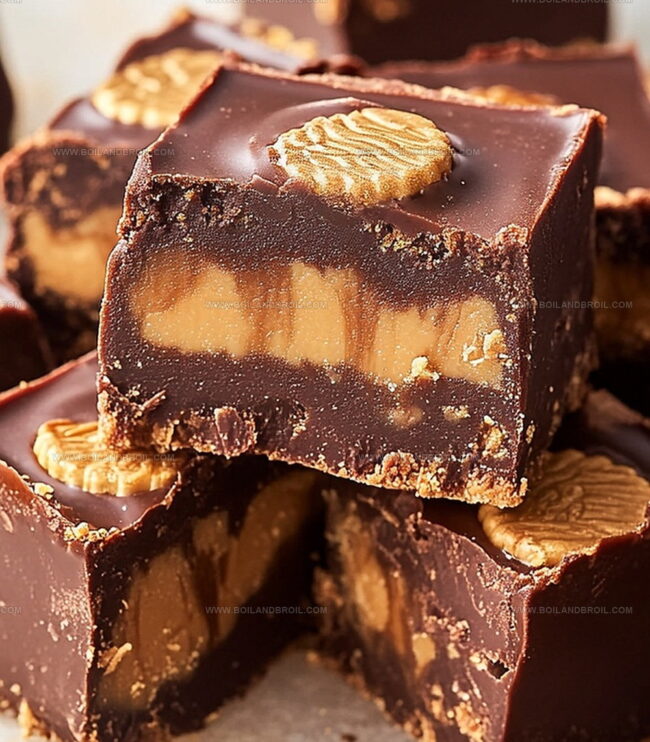
Layers of creamy goodness combine with crunchy candy pieces for an irresistible treat.
Chocolate fanatics understand the power of unexpected flavor combinations.
Crumbled candy bars create unexpected texture surprises in every bite.
Dessert lovers know how special homemade sweets can be when crafted with passion.
Minimal ingredients and simple steps mean you can whip up this incredible confection faster than you might expect.
Prepare to be the dessert hero at your next gathering – this fudge will have everyone begging for your recipe.
Butterfinger Reeses Fudge Must-Knows

Items Needed for Butterfinger Reeses Fudge
Chocolate Base:Candy Ingredients:Preparation Ingredient:Butterfinger Reeses Fudge Step-by-Step
Step 1: Prepare Baking Surface
Line an 8×8-inch baking pan with parchment paper, ensuring extra paper hangs over the edges for easy lifting later.
Step 2: Create Chocolate Base
In a medium saucepan over low heat, combine:Stir continuously until ingredients melt into a smooth, glossy mixture.
Remove from heat and blend in vanilla extract.
Step 3: Incorporate Candy Pieces
Gently mix in half of the chopped:Pour the fudge mixture into the prepared pan, spreading evenly with a spatula.
Step 4: Decorate Fudge Surface
Sprinkle remaining chopped candy pieces across the top, pressing them gently into the fudge to ensure they stick.
Step 5: Chill and Set
Refrigerate the fudge for 2 hours or until completely firm and solid.
Step 6: Slice and Enjoy
Remove fudge from pan using parchment paper edges.
Cut into bite-sized squares and serve chilled.
Helpful Tips for Butterfinger Reeses Fudge
Save & Heat Butterfinger Reeses Fudge
Snacks to Pair with Butterfinger Reeses Fudge
New Ways to Serve Butterfinger Reeses Fudge
FAQs
Yes, you can substitute semisweet and milk chocolate chips with dark chocolate or white chocolate chips. Just ensure they melt smoothly and are of good quality.
Stir the chocolate mixture constantly over low heat and avoid overheating. Use a heavy-bottomed saucepan and remove from heat as soon as everything is melted and smooth.
Refrigeration helps the fudge set quickly and maintain its firm texture. Chilling for at least 2 hours ensures the fudge cuts cleanly and holds its shape.
Absolutely! You can prepare the fudge up to a week in advance. Store it in an airtight container in the refrigerator, and it will remain fresh and delicious.
Print
Butterfinger Reeses Fudge Recipe
- Total Time: 25 minutes
- Yield: 12 1x
Description
Indulgent Butterfinger Reeses Fudge blends rich chocolate with crunchy candy bars, creating a dreamy dessert sensation. Sweet layers of creamy chocolate meld perfectly with salty-sweet peanut butter, promising pure bliss in each delectable bite you’ll savor.
Ingredients
Main Ingredients:
- 2 cups (480 ml) semisweet chocolate chips
- 1 cup (240 ml) milk chocolate chips
- 1 cup (240 ml) chopped Butterfinger candy bars
- 1 cup (240 ml) chopped Reeses Peanut Butter Cups
Binding Ingredients:
- 1 can (14 ounces or 396 grams) sweetened condensed milk
Flavor Enhancers:
- 2 tablespoons (30 ml) unsalted butter
- 1 teaspoon (5 ml) vanilla extract
Instructions
- Prepare the workspace by lining an 8×8-inch baking dish with parchment paper, ensuring extra paper hangs over the edges for effortless removal.
- Create a smooth chocolate base by combining semisweet and milk chocolate chips, sweetened condensed milk, and butter in a medium saucepan. Melt ingredients over low heat, stirring continuously until the mixture transforms into a glossy, uniform consistency.
- Remove the chocolate mixture from heat and infuse with vanilla extract, stirring to incorporate the aromatic flavor.
- Enhance the fudge by gently folding half of the chopped Butterfinger and Reeses Peanut Butter Cups into the melted chocolate, distributing the candy pieces evenly throughout the mixture.
- Transfer the fudge mixture into the prepared baking dish, using a spatula to spread it uniformly and create a smooth surface.
- Garnish the fudge by scattering the remaining chopped Butterfinger and Reeses Peanut Butter Cups across the top, delicately pressing them into the surface to ensure they adhere.
- Chill the fudge in the refrigerator for approximately 2 hours, or until it becomes completely firm and set.
- Once solidified, utilize the parchment paper overhang to lift the fudge from the dish, then slice into bite-sized squares using a sharp knife.
- Serve and enjoy the decadent, candy-studded chocolate treat.
Notes
- Prevent Chocolate Burning: Melt chocolate using a double boiler or low heat to ensure smooth, glossy texture without scorching.
- Candy Crushing Hack: Freeze Butterfinger and Reeses before chopping for cleaner, more precise cuts and less messy crumbling.
- Flavor Customization: Swap candies with similar textured alternatives like Snickers or Crunch bars for unique taste variations.
- Storage Secret: Keep fudge refrigerated in an airtight container for up to one week, separating layers with parchment paper to maintain freshness.
- Prep Time: 10 minutes
- Cook Time: 15 minutes
- Category: Desserts, Snacks
- Method: Baking
- Cuisine: American
Nutrition
- Serving Size: 12
- Calories: 305
- Sugar: 27g
- Sodium: 86mg
- Fat: 16g
- Saturated Fat: 9g
- Unsaturated Fat: 7g
- Trans Fat: 0g
- Carbohydrates: 36g
- Fiber: 1g
- Protein: 3g
- Cholesterol: 12mg
Clara Thompson
Recipe Developer & Culinary Educator
Expertise
Developing accessible single-serving recipes, Food writing and content creation, Plant-based and allergen-friendly cooking, Culinary education and workshop facilitation
Education
Oregon Culinary Institute (Portland, OR)
Diploma in Culinary Arts
Specialized in plant-based cooking and sustainable kitchen practices.
Portland Community College
Certificate in Food Writing and Media
Focused on recipe writing, food photography, and digital content creation.
Clara’s food journey began with a curiosity for color, texture, and ingredients pulled straight from the garden. Her background in plant-forward cooking and creative writing gives her a unique edge – she makes healthy, flavorful food feel inviting, not intimidating.
She specializes in meals that work for busy lives and different diets, all without sacrificing taste. Clara’s voice comes through in every recipe she writes – clear, kind, and encouraging.