Quick Cake Mix Cookie Bars Recipe: Sweet Treat Success
Sweet memories flood back with these irresistible cake mix cookie bars that combine the best of both worlds.
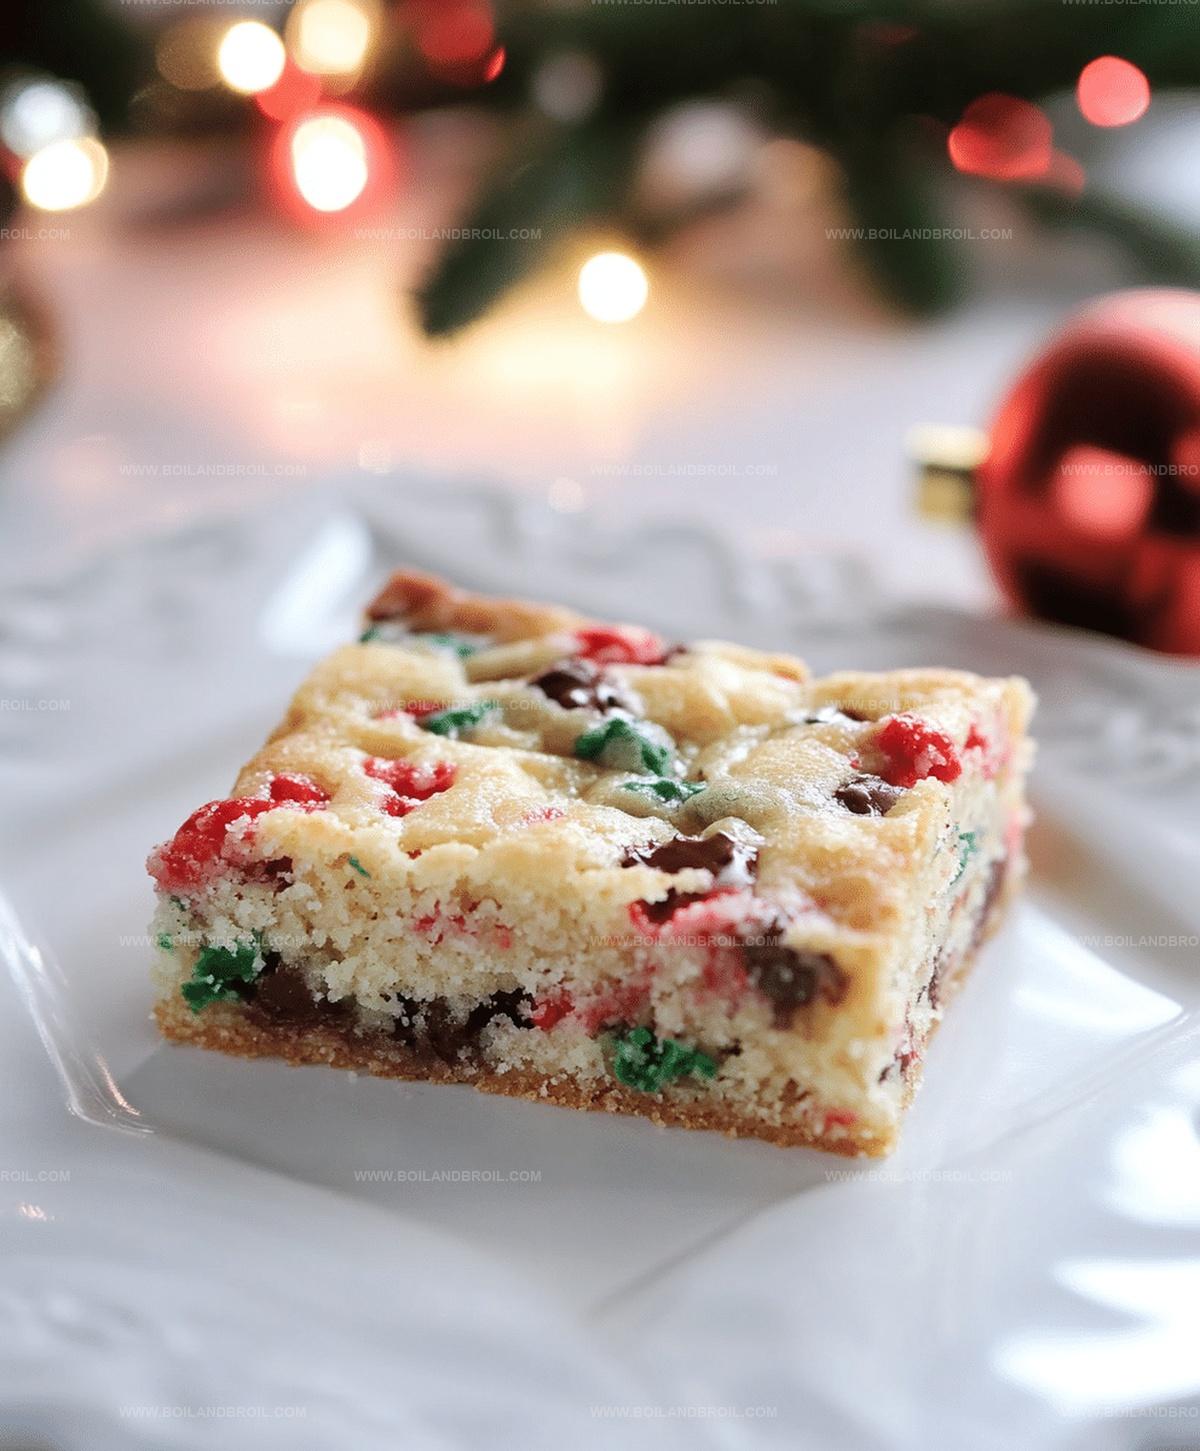
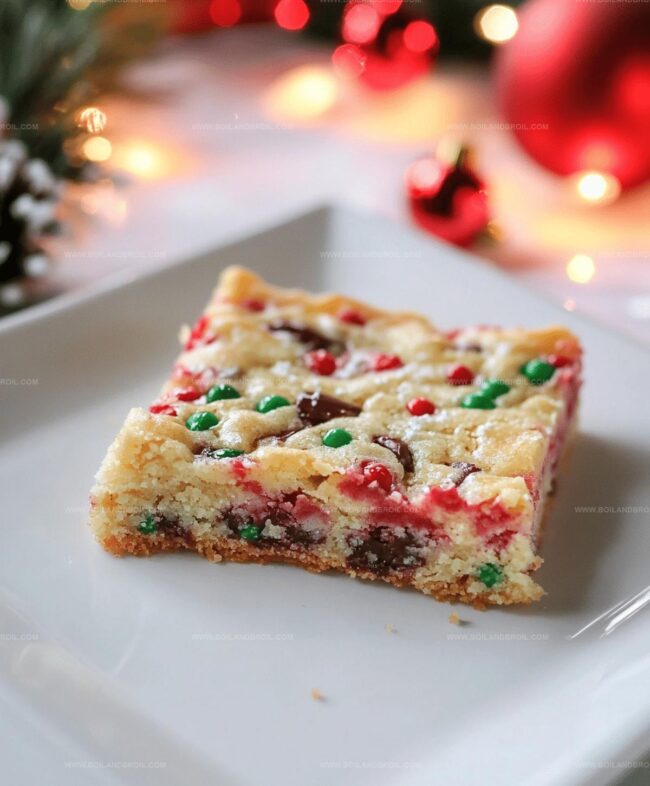
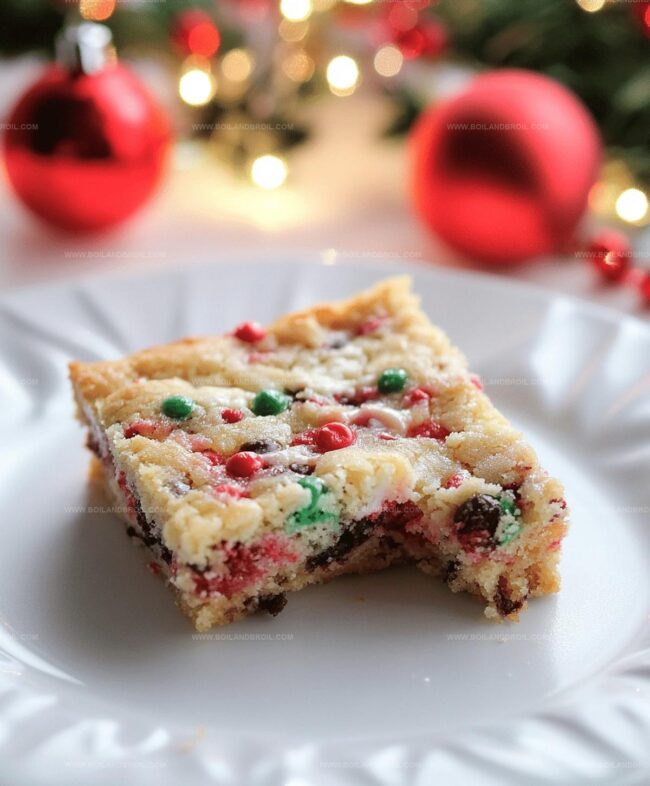
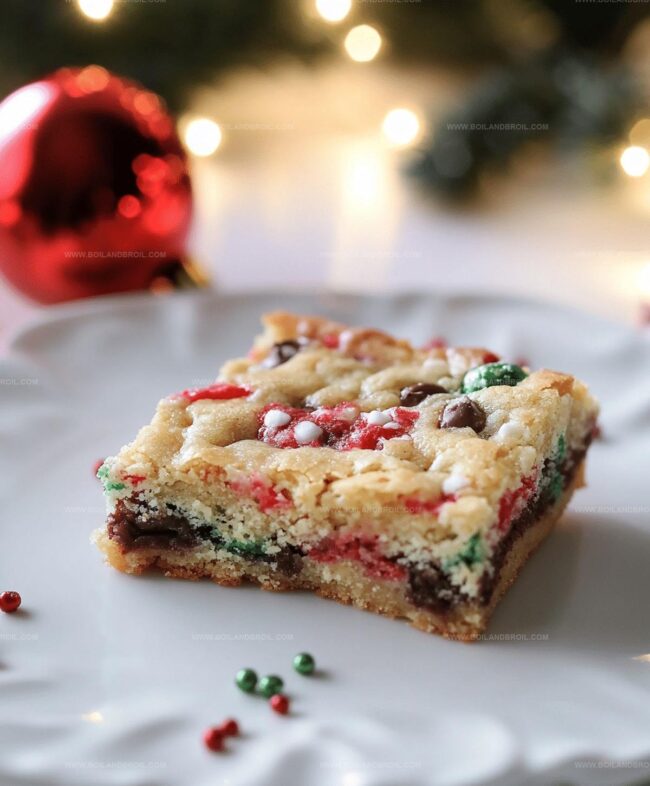
Soft, chewy, and incredibly simple, this cake mix cookie bars recipe delivers pure dessert magic in every bite.
You can whip up these delectable treats with minimal effort and maximum flavor.
The secret weapon?
A standard cake mix that becomes the perfect base for a quick and delightful dessert.
Pantry staples and a few extra ingredients are all you need to create these mouthwatering bars.
Chocolate chips, sprinkles, or nuts can easily customize this foolproof recipe to match your mood or craving.
Let these cookie bars become your new go-to dessert that will have everyone asking for seconds.
Cookie Bar Flavor Ideas
FAQs
Yes, you can swap the yellow cake mix for other flavors like white, chocolate, or funfetti. Each flavor will give a unique twist to the cookie bars.
No problem! You can substitute M&Ms with chocolate chips, sprinkles, chopped nuts, or any other mix-in you prefer. Just use about 1 cup of your chosen add-in.
Look for golden brown edges and a toothpick that comes out clean or with just a few moist crumbs. The center should be soft but not wet. Avoid overbaking to keep the bars chewy.
While not mandatory, parchment paper makes removing the bars easier and prevents sticking. If you don’t have it, generously grease the pan with butter or cooking spray.
Why Cookie Bars Are So Easy
Cake Mix Cookie Bar Ingredients
Base Mix:Colorful Add-Ins:Baking Essentials:Bake Cake Mix Cookie Bars Like a Pro
Step 1: Prep the Oven and Pan
Crank up your oven to 350°F.
Grab a 9×9 baking pan and give it a quick spray with cooking oil.
Line the pan with parchment paper, letting the edges hang over the sides for easy removal later.
Step 2: Create the Base Mixture
Grab a mixing bowl and toss in:Stir everything together until you’ve got a smooth, thick batter that looks super inviting and slightly sticky.
Step 3: Add Bursts of Color
Gently fold in most of the M&Ms into the batter.
Save a few candies to sprinkle on top for an extra pop of color and fun.
Step 4: Spread the Love
Transfer the batter to your prepared pan.
Use a spatula to spread it evenly, making sure to press into the corners.
Don’t stress about perfect smoothness – it’ll work itself out during baking.
Step 5: Bake to Perfection
Slide the pan into the oven and bake for 25-30 minutes.
You’re looking for golden brown edges and a center that’s set but still soft.
A toothpick inserted in the middle should come out clean.
Step 6: Cool and Slice
Let the bars rest in the pan for 10 minutes.
Then use the parchment paper handles to lift the entire batch onto a cutting board.
Slice into nine delicious squares (or more if you’re feeling generous).
Cookie Bar Tips and Tricks
Storing and Reheating Cookie Bars
Perfect Pairings for Cookie Bars
Pair Sweet Sensations with Delightful Beverages: Print
Cake Mix Cookie Bars Recipe
- Total Time: 40 minutes
- Yield: 12 1x
Description
Indulgent cake mix cookie bars blend classic dessert magic into one irresistible treat. Chocolate chips and rich texture create a simple, crowd-pleasing dessert you’ll crave again and again.
Ingredients
Main Ingredients:
- 1 box yellow cake mix
- 2 large eggs
- 1/2 cup (113 grams) butter
- 2 cups (340 grams) M&Ms
Optional Toppings/Mix-ins:
- None listed in original recipe
Baking Essentials:
- None listed in original recipe
Instructions
- Prepare the baking environment by heating the oven to 350°F. Coat a 9×9 inch pan with grease and create a parchment paper sling for easy removal.
- In a mixing bowl, thoroughly combine yellow cake mix, melted butter, and eggs until achieving a uniform, dense consistency.
- Gently incorporate M&Ms into the batter, reserving a small portion for decorative topping if desired.
- Carefully spread the thick batter across the prepared pan, ensuring even distribution and pressing into all corners.
- Bake for 25-30 minutes, monitoring until the surface turns golden brown and a toothpick emerges clean when inserted into the center. The edges should appear crisp while maintaining a soft interior.
- Allow the baked bars to rest in the pan for 10 minutes, then utilize the parchment sling to transfer to a cutting surface. Slice into nine equal squares or adjust size as preferred.
Notes
- Swap cake mix for gluten-free alternatives to accommodate dietary restrictions, ensuring everyone can enjoy these delightful bars.
- Use room temperature eggs and butter for smoother batter mixing and more consistent texture, preventing potential lumps or uneven distribution.
- Check doneness early by testing with a toothpick around 22-25 minutes, as ovens vary and you want to maintain a soft, gooey center without burning the edges.
- Prep Time: 10 minutes
- Cook Time: 30 minutes
- Category: Desserts, Snacks
- Method: Baking
- Cuisine: American
Nutrition
- Serving Size: 12
- Calories: 180
- Sugar: 15g
- Sodium: 150mg
- Fat: 7g
- Saturated Fat: 4g
- Unsaturated Fat: 3g
- Trans Fat: 0g
- Carbohydrates: 25g
- Fiber: 0g
- Protein: 2g
- Cholesterol: 30mg
Clara Thompson
Recipe Developer & Culinary Educator
Expertise
Developing accessible single-serving recipes, Food writing and content creation, Plant-based and allergen-friendly cooking, Culinary education and workshop facilitation
Education
Oregon Culinary Institute (Portland, OR)
Diploma in Culinary Arts
Specialized in plant-based cooking and sustainable kitchen practices.
Portland Community College
Certificate in Food Writing and Media
Focused on recipe writing, food photography, and digital content creation.
Clara’s food journey began with a curiosity for color, texture, and ingredients pulled straight from the garden. Her background in plant-forward cooking and creative writing gives her a unique edge – she makes healthy, flavorful food feel inviting, not intimidating.
She specializes in meals that work for busy lives and different diets, all without sacrificing taste. Clara’s voice comes through in every recipe she writes – clear, kind, and encouraging.