
Dreamy Cake Pops Recipe: Bite-Sized Joy on a Stick
Sweet and playful cake pops bring joy to every celebration, turning ordinary desserts into delightful bite-sized treats.
Kids absolutely adore these colorful confections that sparkle with creativity.
Crafting these miniature delicacies requires minimal baking skills and maximum fun.
Each pop becomes a canvas for personal expression, decorated with sprinkles, chocolate drizzles, or whimsical designs.
Simple ingredients like crumbled cake, frosting, and candy melts come together in a magical transformation.
Hosting a party or craving a sweet moment?
These adorable cake pops will definitely make you the star of any gathering.
Let’s create some edible magic that will have everyone smiling.
Cake Pops – Sweet Bites, Big Smiles

What You’ll Need for Cake Pops
Cake Base:Coating and Decoration:Equipment:How to Shape Your Own Cake Pops
Step 1: Bake and Cool the Cake
Prepare the cake following the package directions.
Allow the cake to cool completely at room temperature, ensuring it’s not warm when you start working with it.
Step 2: Transform Cake into Crumbs
Carefully break the cooled cake into a large mixing bowl.
Use your hands or a fork to crumble the cake into fine, even crumbs.
Ensure no large chunks remain.
Step 3: Create the Perfect Cake Pop Mixture
Ingredients:Mix the frosting into the cake crumbs.
Gently blend until the mixture becomes sticky and holds together when pressed.
The consistency should be moist enough to form balls but not too wet.
Step 4: Shape the Cake Balls
Roll the mixture into uniform one-inch balls using your palms.
Place each ball on a parchment-lined baking sheet.
Make sure they’re smooth and compact.
Step 5: Prepare the Cake Pop Sticks
Melt chocolate in a microwave-safe bowl.
Dip the tip of each lollipop stick into the melted chocolate.
Carefully insert the chocolate-dipped end into the center of each cake ball, creating a secure anchor.
Step 6: Coat with Chocolate Goodness
Ingredients:Dip each cake pop into the melted chocolate, ensuring complete coverage.
Gently tap off excess chocolate.
While the coating is still wet, sprinkle decorative toppings over the surface.
Step 7: Let Them Set
Place the decorated cake pops upright in a styrofoam block or cake pop stand.
Allow them to set completely at room temperature until the chocolate hardens.
Pro Tips for Cake Pop Success
Cake Pop Storage Guide
Pairings for Cake Pops You’ll Enjoy
Cake Pop Flavors to Try Next
FAQs
Dip the tip of each lollipop stick into melted chocolate before inserting into the cake ball. This creates a stronger seal and helps the cake pop stay securely on the stick.
Ensure your cake balls are chilled before dipping and the chocolate is not too hot. If the chocolate is too warm, it can cause the cake balls to expand and crack. Keep cake balls in the refrigerator for about 15 minutes before coating.
Yes, you can prepare cake pops 2-3 days in advance. After decorating, store them in an airtight container in the refrigerator. Let them come to room temperature before serving for the best texture and taste.
Dip the cake pop at a 45-degree angle and gently tap off excess chocolate. Use a tall, narrow container for dipping to help create an even, smooth coating without air bubbles.
Print
Cake Pops Recipe
- Total Time: 50 minutes
- Yield: 10 1x
Description
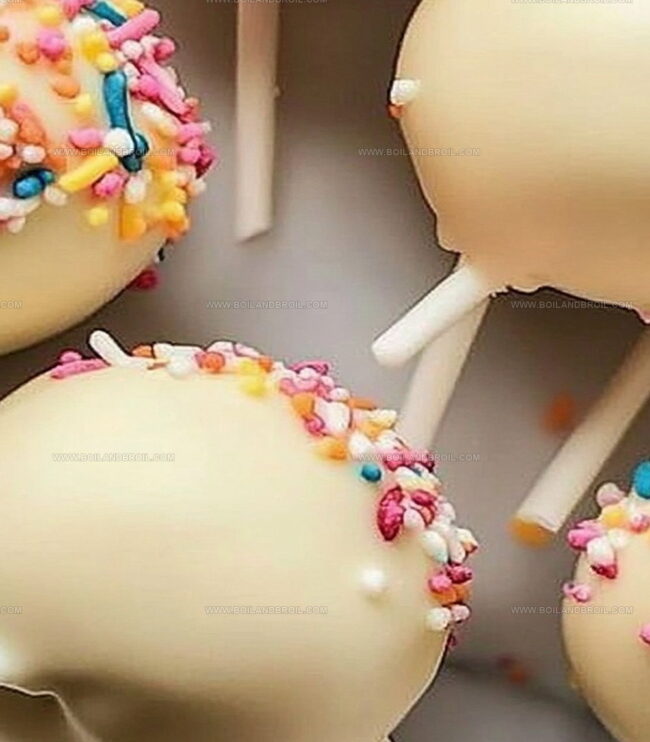
Indulgent chocolate cake pops dance with delightful charm, bringing sweet whimsy to dessert lovers. Classic sprinkles and rich chocolate coating create irresistible bite-sized treats you can’t help but adore.
Ingredients
Main Ingredients:
- 1 cup cake (any flavor, store-bought or homemade)
- 1/2 cup frosting (cream cheese, buttercream, or chocolate)
- 1 cup melting chocolate or candy melts
Coating and Decoration:
- 1/4 cup colorful sprinkles
Serving Tools:
- 10 lollipop sticks
Instructions
- Preheat the oven and prepare the cake mix according to package directions, ensuring even baking at the recommended temperature.
- Allow the freshly baked cake to cool completely on a wire rack, which prevents moisture buildup and ensures a crumbly texture.
- Methodically break the cooled cake into ultra-fine, uniform crumbs using your fingers or a food processor for consistent texture.
- Gradually incorporate frosting into the cake crumbs, mixing until the mixture develops a moldable consistency that holds shape when gently compressed.
- Craft uniform cake balls by rolling the mixture between your palms, creating consistent one-inch spheres positioned carefully on a parchment-lined baking sheet.
- Prepare the chocolate coating by melting slowly using a double boiler or microwave, stirring periodically to maintain smooth consistency.
- Dip each lollipop stick’s tip into the melted chocolate, then carefully insert into the center of each cake ball, providing a secure anchor.
- Submerge each cake pop fully into the warm chocolate coating, gently tapping to remove excess and ensure complete, even coverage.
- While the chocolate remains glossy and wet, sprinkle decorative toppings to create visual appeal and additional texture.
- Position the decorated cake pops upright in a styrofoam block, allowing them to set completely at room temperature until the chocolate hardens.
Notes
- Keep cake slightly underbaked for moister cake pops that hold together better and don’t crumble easily.
- Use room temperature frosting for smoother mixing and easier binding of cake crumbs.
- Chill cake balls for 15-20 minutes before dipping to prevent them from falling apart in warm chocolate.
- Experiment with different cake flavors and frosting combinations for unique taste variations like red velvet with cream cheese or chocolate with peanut butter.
- Prep Time: 20 minutes
- Cook Time: 30 minutes
- Category: Desserts, Snacks
- Method: Baking
- Cuisine: American
Nutrition
- Serving Size: 10
- Calories: 210
- Sugar: 20 g
- Sodium: 150 mg
- Fat: 10 g
- Saturated Fat: 6 g
- Unsaturated Fat: 4 g
- Trans Fat: 0 g
- Carbohydrates: 28 g
- Fiber: 1 g
- Protein: 2 g
- Cholesterol: 30 mg
Jack Sullivan
Founder & Culinary Storyteller
Expertise
Single-recipe development with a narrative approach, Culinary storytelling and food history, Seasonal and regional ingredient utilization, Home cooking techniques adapted for modern kitchens
Education
New England Culinary Institute (Montpelier, VT)
Certificate in Culinary Arts
Focused on farm-to-table cooking, sustainable practices, and modern plating techniques.
Asheville-Buncombe Technical Community College
Associate Degree in Culinary Arts
Emphasized Southern Appalachian cuisine and local ingredient sourcing.
Jack grew up surrounded by smoky skillets and handwritten recipes in the mountains of North Carolina. His roots in Appalachian cooking shaped the way he sees food – as something that connects people, tells a story, and holds meaning.
With hands-on training and a background in sustainable, regional cooking, Jack started Boil And Broil to make meaningful meals more accessible. He’s all about one-dish recipes that are simple to follow but rich with flavor and history.