
Flaky Cherry Cheese Danish Recipe That’s Simply Heavenly
Crafting the perfect cherry cheese danish requires patience and a dash of culinary magic.
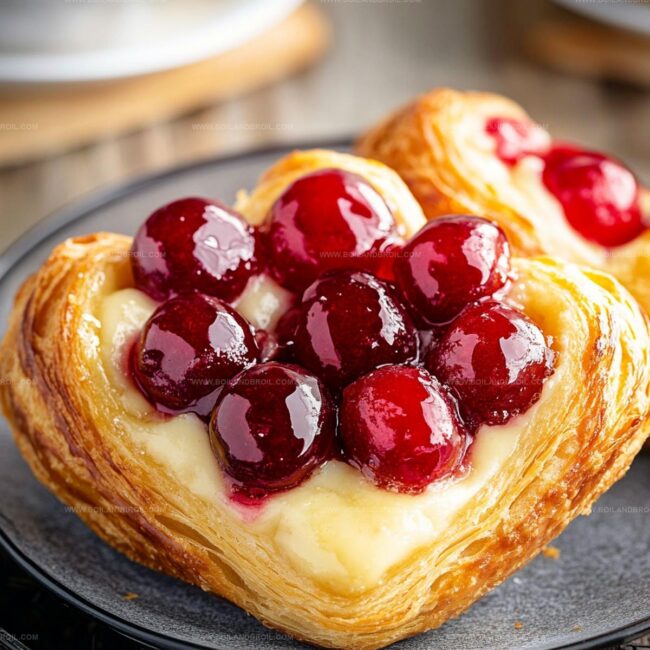
Buttery layers of pastry hide creamy cheese and vibrant fruit inside.
Professional bakers know these delicate pastries demand careful technique.
Delightful aromas will fill your kitchen as golden-brown edges crisp beautifully.
Soft cream cheese mingles with tart cherries, creating a harmonious balance of flavors.
Home cooks can master this elegant breakfast classic with simple ingredients and careful steps.
Slice into this delectable danish and savor every luxurious bite.
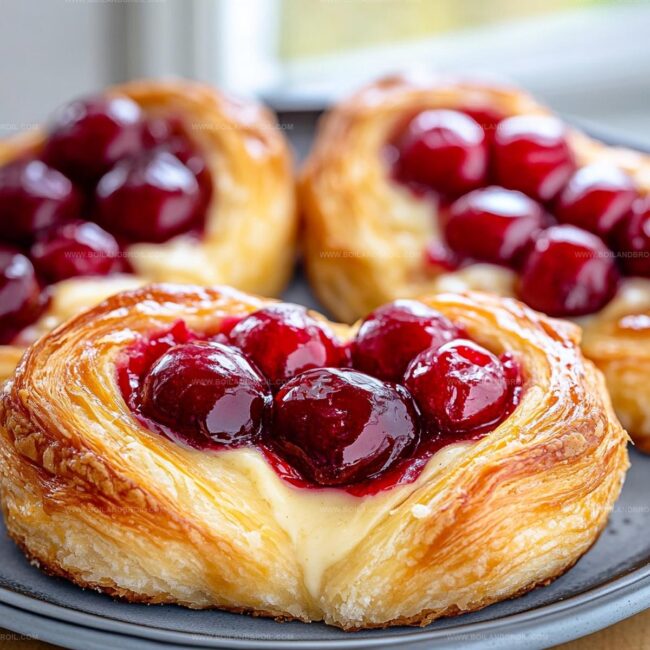
Cherry Cheese Danish Flaky Sweet Sensation

What You Need for Cherry Cheese Danish

How to Bake Cherry Cheese Danish

Step 1: Warm Up the Oven
Crank the oven to 375°F (190°C).
Grab a baking sheet and line it with parchment paper.
Gently unroll the puff pastry and slice it into charming squares or rectangles.
Step 2: Whip Up the Creamy Filling
In a mixing bowl, blend together:Whisk these ingredients until they transform into a silky, smooth mixture that looks absolutely irresistible.
Step 3: Build Your Danish Masterpiece
Arrange each pastry square on the prepared baking sheet.
Generously spread the cream cheese mixture right in the center of each square.
Crown the cream cheese with a dollop of cherry preserves or pie filling.
Step 4: Wrap and Seal the Treasure
Gently fold the pastry corners over the luscious filling.
Pinch the edges carefully to create a tight seal.
Brush the tops with beaten egg to give them a gorgeous golden glow.
Step 5: Bake to Perfection
Slide the baking sheet into the oven.
Bake for 20-25 minutes until the pastry rises to a beautiful golden color and looks wonderfully puffy.
Step 6: Cool and Dress Up
Let the Danish cool down for a few moments.
For an extra touch of sweetness, dust with a sprinkle of powdered sugar.
Serve and watch everyone’s eyes light up!
Pro Tips for Perfect Cherry Cheese Danish

Storing and Reheating Cherry Cheese Danish
Ideal Pairings for Cherry Cheese Danish
Variations on Cherry Cheese Danish
FAQs

This danish is surprisingly easy, even for beginner bakers. The key steps are simple: unroll puff pastry, mix cream cheese filling, add cherries, and fold the corners. Most home cooks can make these with basic kitchen skills.
Tart cherry preserves or sweet cherry pie filling both work great. Pre-made pie filling is convenient, while homemade preserves offer a more authentic flavor. Choose based on your preference and what’s available.
Yes, you can prepare the danish up to the point of folding and keep them refrigerated for several hours before baking. This makes them perfect for breakfast or brunch prep. Just brush with egg wash and bake when ready to serve.
No special equipment is needed. A mixing bowl, baking sheet, parchment paper, and basic kitchen tools are sufficient. A hand mixer helps with the cream cheese filling, but you can also mix by hand.
Print
Cherry Cheese Danish Recipe
- Total Time: 40 minutes
- Yield: 8 1x
Description
Indulgent cherry cheese danish brings European bakery charm straight to kitchen counters with golden, flaky pastry cradling luscious cream cheese and tangy cherry filling. Sweet and rich layers promise delightful moments you’ll savor with morning coffee or afternoon treat.
Ingredients
Main Ingredients:
- 1 sheet puff pastry (thawed if frozen)
- 8 ounces (226 grams) cream cheese (softened)
- 1/3 cup cherry preserves or pie filling
Dairy and Binding Ingredients:
- 1 egg
- 1 egg yolk
- 1/4 cup sugar
- 1/2 teaspoon vanilla extract
Dry Ingredients:
- 1 tablespoon all-purpose flour
- Powdered sugar (optional, for garnish)
Instructions
- Prepare the workspace by heating the oven to 375F (190C) and lining a baking sheet with parchment paper.
- Gently unroll the puff pastry and slice into symmetrical rectangular or square sections.
- Create a luxurious cream cheese mixture by blending cream cheese, sugar, vanilla extract, egg yolk, and flour until achieving a silky, uniform consistency.
- Position each pastry section on the prepared baking sheet, leaving adequate spacing between pieces.
- Carefully spread the cream cheese mixture into the center of each pastry section, ensuring an even distribution.
- Delicately layer cherry preserves or pie filling atop the cream cheese base, creating an appetizing visual contrast.
- Artfully fold the pastry corners toward the center, gently pressing and pinching edges to securely encase the filling.
- Brush the exterior with beaten egg, which will create a lustrous, golden-brown finish during baking.
- Transfer the baking sheet to the preheated oven and bake for 20-25 minutes until pastries transform into puffy, golden delicacies.
- Remove from oven and allow Danish to cool momentarily, allowing flavors to settle and texture to stabilize.
- Optional: Dust with powdered sugar for an elegant, sweet presentation before serving.
Notes
- Swap pastry types easily by using homemade or store-bought puff pastry, ensuring consistent flakiness and texture.
- Adjust filling sweetness by modifying sugar levels or using alternative sweeteners like honey or maple syrup for dietary preferences.
- Prevent soggy bottoms by preheating the baking sheet or using a pizza stone to create a crisp, golden base.
- Experiment with fruit variations like blueberry, raspberry, or apricot preserves to customize flavor profiles and add personal creativity.
- Prep Time: 15 minutes
- Cook Time: 25 minutes
- Category: Breakfast, Snacks, Desserts
- Method: Baking
- Cuisine: Danish
Nutrition
- Serving Size: 8
- Calories: 250
- Sugar: 10 g
- Sodium: 200 mg
- Fat: 15 g
- Saturated Fat: 8 g
- Unsaturated Fat: 5 g
- Trans Fat: 0 g
- Carbohydrates: 27 g
- Fiber: 1 g
- Protein: 4 g
- Cholesterol: 60 mg
Jack Sullivan
Founder & Culinary Storyteller
Expertise
Single-recipe development with a narrative approach, Culinary storytelling and food history, Seasonal and regional ingredient utilization, Home cooking techniques adapted for modern kitchens
Education
New England Culinary Institute (Montpelier, VT)
Certificate in Culinary Arts
Focused on farm-to-table cooking, sustainable practices, and modern plating techniques.
Asheville-Buncombe Technical Community College
Associate Degree in Culinary Arts
Emphasized Southern Appalachian cuisine and local ingredient sourcing.
Jack grew up surrounded by smoky skillets and handwritten recipes in the mountains of North Carolina. His roots in Appalachian cooking shaped the way he sees food – as something that connects people, tells a story, and holds meaning.
With hands-on training and a background in sustainable, regional cooking, Jack started Boil And Broil to make meaningful meals more accessible. He’s all about one-dish recipes that are simple to follow but rich with flavor and history.