
The Sweetest Cherry Cheesecake Cookies Recipe You’ll Ever Try
Sweet afternoons become magical when you whip up these dreamy cherry cheesecake cookies that melt instantly in your mouth.
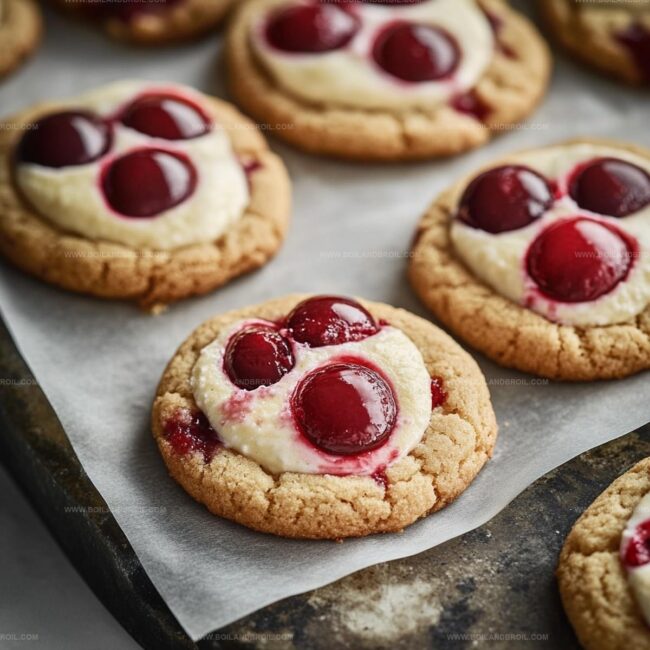
Creamy Philadelphia cream cheese blends perfectly with tangy cherries for an irresistible treat.
Crumbling graham crackers adds delightful texture to each bite-sized morsel.
Soft and pillowy, these cookies capture the essence of classic cheesecake in a handheld form.
Bakers of all skill levels can master this simple yet impressive dessert.
Nobody will believe you crafted such decadent cookies with minimal effort.
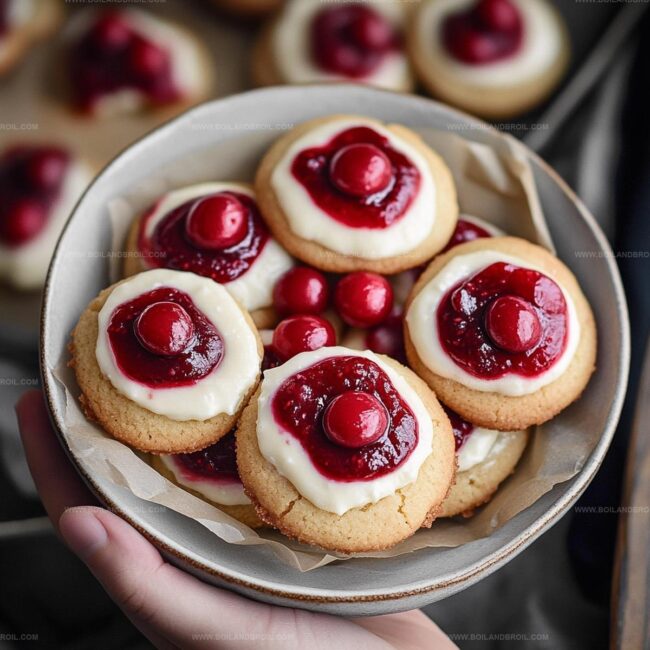
Prepare to impress everyone at your next gathering with these crowd-pleasing delights.
Cherry Cheesecake Cookies with a Fruity Finish
What Makes Cherry Cheesecake Cookies Tick
Cookie Base Ingredients:Wet Ingredients:Cheesecake and Topping Ingredients:Assembling Cherry Cheesecake Cookies with Care

Step 1: Prepare Baking Station
Preheat the oven to 350F (175C).
Cover two baking sheets with parchment paper to create a non-stick surface for your delicious cookies.
Step 2: Create Cookie Dough Base
Mix softened butter and sugar in a large bowl until the mixture becomes light and airy.
Add egg and vanilla extract, blending until everything is perfectly combined.
In a separate bowl, blend flour, baking powder, and salt.
Slowly incorporate dry ingredients into the wet mixture, forming a soft, smooth dough.
Step 3: Whip Cheesecake Filling
In a small bowl, whisk cream cheese, sugar, and vanilla extract until the mixture becomes silky and completely smooth.
Step 4: Form Cookie Balls
Roll the cookie dough into tablespoon-sized balls.
Place them on prepared baking sheets, leaving about 2 inches between each cookie.
Create a gentle indentation in the center of each dough ball using your thumb or the back of a spoon.
Step 5: Fill Cookie Centers
Carefully spoon cheesecake filling into the center of each cookie, ensuring an even distribution.
Step 6: Top with Cherry Goodness
Gently place cherry pie filling on top of the cheesecake center, adding 1-2 cherries to each cookie for a burst of fruity flavor.
Step 7: Bake to Perfection
Slide the baking sheets into the oven and bake for 12-15 minutes.
Look for lightly golden edges and set centers.
Once baked, let cookies rest on the baking sheet for 5 minutes, then transfer to a wire rack to cool completely.
Easy Tips for Cherry Cheesecake Cookies
How to Store Cherry Cheesecake Cookies
Serve Cherry Cheesecake Cookies With These Sips
Pair Sweet Sips with Cherry Cheesecake Cookies: A Delightful Flavor Adventure
Versions to Try with Cherry Cheesecake Cookies
FAQs
Not at all! The recipe is straightforward and requires basic baking skills. Even beginner bakers can successfully create these delicious cherry cheesecake cookies with simple steps and common ingredients.
Fresh cherries can work, but they might release more liquid during baking. If using fresh cherries, chop them finely and drain excess juice to prevent the cookies from becoming soggy.
Look for lightly golden edges and set centers. The cookies should look slightly puffy and not wet in the middle. They will continue to firm up as they cool on the baking sheet.
Store in an airtight container in the refrigerator for up to 5 days. The cream cheese filling requires refrigeration to maintain freshness and prevent spoiling.
Print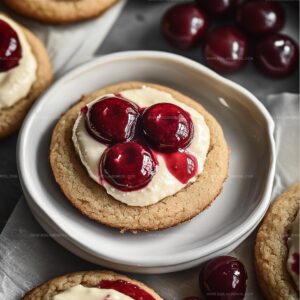
Cherry Cheesecake Cookies Recipe
- Total Time: 35 minutes
- Yield: 24 1x
Description
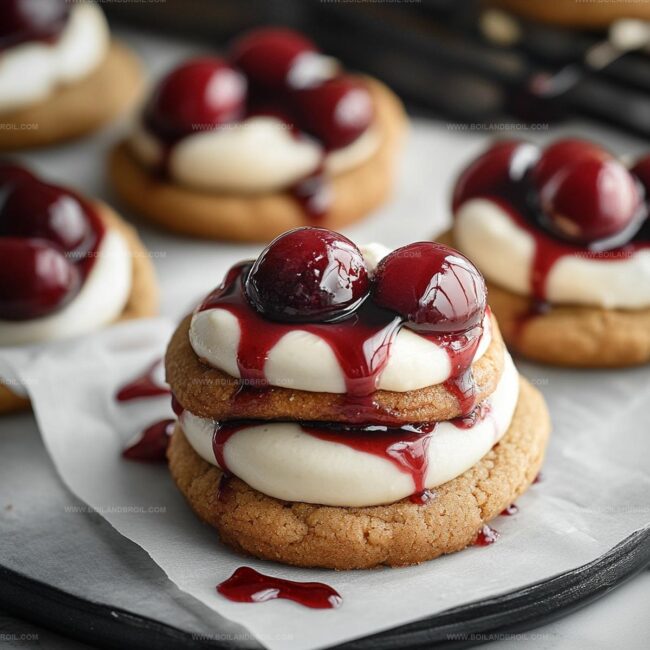
Sweet cherry cheesecake cookies blend creamy richness with fruity charm, creating an irresistible dessert that melts in your mouth. Each bite promises a delightful balance of tangy cream cheese and luscious cherry goodness you cannot resist.
Ingredients
Primary Ingredients:
- 2 1/4 cups all-purpose flour
- 1 cup unsalted butter, softened
- 4 ounces (113 grams) cream cheese, softened
- 1 can (21 ounces/595 grams) cherry pie filling
Sweeteners and Binding:
- 1 1/4 cups granulated sugar
- 1 large egg
Flavor Enhancers:
- 1 teaspoon vanilla extract
- 1 teaspoon baking powder
- 1/4 teaspoon salt
Instructions
- Preheat the oven to 350F (175C) and prepare two baking sheets with parchment paper for optimal cookie performance.
- Create the cookie base by whipping softened butter and sugar until airy and pale, approximately 2-3 minutes. Incorporate egg and vanilla extract, ensuring complete integration.
- Separately combine flour, baking powder, and salt. Gradually fold dry ingredients into the butter mixture, mixing until a cohesive dough develops.
- Craft the creamy cheesecake filling by blending cream cheese, sugar, and vanilla extract until silky and uniform in texture.
- Form cookie dough into tablespoon-sized spheres, positioning them evenly across baking sheets with 2-inch spacing.
- Gently press a thumb or spoon indentation into the center of each cookie dough ball, creating a perfect vessel for filling.
- Delicately spoon cream cheese mixture into the cookie centers, ensuring precise and even distribution.
- Crown each filled cookie with cherry pie filling, strategically placing 1-2 cherries for maximum visual and flavor appeal.
- Bake for 12-15 minutes until cookie edges turn golden and centers stabilize. Allow cookies to rest on baking sheet for 5 minutes before transferring to a cooling rack.
Notes
- Swap cream cheese for dairy-free alternatives like vegan cream cheese to make these cookies suitable for lactose-intolerant or vegan diets.
- Chill the dough for 30 minutes before shaping to prevent spreading and maintain a perfect round cookie shape during baking.
- Use fresh cherries as a healthier alternative to pie filling, chopping them finely and mixing with a touch of honey for natural sweetness.
- Experiment with different fruit preserves like raspberry or blueberry to create unique flavor variations that still complement the creamy cheesecake center.
- Prep Time: 20 minutes
- Cook Time: 15 minutes
- Category: Desserts, Snacks
- Method: Baking
- Cuisine: American
Nutrition
- Serving Size: 24
- Calories: 160
- Sugar: 10 g
- Sodium: 50 mg
- Fat: 7 g
- Saturated Fat: 4 g
- Unsaturated Fat: 2 g
- Trans Fat: 0 g
- Carbohydrates: 22 g
- Fiber: 0.5 g
- Protein: 1.5 g
- Cholesterol: 30 mg
Jack Sullivan
Founder & Culinary Storyteller
Expertise
Single-recipe development with a narrative approach, Culinary storytelling and food history, Seasonal and regional ingredient utilization, Home cooking techniques adapted for modern kitchens
Education
New England Culinary Institute (Montpelier, VT)
Certificate in Culinary Arts
Focused on farm-to-table cooking, sustainable practices, and modern plating techniques.
Asheville-Buncombe Technical Community College
Associate Degree in Culinary Arts
Emphasized Southern Appalachian cuisine and local ingredient sourcing.
Jack grew up surrounded by smoky skillets and handwritten recipes in the mountains of North Carolina. His roots in Appalachian cooking shaped the way he sees food – as something that connects people, tells a story, and holds meaning.
With hands-on training and a background in sustainable, regional cooking, Jack started Boil And Broil to make meaningful meals more accessible. He’s all about one-dish recipes that are simple to follow but rich with flavor and history.