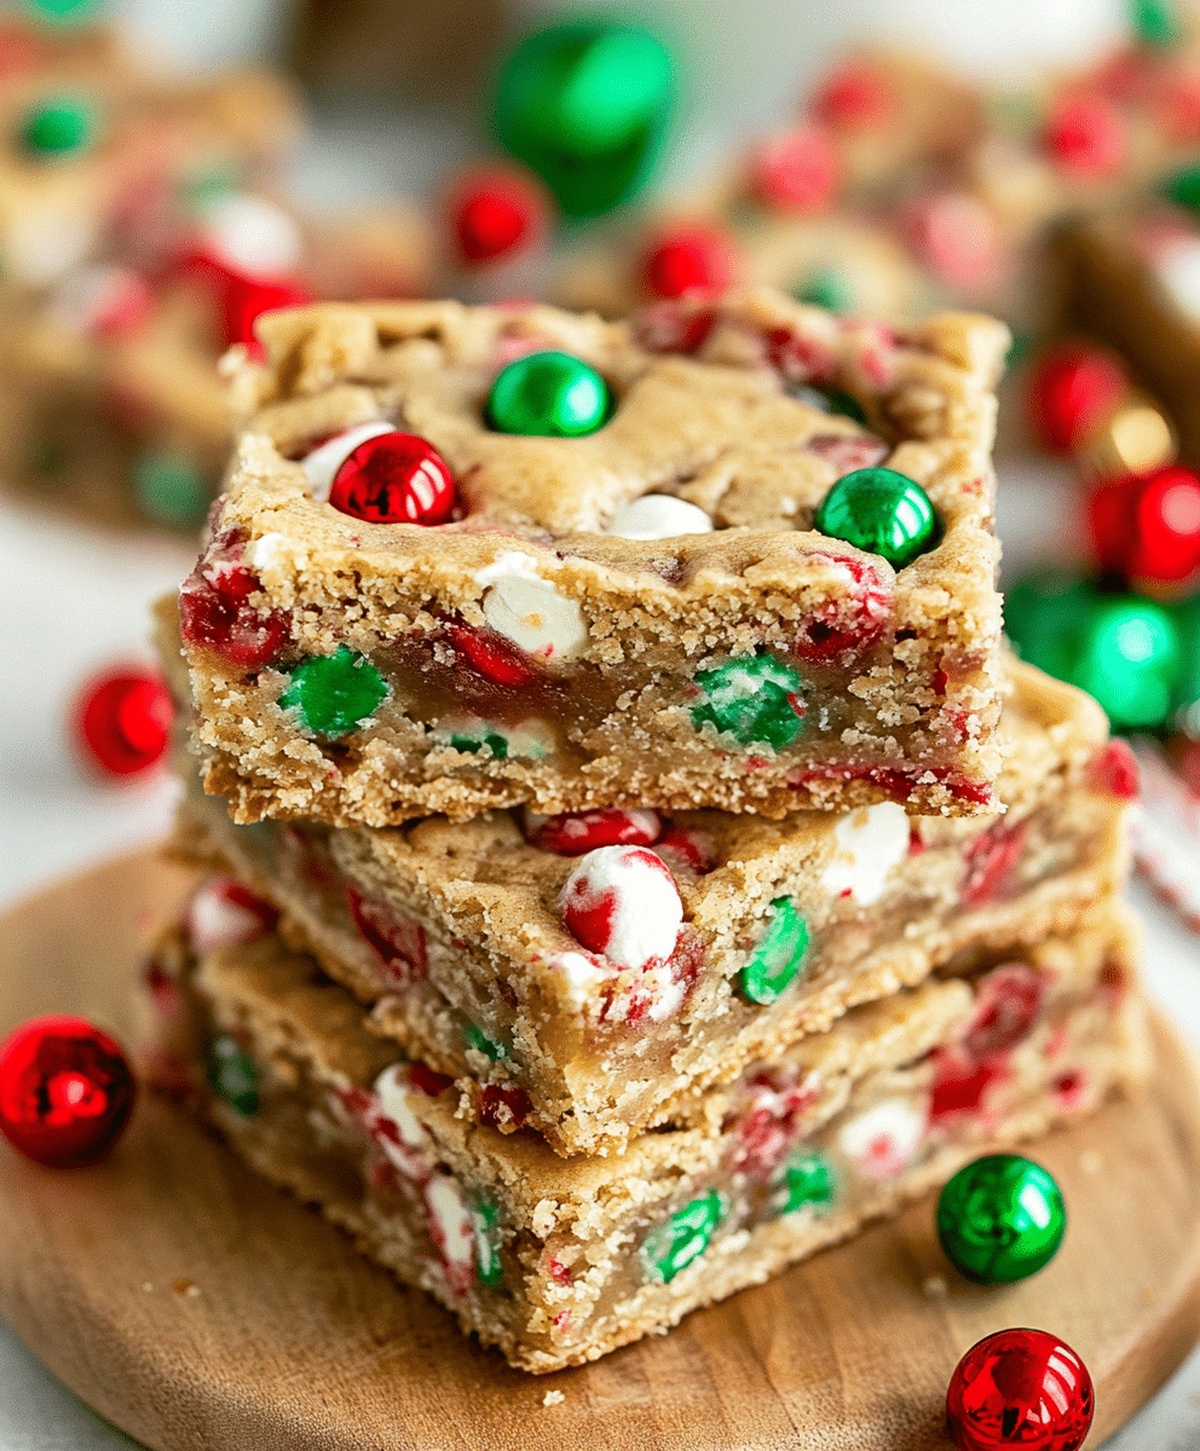
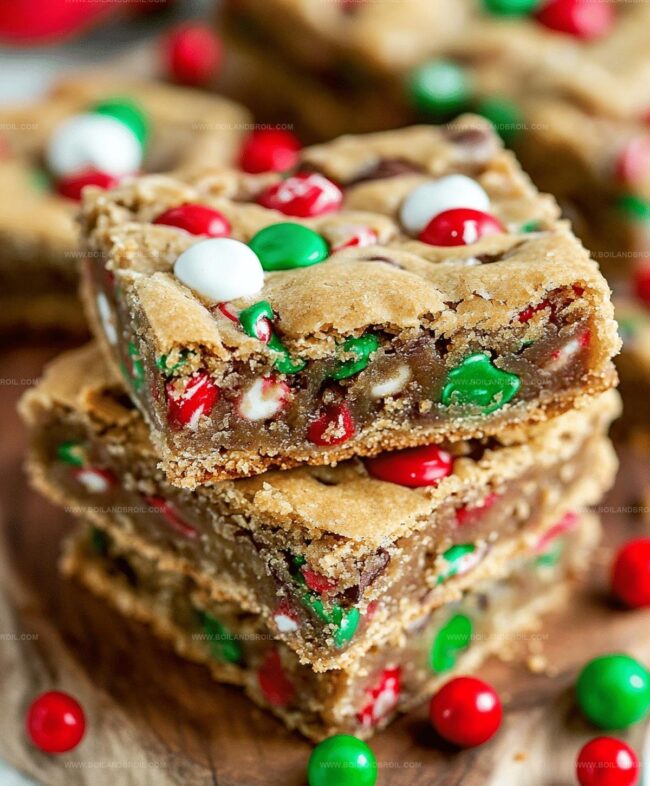
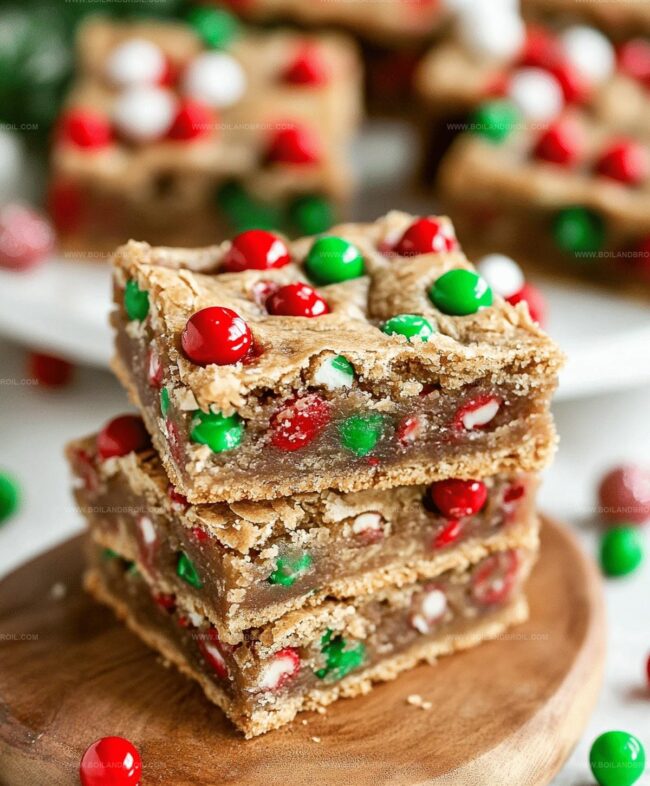
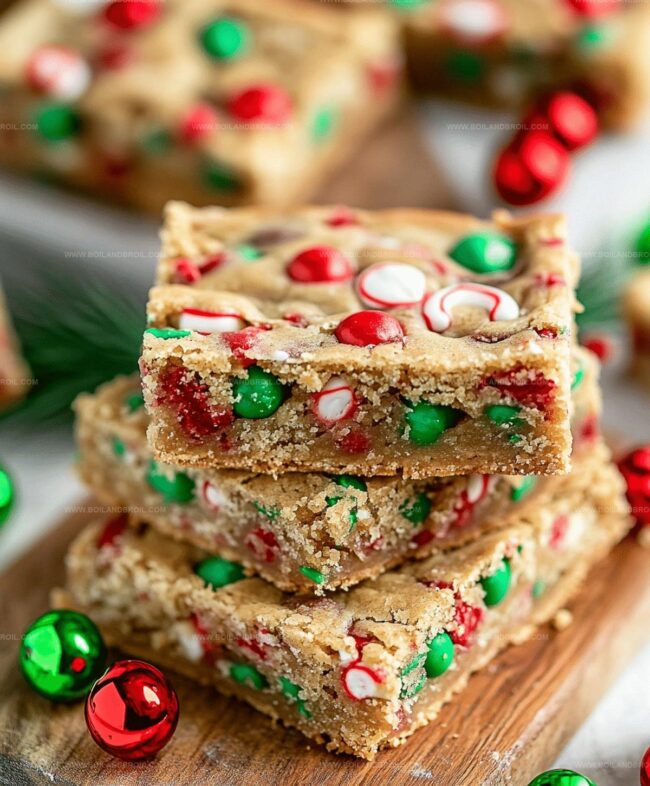
Easy Festive Christmas Cookie Bars Recipe for Holiday Joy
Sweet aromas of butter and sugar dance through the kitchen when you whip up these delectable Christmas cookie bars that promise pure holiday bliss.
Festive baking doesn’t get easier or more delightful than this simple treat.
Soft, chewy, and packed with seasonal cheer, these bars melt in your mouth with every bite.
The combination of classic ingredients creates a dessert that feels like a warm holiday hug.
Rich vanilla and hints of cinnamon weave through each tender layer, making these bars impossible to resist.
Grab a plate and spread some joy with this crowd-pleasing recipe that turns ordinary moments into magical memories.
You’ll want to share these irresistible bars with everyone at your holiday gathering.
Why Christmas Cookie Bars Always Disappear Fast
Capture the holiday spirit with these vibrant, colorful Christmas cookie bars packed with cheerful M&Ms and sprinkles.
Perfect for bakers of all skill levels, this recipe requires minimal techniques and delivers maximum deliciousness with simple mixing and pressing steps.
Engage kids in the kitchen by letting them help sprinkle toppings and press the dough, creating memorable moments while crafting a sweet holiday treat.
What Goes Into Christmas Cookie Bars
Base Ingredients:
Butter: Provides rich flavor and helps create a soft, tender texture.
Brown Sugar: Adds moisture and deep caramel-like sweetness to the cookie bars.
Eggs: Bind the ingredients together and contribute to the bar's structure.
Vanilla Extract: Enhances the overall flavor profile with its warm, sweet essence.
Dry Ingredients:
All-Purpose Flour: Forms the primary structure of the cookie bars.
Salt: Balances the sweetness and intensifies the overall flavor.
Baking Powder: Helps the bars rise and creates a light, tender texture.
Decorative Mix-Ins:
M&Ms, Sprinkles: Add color, crunch, and festive holiday spirit to the cookie bars.
How to Make Christmas Cookie Bars Step by Step
Step 1: Prepare Baking Station
Warm up your oven to 350°F.
Grab a metal 9×13″ pan and line it with foil, letting edges hang over for easy bar removal.
Coat the foil with cooking spray to prevent sticking.
Step 2: Cream Butter and Sugar
Grab your electric mixer and blend butter with brown sugar until the mixture looks crumbly and light.
Pour in eggs and vanilla extract, whipping until the mixture becomes smooth and fluffy.
Step 3: Combine Dry Components
Mix in salt and baking powder first.
Slowly fold in flour until a thick dough forms.
Don’t stress if mixing takes some muscle – that’s totally normal.
Step 4: Fold in Colorful Goodies
Stir most of the M&Ms and sprinkles into the dough.
Keep a small handful aside for decorating the top.
This trick ensures colorful bits are spread throughout and look pretty on the surface.
Step 5: Spread Dough Evenly
Transfer dough to prepared pan.
Spray hands with cooking spray to prevent sticking, then gently press dough into a uniform layer.
Sprinkle reserved M&Ms and sprinkles across the top.
Step 6: Bake and Cool
Slide pan into preheated oven.
Bake for 22-25 minutes until edges turn golden.
Bars will continue firming up while cooling.
Allow bars to cool completely before slicing into delightful squares.
Best Tips for Baking Christmas Cookie Bars
Spray your hands with cooking spray when pressing the dough to prevent messy, sticky situations and ensure a smooth, even layer.
Save a handful of M&Ms and sprinkles to sprinkle on top after spreading the dough, creating a visually appealing and evenly distributed look.
Watch the baking time closely, aiming for lightly golden edges around 22-25 minutes to maintain a soft, chewy texture without overbaking.
Allow the bars to cool entirely in the pan to help them set and make clean, precise cuts easier when slicing.
Use foil with overhang and cooking spray to create a non-stick surface that allows for simple and mess-free bar removal.
How to Store and Reheat Christmas Cookie Bars
Store cooled cookie bars in an airtight container for up to 5 days. Place parchment paper between layers to prevent sticking and maintain freshness.
Wrap individual bars tightly in plastic wrap, then place in a freezer-safe container. Freeze for up to 3 months, ensuring no air touches the bars to prevent freezer burn.
Remove frozen bars from the freezer and let them sit at room temperature for 30-45 minutes. Avoid microwaving to preserve texture and prevent soggy edges.
Warm refrigerated or thawed bars in the microwave for 10-15 seconds on low power. Alternatively, warm in a preheated oven at 300°F for 3-5 minutes to restore their soft, fresh-baked texture.
Serving Ideas for Christmas Cookie Bars
Elevate Holiday Cookie Bars Pairings
Festive Milk Matchup: Serve chilled whole milk to complement the sweet, buttery cookie bars. The creamy richness cuts through the sugary texture and enhances the chocolate M&M flavors.
Cozy Beverage Companion: Brew a warm mug of vanilla chai tea that echoes the vanilla extract in the recipe. Its spicy undertones beautifully balance the cookie's sweetness and add festive warmth.
Dessert Wine Delight: Pour a small glass of moscato, whose light, fruity sweetness perfectly matches the playful sprinkles and chocolate candy elements. Its gentle bubbles cleanse the palate between bites.
Complementary Flavor Boost: Add a small scoop of vanilla bean ice cream alongside the bars. The cold, smooth ice cream creates a delightful temperature contrast and amplifies the dessert's rich, sweet profile.
Ways to Change Up Christmas Cookie Bars
Gluten-Free Holiday Bars: Replace wheat flour with a gluten-free blend like almond or rice flour to accommodate celiac or gluten-sensitive bakers.
Vegan Festive Squares: Swap eggs with mashed banana or applesauce, use dairy-free butter substitute, and select plant-based chocolate candies for a completely vegan version.
Low-Sugar Christmas Treat: Substitute brown sugar with monk fruit sweetener or stevia, and use sugar-free chocolate candies to reduce overall sugar content for diabetic-friendly option.
Nut-Friendly Winter Bars: Add chopped pecans or walnuts into the dough for extra crunch and nutty flavor, perfect for those wanting additional texture and protein boost.
FAQs
Can I use different types of candy instead of M&Ms?
Yes, you can easily swap M&Ms with chocolate chips, chopped candy bars, or other colorful candies that melt well. Just ensure they’re roughly the same size for even distribution.
How do I know when the cookie bars are perfectly baked?
Look for lightly golden edges and a set center. The bars will seem slightly underbaked when you first remove them, but they’ll firm up while cooling. A toothpick inserted in the center should come out with a few moist crumbs.
Are these cookie bars good for holiday parties?
Absolutely! They’re festive, easy to make, and crowd-pleasing. The colorful sprinkles and M&Ms make them look fun and celebratory, perfect for sharing at potlucks or family gatherings.
What's the best way to cut these bars for clean slices?
Let the bars cool completely, then use the foil overhang to lift them out of the pan. Use a sharp knife wiped clean between cuts for neat, even squares.
Developing accessible single-serving recipes, Food writing and content creation, Plant-based and allergen-friendly cooking, Culinary education and workshop facilitation
Education
Oregon Culinary Institute (Portland, OR) Diploma in Culinary Arts
Specialized in plant-based cooking and sustainable kitchen practices.
Portland Community College Certificate in Food Writing and Media
Focused on recipe writing, food photography, and digital content creation.
Clara’s food journey began with a curiosity for color, texture, and ingredients pulled straight from the garden. Her background in plant-forward cooking and creative writing gives her a unique edge – she makes healthy, flavorful food feel inviting, not intimidating.
She specializes in meals that work for busy lives and different diets, all without sacrificing taste. Clara’s voice comes through in every recipe she writes – clear, kind, and encouraging.
Clara Thompson
Recipe Developer & Culinary Educator
Expertise
Developing accessible single-serving recipes, Food writing and content creation, Plant-based and allergen-friendly cooking, Culinary education and workshop facilitation
Education
Oregon Culinary Institute (Portland, OR)
Diploma in Culinary Arts
Specialized in plant-based cooking and sustainable kitchen practices.
Portland Community College
Certificate in Food Writing and Media
Focused on recipe writing, food photography, and digital content creation.
Clara’s food journey began with a curiosity for color, texture, and ingredients pulled straight from the garden. Her background in plant-forward cooking and creative writing gives her a unique edge – she makes healthy, flavorful food feel inviting, not intimidating.
She specializes in meals that work for busy lives and different diets, all without sacrificing taste. Clara’s voice comes through in every recipe she writes – clear, kind, and encouraging.