Jolly Christmas Crinkle Cookies Recipe for Sweet Holiday Joy
Festive baking takes on a magical twist with these delightful Christmas crinkle cookies that melt in your mouth.
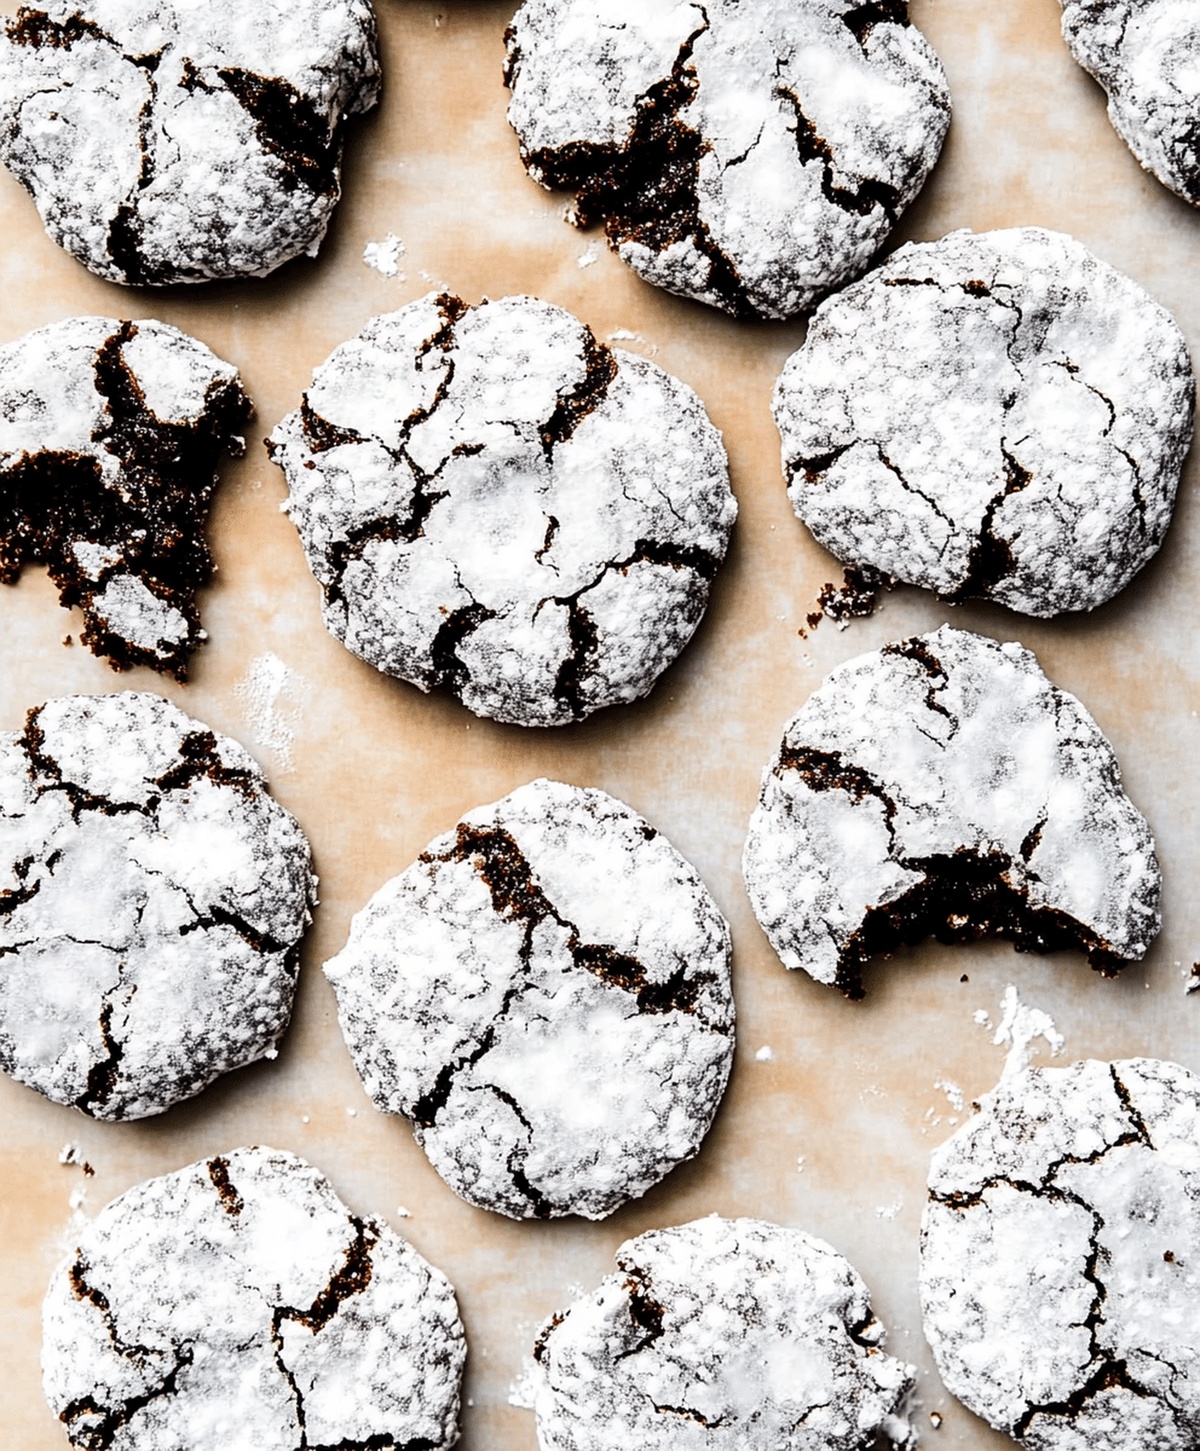
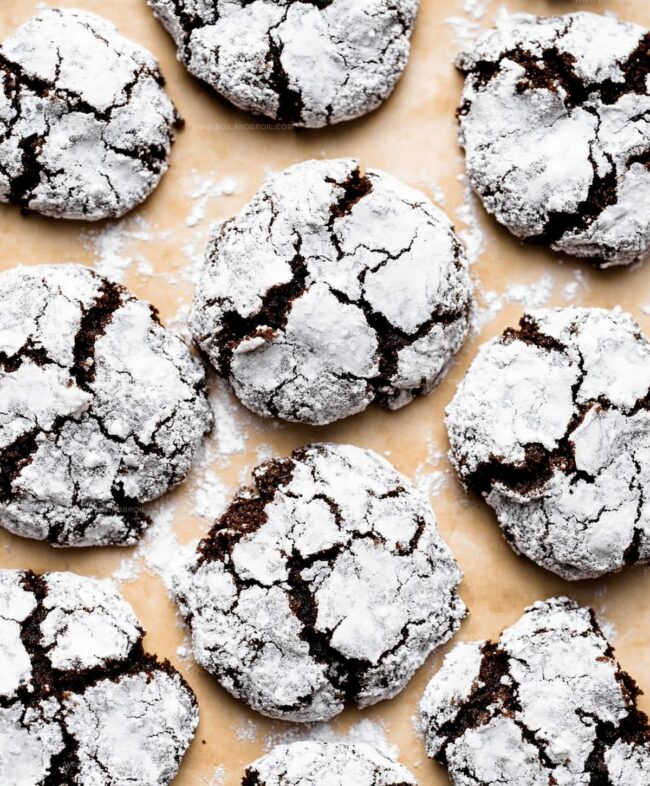
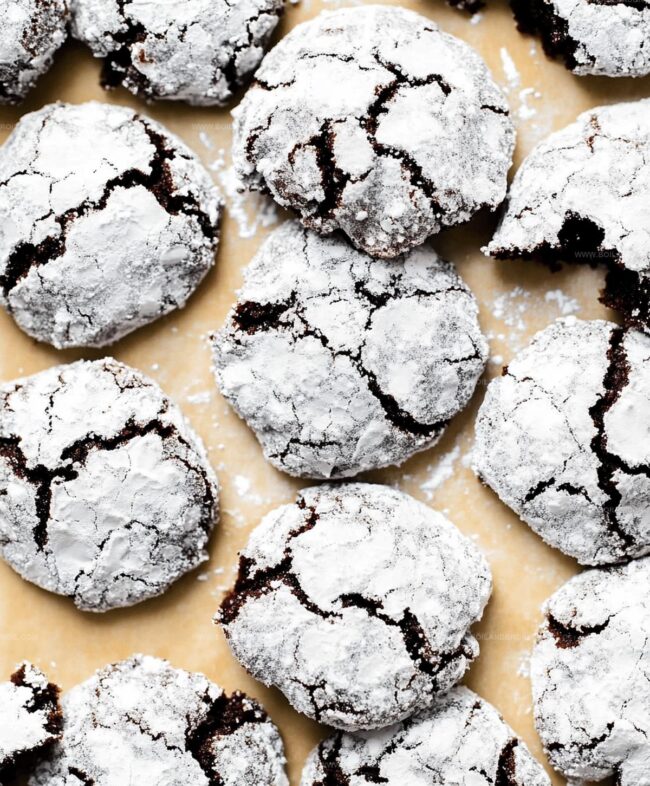
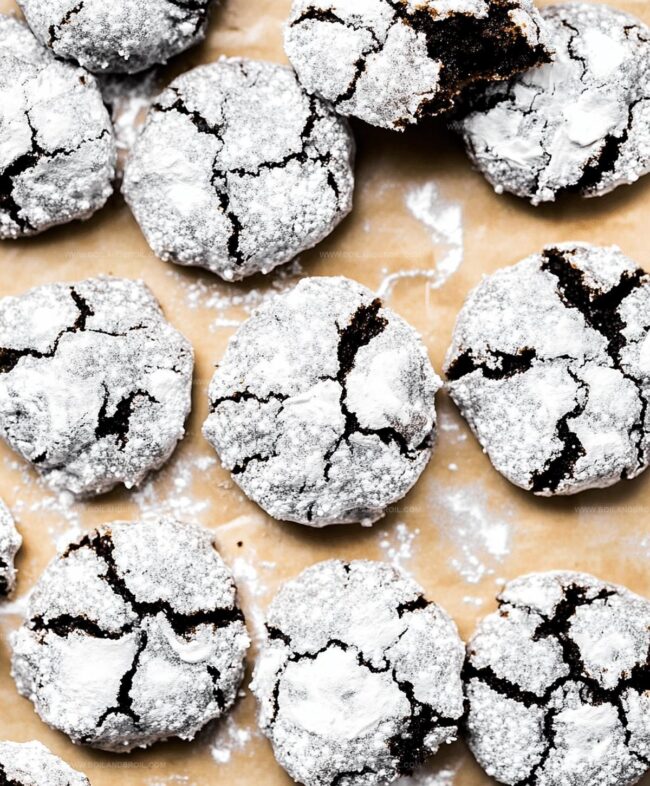
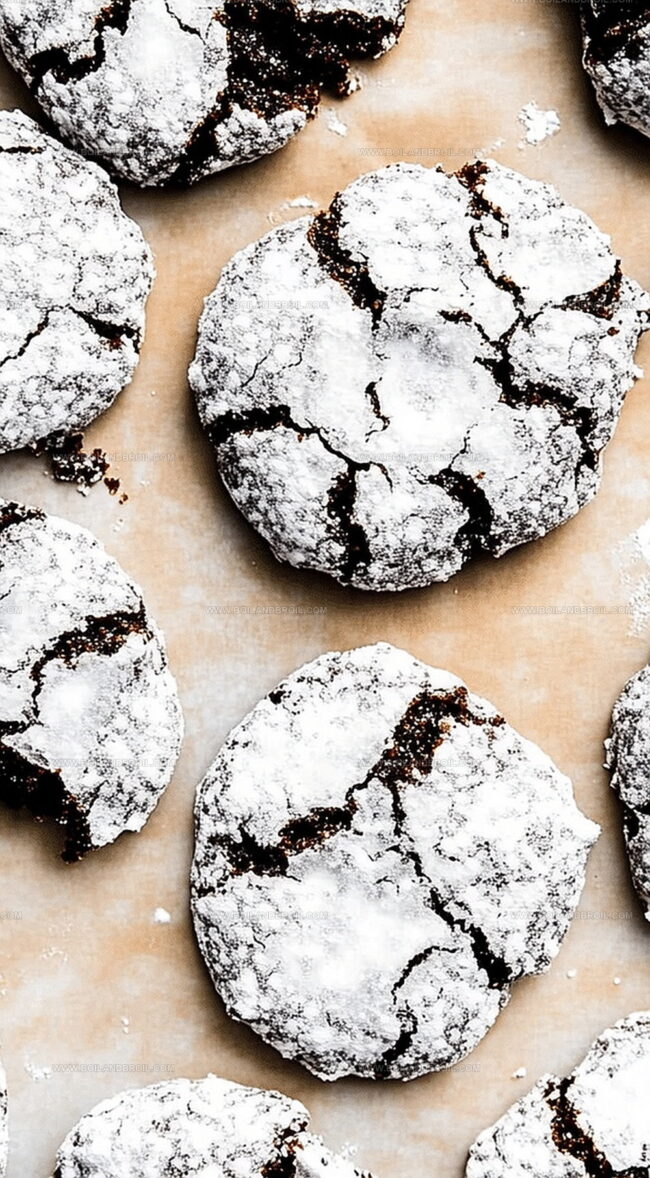
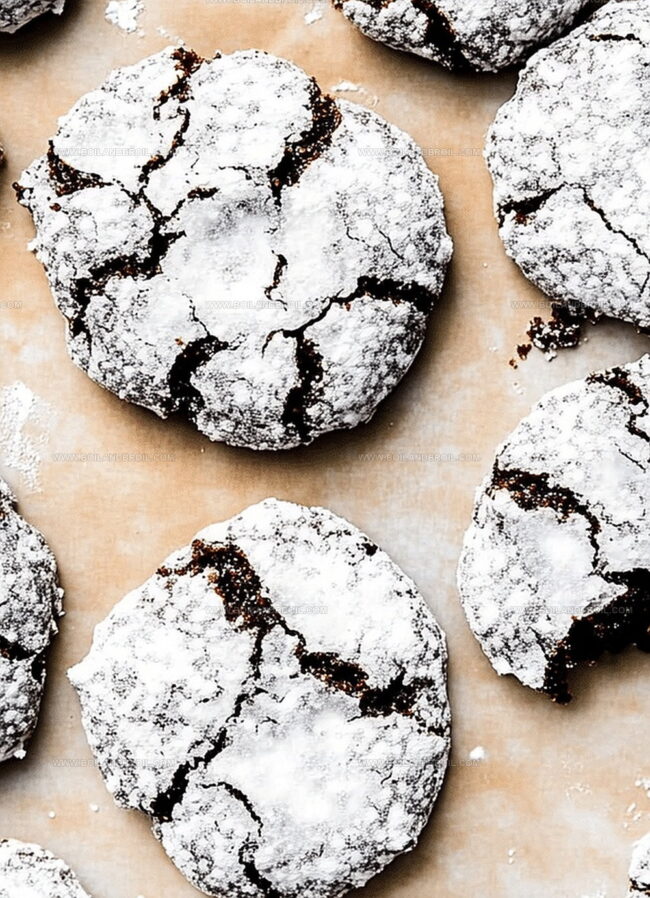
Powdered sugar creates a stunning winter landscape across each dark chocolate cookie.
The contrast between the crisp exterior and soft center makes these treats absolutely irresistible.
Dusted with a snowy white coating, these cookies bring joy to every holiday gathering.
Rich chocolate and delicate sugar combine to create a classic dessert that sparks sweet memories.
You’ll love how simple these cookies are to prepare with just a few basic ingredients.
Deck your holiday table with these beautiful, crackly delights that promise to delight both kids and adults.
Why Christmas Crinkle Cookies Shine Bright
Must-Have Ingredients for Crinkle Cookies
Base Ingredients:Color Ingredients:Coating and Finishing Ingredients:How to Whip Up Christmas Crinkle Cookies
Step 1: Prepare Baking Environment
Set the oven to 375°F and line a baking sheet with parchment paper or silicone mat.
This creates the perfect surface for your festive cookies to bake beautifully.
Step 2: Create Cookie Base
Grab a large mixing bowl and combine:Stir the ingredients until they form a smooth, thick mixture.
The dough should look slightly sticky and well-blended.
Step 3: Add Festive Colors
Divide the prepared dough into two equal portions in separate bowls.
Add red food coloring to one bowl and green food coloring to the other.
Mix thoroughly until the colors are completely integrated.
Pro tip: Wear disposable gloves to keep your hands stain-free.
Step 4: Chill Cookie Dough
Refrigerate both colored dough bowls for a minimum of 30 minutes.
Chilling helps firm up the dough, making it easier to handle and ensures your cookies will have a perfect texture.
Step 5: Shape and Coat Cookies
Use a cookie scoop or tablespoon to portion the dough.
Roll each portion into a ball, then generously coat in powdered sugar.
If the dough feels too sticky, gradually knead in small amounts of flour until it becomes more manageable.
Step 6: Bake to Perfection
Arrange the sugar-coated dough balls on the prepared baking sheet, spacing them approximately 2 inches apart.
Bake for 9-11 minutes.
The cookies should appear set but remain soft in the center.
Avoid overbaking to maintain their delightful texture.
Step 7: Cool and Enjoy
Allow the cookies to rest on the baking sheet for a few minutes before transferring to a cooling rack.
The cookies will develop their signature crackled appearance as they cool, creating a stunning holiday treat.
Crinkle Cookie Baking Pointers
Keep Christmas Crinkle Cookies Fresh Longer
Tasty Pairings for Crinkle Cookies
Crinkle Cookie Twists and Adjustments
FAQs
Chilling helps solidify the fat in the dough, preventing cookies from spreading too much during baking. It also makes the dough easier to handle and roll into balls, ensuring a better texture and appearance.
While white cake mix works best, you can experiment with yellow or vanilla cake mixes. Just ensure they’re similar in consistency to maintain the cookie’s structure and taste.
Roll the dough balls completely in powdered sugar before baking. The sugar creates those signature crackled edges when the cookies expand in the oven, giving them their classic crinkle look.
While not mandatory, gloves prevent food coloring from staining your hands. If you don’t mind temporary colored fingers, you can mix without them, but gloves make the process cleaner and easier.
Print
Christmas Crinkle Cookies Recipe
- Total Time: 50 minutes
- Yield: 24 1x
Description
Festive Christmas crinkle cookies bring holiday cheer with their powdered sugar-dusted chocolatey goodness. Bakers delight in creating these classic treats that melt in your mouth and spread winter magic at family gatherings.
Ingredients
Main Ingredients:
- 1 box white cake mix
- 2 eggs
- 1/3 cup (79 ml) vegetable oil
Flavoring:
- 1 teaspoon (5 ml) vanilla
Decorative Ingredients:
- 1/3 cup (40 g) powdered sugar
- red food coloring gel
- green food coloring gel
Instructions
- Prepare the oven environment at 375°F, positioning a rack in the center and lining a baking sheet with parchment paper or silicone mat to prevent sticking and ensure uniform baking.
- Create a uniform base by whisking together white cake mix, eggs, vanilla extract, and vegetable oil in a large mixing bowl until the mixture becomes a cohesive, thick dough.
- Divide the prepared dough into two equal portions, strategically separating them into distinct containers for color application.
- Incorporate vibrant holiday colors by adding red food coloring to one portion and green to the other, thoroughly mixing until the pigments are evenly distributed throughout each dough section.
- Refrigerate both colored dough portions for a minimum of 30 minutes, allowing the mixture to firm up and become more manageable for shaping.
- Using a cookie scoop or tablespoon, portion out small rounds of dough and roll them into smooth spheres, then generously coat each ball with powdered sugar to create the signature crinkle effect.
- If the dough proves too sticky, gradually incorporate additional flour, one tablespoon at a time, to achieve the ideal rolling consistency.
- Arrange the sugar-coated dough balls on the prepared baking sheet, maintaining approximately 2 inches of space between each cookie to prevent merging during baking.
- Bake for 9-11 minutes, watching for a set exterior while maintaining a soft, slightly tender center—avoid over-baking to preserve the cookies’ delicate texture.
- Allow the cookies to rest on the baking sheet for a brief 2-3 minutes before transferring to a wire cooling rack, enabling them to set and develop their characteristic crackled appearance.
Notes
- Swap regular cake mix with gluten-free alternatives for those with dietary restrictions, ensuring everyone can enjoy these festive treats.
- Control color intensity by gradually adding food coloring, allowing precise customization of red and green hues for a personalized holiday look.
- Prevent dough stickiness by chilling longer or adding extra flour, which helps maintain cookie shape and makes rolling easier.
- Store cookies in an airtight container with parchment paper between layers to maintain softness and prevent cracking for several days.
- Prep Time: 40 minutes
- Cook Time: 10 minutes
- Category: Desserts
- Method: Baking
- Cuisine: American
Nutrition
- Serving Size: 24
- Calories: 150
- Sugar: 6 g
- Sodium: 180 mg
- Fat: 7 g
- Saturated Fat: 1 g
- Unsaturated Fat: 6 g
- Trans Fat: 0 g
- Carbohydrates: 20 g
- Fiber: 0 g
- Protein: 2 g
- Cholesterol: 30 mg
Clara Thompson
Recipe Developer & Culinary Educator
Expertise
Developing accessible single-serving recipes, Food writing and content creation, Plant-based and allergen-friendly cooking, Culinary education and workshop facilitation
Education
Oregon Culinary Institute (Portland, OR)
Diploma in Culinary Arts
Specialized in plant-based cooking and sustainable kitchen practices.
Portland Community College
Certificate in Food Writing and Media
Focused on recipe writing, food photography, and digital content creation.
Clara’s food journey began with a curiosity for color, texture, and ingredients pulled straight from the garden. Her background in plant-forward cooking and creative writing gives her a unique edge – she makes healthy, flavorful food feel inviting, not intimidating.
She specializes in meals that work for busy lives and different diets, all without sacrificing taste. Clara’s voice comes through in every recipe she writes – clear, kind, and encouraging.