Dreamy Coconut Cream Pie Recipe: Tropical Bliss in Every Slice
Crafting a delectable coconut cream pie brings pure joy to any dessert lover’s kitchen.
Sweet memories of tropical flavors dance across your taste buds with each creamy bite.
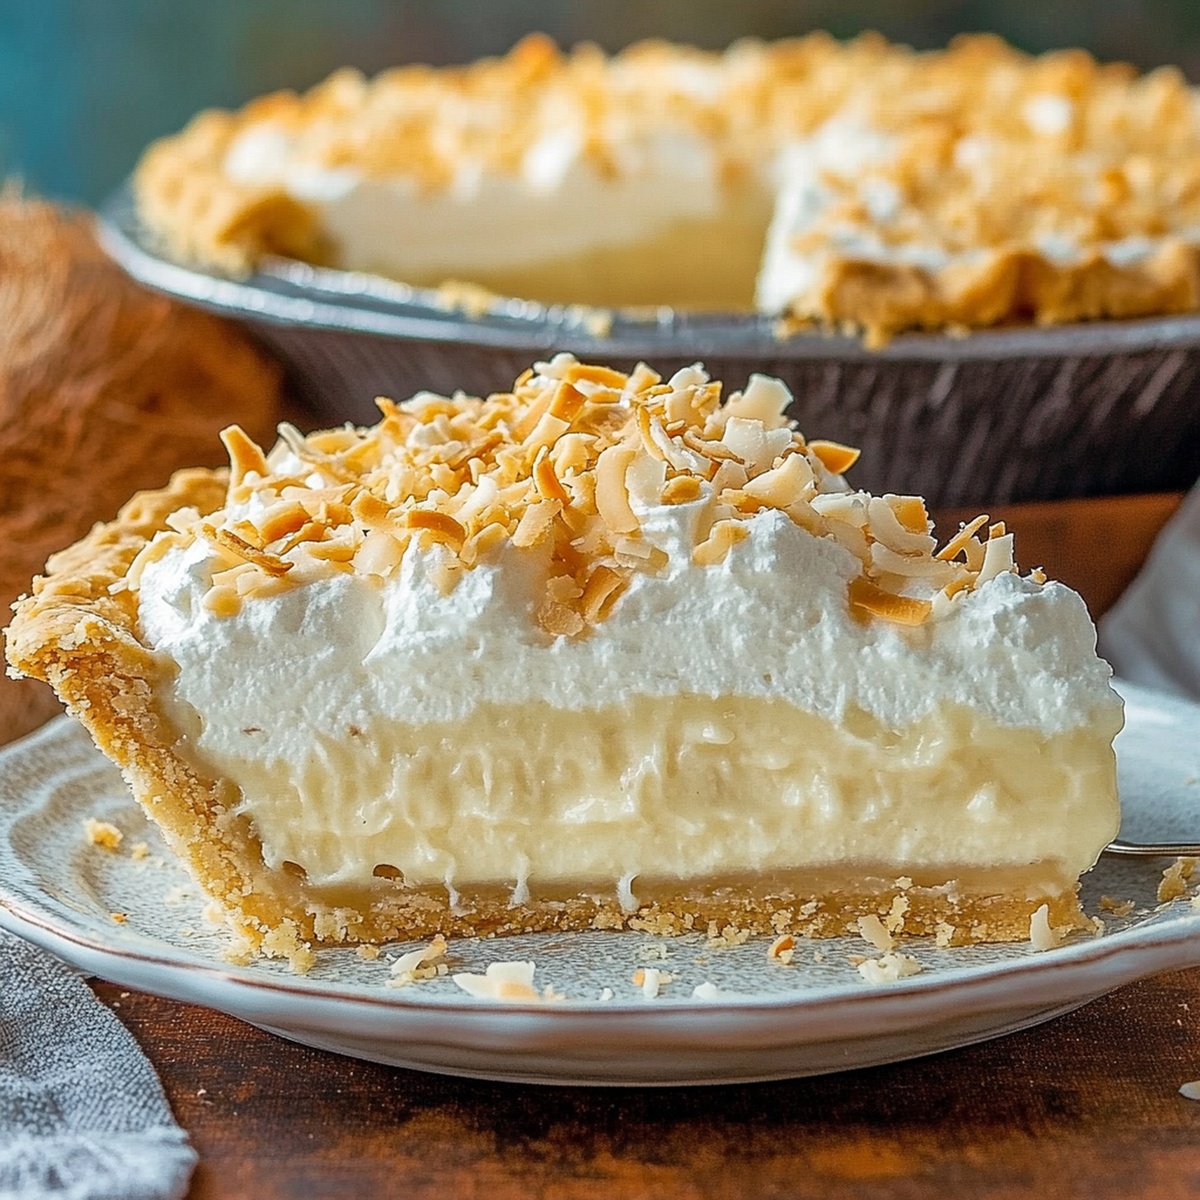
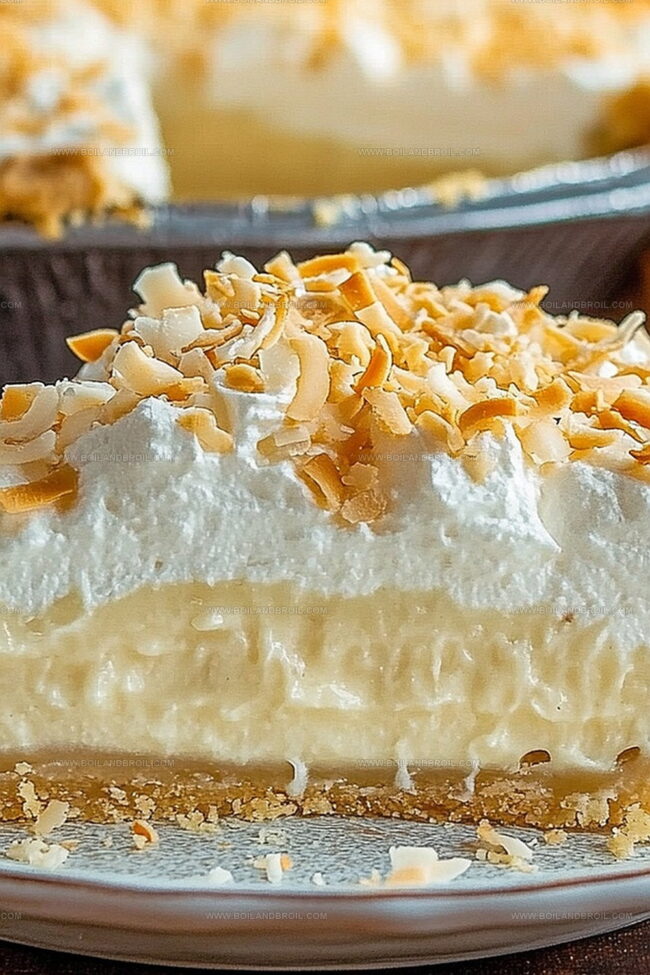
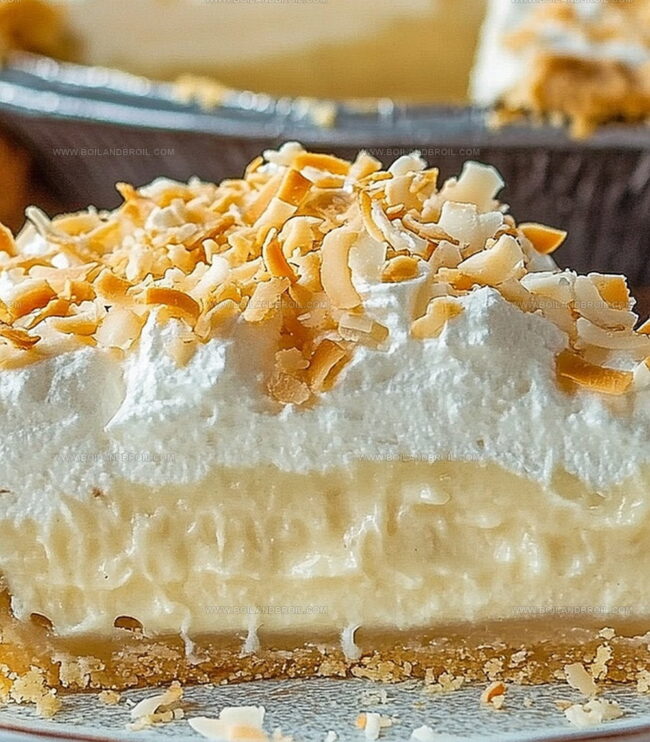
Layers of silky filling nestle between flaky pastry, promising delightful indulgence.
coconut rich, subtle notes create a dreamy texture that melts perfectly on your palate.
Bakers of all skill levels can master this classic dessert with simple techniques.
Whisked custard and toasted coconut flakes transform an ordinary pie into something extraordinary.
You won’t be able to resist diving into this heavenly creation.
Coconut Cream Pie Perks to Know
Ingredients in Coconut Cream Pie
Pie Base:Filling Ingredients:Topping Ingredients:Instructions for Coconut Cream Pie
Step 1: Craft Your Coconut Pie Crust
Warm up your oven to 180C (350F).
Grab a mixing bowl and combine these tasty ingredients:Press this crumbly mixture firmly into a 9-inch pie dish, covering bottom and sides completely.
Bake for 8-10 minutes until it turns a delightful golden color.
Let the crust cool down completely.
Step 2: Create Luscious Coconut Filling
In a saucepan, blend these dreamy ingredients:Cook over medium heat, stirring constantly until the mixture starts bubbling and thickening.
Step 3: Gentle Egg Transformation
Whisk egg yolks in a separate bowl.
Slowly add hot mixture into yolks, whisking rapidly to prevent scrambling.
Pour this silky blend back into the saucepan, continuing to stir until the filling becomes wonderfully thick.
Step 4: Perfect the Filling
Remove from heat and stir in butter and vanilla extract.
Pour this creamy goodness into the cooled crust, smoothing the surface with a spatula.
Chill in the refrigerator for minimum 4 hours.
Step 5: Crown with Whipped Cream
Whip heavy cream with sugar until it forms beautiful stiff peaks.
Spread or pipe this fluffy cloud over the set pie.
Step 6: Final Flourish
Sprinkle toasted shredded coconut on top.
Slice and serve this decadent dessert chilled.
Expert Notes for Coconut Cream Pie
Coconut Cream Pie Storage and Reheat Info
Ideal Matches for Coconut Cream Pie
New Takes on Coconut Cream Pie
FAQs
You’ll need graham crackers, sugar, butter, shredded coconut, milk, heavy cream, cornstarch, egg yolks, vanilla extract, and salt for the main components.
Yes, you can prepare the pie a day in advance. It actually tastes better after chilling for several hours, which allows the filling to set and flavors to develop fully.
Absolutely! Tempering prevents the eggs from scrambling and ensures a smooth, creamy filling by gradually raising the egg temperature with the hot mixture.
The filling is ready when it coats the back of a spoon and leaves a clear path when you run your finger through it, typically after 2-3 minutes of cooking.
Print
Baked Chicken Cordon Bleu Recipe
- Total Time: 45 minutes
- Yield: 4 1x
Description
Crispy golden chicken cordon bleu delivers Swiss cheese and ham’s delightful embrace within tender chicken breasts. Homemade comfort combines classic French-inspired flavors with simple ingredients, promising a satisfying meal you’ll savor with every delectable bite.
Ingredients
Main Protein:
- 4 boneless, skinless chicken breasts
- 8 slices of ham
- 4 ounces (113 grams) Swiss cheese
Coating Ingredients:
- 1 cup panko breadcrumbs
- 1/2 cup all-purpose flour
- 2 large eggs, beaten
- 1 teaspoon garlic powder
- Salt to taste
- Pepper to taste
Serving Sauce:
- 2 tablespoons mustard
Instructions
- Prepare the oven at 400F (200C) and lightly coat a baking dish with nonstick spray to prevent sticking.
- Gently flatten chicken breasts to an even half-inch thickness using a meat mallet, ensuring uniform cooking.
- Create elegant rolls by layering each chicken breast with thin slices of ham and Swiss cheese, carefully tucking and rolling into compact parcels.
- Develop a crispy exterior by coating each chicken roll: first dust with flour, then dip into beaten eggs, and finally roll in panko breadcrumbs for maximum crunch.
- Arrange the prepared rolls seam-side down in the greased baking dish, maintaining space between each piece for even heat circulation.
- Bake for 25-30 minutes, monitoring until the exterior turns golden brown and the internal temperature reaches a safe 165F (75C) using a meat thermometer.
- Remove from oven and let the chicken rest for 3-4 minutes, allowing juices to redistribute and ensuring a moist, tender texture.
- Slice diagonally and garnish with a light drizzle of tangy mustard sauce for an extra flavor dimension before serving.
Notes
- Select chicken breasts of uniform thickness to ensure even cooking and prevent dry edges.
- Chill rolled chicken for 15 minutes before breading to help coating stick better and prevent unraveling during baking.
- Substitute gluten-free breadcrumbs or crushed cornflakes for a celiac-friendly version without compromising crispy texture.
- Experiment with different cheese varieties like Gruyère or provolone to create unique flavor profiles while maintaining classic dish structure.
- Prep Time: 15 minutes
- Cook Time: 30 minutes
- Category: Dinner, Lunch, Appetizer
- Method: Baking
- Cuisine: French
Nutrition
- Serving Size: 4
- Calories: 450
- Sugar: 1g
- Sodium: 900mg
- Fat: 20g
- Saturated Fat: 7g
- Unsaturated Fat: 10g
- Trans Fat: 0g
- Carbohydrates: 30g
- Fiber: 1g
- Protein: 40g
- Cholesterol: 150mg
Clara Thompson
Recipe Developer & Culinary Educator
Expertise
Developing accessible single-serving recipes, Food writing and content creation, Plant-based and allergen-friendly cooking, Culinary education and workshop facilitation
Education
Oregon Culinary Institute (Portland, OR)
Diploma in Culinary Arts
Specialized in plant-based cooking and sustainable kitchen practices.
Portland Community College
Certificate in Food Writing and Media
Focused on recipe writing, food photography, and digital content creation.
Clara’s food journey began with a curiosity for color, texture, and ingredients pulled straight from the garden. Her background in plant-forward cooking and creative writing gives her a unique edge – she makes healthy, flavorful food feel inviting, not intimidating.
She specializes in meals that work for busy lives and different diets, all without sacrificing taste. Clara’s voice comes through in every recipe she writes – clear, kind, and encouraging.