Easy Easter Candy Bark Recipe: A Springtime Sweet Treat
Sweet memories of childhood Easter celebrations come flooding back with this delightful Easter candy bark that sparkles with colorful charm.
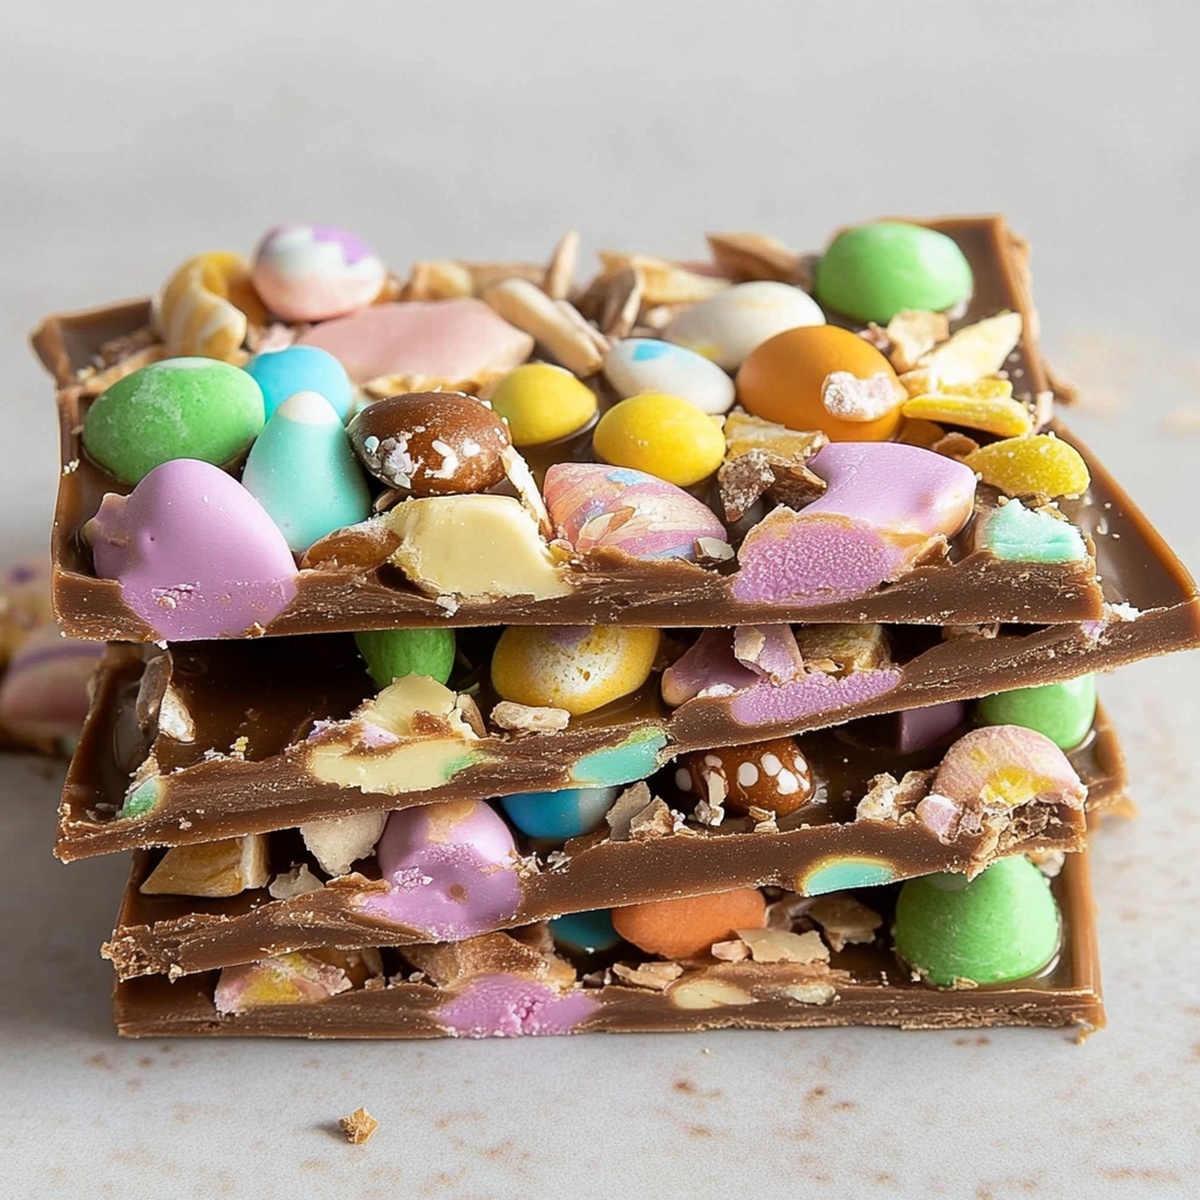
Pastel-hued candies and chocolate create a whimsical treat perfect for spring gatherings.
Delicate chocolate layers provide a smooth canvas for playful decorations.
Vibrant mini eggs and sprinkles add a festive touch to every delectable bite.
Kids and adults alike will adore the playful design and irresistible flavor combination.
Simple ingredients transform into a magical dessert that captures the joy of holiday traditions.
You can craft this impressive confection in minutes, making it an effortless yet stunning addition to your Easter table.
Easter Candy Bark: Colorful Crunch Creation
Easter Candy Bark Ingredient Essentials
Chocolate Base:Decorative Toppings:Additional Supplies:How to Create Festive Candy Bark
Step 1: Prepare Baking Surface
Line a baking sheet with parchment paper, ensuring the entire surface is completely covered and smooth for easy chocolate spreading.
Step 2: Melt First Chocolate Layer
Microwave white chocolate chips in 30-second bursts, stirring between each interval until the chocolate transforms into a silky, glossy mixture with no lumps remaining.
Step 3: Create Base Chocolate Layer
Gently pour the melted white chocolate onto the prepared parchment paper, using a spatula to spread it evenly across the surface, creating a smooth and uniform layer.
Step 4: Design Chocolate Swirls
Combine remaining white chocolate with milk chocolate chips, melting them together to create a beautiful marbled effect.
Carefully drizzle and swirl the mixed chocolates over the white chocolate base using artistic, zigzag motions.
Step 5: Decorate With Easter Treats
While the chocolate remains warm and slightly soft, artfully scatter these delightful toppings:Step 6: Chill and Set
Place the decorated chocolate bark in the refrigerator for approximately one hour, allowing it to completely firm up and solidify.
Step 7: Break and Serve
Remove the bark from the refrigerator and break into irregular, rustic pieces.
Serve and enjoy this delectable Easter treat with family and friends.
Tricks for Crisp, Shiny Candy Bark
Storing and Serving Easter Candy Bark
Pairing Ideas for Candy Bark Fun
Unique Twists on Easter Candy Bark
FAQs
Yes, you can substitute white chocolate with milk or dark chocolate, or mix different chocolate types for unique flavor combinations.
Use short 30-second microwave intervals and stir frequently to ensure smooth, even melting without scorching the chocolate.
You can melt chocolate using a double boiler method by placing a heat-safe bowl over simmering water, stirring until smooth and fully melted.
When stored in an airtight container in the refrigerator, the bark will remain fresh for up to 7-10 days, maintaining its texture and flavor.
Print
Easter Candy Bark Recipe
- Total Time: 15 minutes
- Yield: 12 1x
Description
Delightful Easter Candy Bark brings festive cheer with its colorful chocolate base sprinkled with pastel candies and springtime treats. Sweet layers of chocolate create a playful dessert perfect for holiday celebrations and delighting friends and family.
Ingredients
Main Chocolate Ingredients:
- 1 cup (240 ml) white chocolate chips
- 1 cup (240 ml) milk chocolate chips
Decorative Ingredients:
- 1 cup (240 ml) candy-coated chocolate eggs
Topping Ingredients:
- 1/2 cup (120 ml) vibrant sprinkles
Instructions
- Prepare a baking sheet by laying down parchment paper, ensuring complete coverage of the surface.
- Carefully microwave white chocolate chips in short 30-second bursts, stirring between intervals until achieving a silky, smooth consistency.
- Gently cascade the melted white chocolate onto the parchment-lined sheet, using a spatula to distribute evenly and create a uniform layer.
- Create a delightful marbled effect by melting the remaining white chocolate together with milk chocolate chips, then artfully drizzling the combined mixture across the initial white chocolate foundation.
- While the chocolate remains warm and slightly fluid, strategically scatter colorful candy-coated eggs and festive sprinkles across the surface, ensuring even distribution.
- Transfer the decorated bark to the refrigerator and allow it to set completely for approximately 60 minutes, or until the chocolate becomes firm and glossy.
- Once chilled, use gentle hand motions to break the bark into irregular, rustic pieces, revealing the beautiful swirled pattern underneath.
- Serve immediately or store in an airtight container to maintain freshness and texture.
Notes
- Precision in chocolate melting prevents burning, so use short microwave intervals and stir consistently to achieve smooth, glossy texture.
- Experiment with different chocolate varieties like dark or milk chocolate to create unique flavor combinations and personalize the bark.
- Gluten-free option is naturally available by ensuring all chocolate and candy decorations are certified gluten-free, making this dessert adaptable for various dietary needs.
- Cool the bark completely before breaking to ensure clean, crisp pieces that look professionally crafted and maintain an elegant presentation.
- Prep Time: 10 minutes
- Cook Time: 5 minutes
- Category: Desserts, Snacks
- Method: Baking
- Cuisine: American
Nutrition
- Serving Size: 12
- Calories: 200
- Sugar: 20 g
- Sodium: 50 mg
- Fat: 10 g
- Saturated Fat: 6 g
- Unsaturated Fat: 4 g
- Trans Fat: 0 g
- Carbohydrates: 30 g
- Fiber: 1 g
- Protein: 2 g
- Cholesterol: 5 mg
Jack Sullivan
Founder & Culinary Storyteller
Expertise
Single-recipe development with a narrative approach, Culinary storytelling and food history, Seasonal and regional ingredient utilization, Home cooking techniques adapted for modern kitchens
Education
New England Culinary Institute (Montpelier, VT)
Certificate in Culinary Arts
Focused on farm-to-table cooking, sustainable practices, and modern plating techniques.
Asheville-Buncombe Technical Community College
Associate Degree in Culinary Arts
Emphasized Southern Appalachian cuisine and local ingredient sourcing.
Jack grew up surrounded by smoky skillets and handwritten recipes in the mountains of North Carolina. His roots in Appalachian cooking shaped the way he sees food – as something that connects people, tells a story, and holds meaning.
With hands-on training and a background in sustainable, regional cooking, Jack started Boil And Broil to make meaningful meals more accessible. He’s all about one-dish recipes that are simple to follow but rich with flavor and history.