
Spring’s Joy: Easy Easter Dirt Cake No-Bake Recipe
Chocolate lovers rejoice with this delightful Easter dirt cake that combines creamy textures and playful nostalgia.
Layers of crushed cookies and rich pudding create a dessert that delights both kids and adults.
The (no-bake) method makes this treat incredibly simple to assemble.
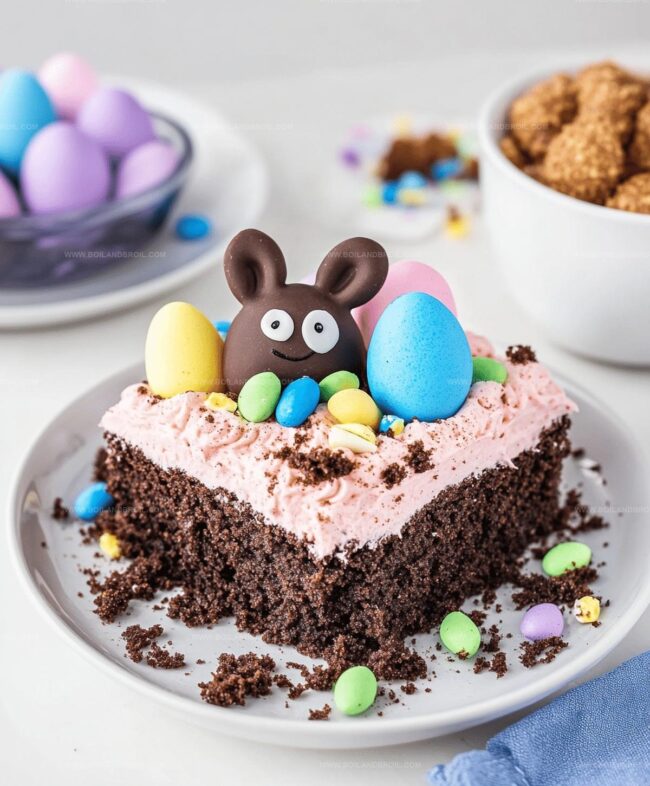
Crumbled chocolate cookies mimic earthy soil, while fluffy pudding layers add decadent smoothness.
Gummy worms peek through the chocolatey landscape, adding whimsy and fun to every spoonful.
Colorful sprinkles and chocolate decorations transform this dessert into a festive spring centerpiece.
You’ll want to serve this crowd-pleasing Easter dirt cake at your next gathering.
Pair This Dessert With These Sweets
Cute Add-Ons for Easter Dirt Cake
FAQs
This no-bake dessert combines creamy pudding, cream cheese, and crushed Oreos with festive Easter decorations like M&Ms and Peeps, creating a fun and easy holiday treat that doesn’t require any baking.
Yes, you can prepare the Easter Dirt Cake up to a day in advance. Keep it refrigerated, and add the decorative toppings like M&Ms and Peeps just before serving to maintain their fresh look and crunch.
Absolutely! Children will love the playful layers, chocolate flavor, and colorful Easter decorations. It’s a great dessert for family gatherings and Easter celebrations that kids can help assemble.
No special equipment is needed. You’ll just require a mixing bowl, whisk, 9×13 dish, and basic kitchen tools like a spatula and measuring cups to create this delightful dessert.
Why Easter Dirt Cake Is Always a Hit

What You’ll Need for This No-Bake Dessert
Main Base Ingredients:Pudding and Whip Ingredients:Crumb and Decorative Ingredients:How to Layer Easter Dirt Cake
Step 1: Whip Creamy Base
In a large mixing bowl, blend softened butter, cream cheese, and powdered sugar until the mixture becomes incredibly smooth and fluffy.
The result should be a rich, velvety foundation for your dessert.
Step 2: Prepare Chocolate Pudding
In a separate bowl, combine milk and instant chocolate pudding mix.
Whisk thoroughly until the mixture transforms into a thick, silky consistency.
Take your time to ensure no lumps remain.
Step 3: Blend Pudding and Cream Cheese
Carefully pour the pudding mixture into the cream cheese base.
Use a mixer to combine completely, making sure to scrape down the bowl’s sides.
The aroma will be absolutely tempting.
Step 4: Fold in Whipped Topping
Gently incorporate the thawed Cool Whip into the pudding mixture.
Use soft, careful folding motions to maintain the light, airy texture of the filling.
Step 5: Layer Cookie Base
Prepare your serving dish by creating a bottom layer of crushed Oreo cookies.
Spread them evenly across the base of the dish.
Pour the creamy pudding mixture over the cookies, ensuring an even distribution.
Step 6: Add Remaining Cookie Layer
Sprinkle the remaining crushed Oreo cookies on top of the pudding layer.
Press down gently to create a compact surface.
Step 7: Chill and Decorate
Refrigerate the dessert for at least 2 hours to allow the layers to set perfectly.
Just before serving, add a festive touch with:The dessert will be a delightful centerpiece that captures the joy of Easter celebrations.
Tips for Better Texture and Flavor

Storing and Reheating Dirt Cake Properly
Print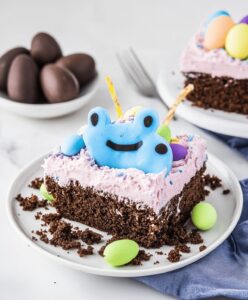
Easter Dirt Cake (no-bake) Recipe
- Total Time: 20 minutes
- Yield: 12 1x
Description
Springtime delights come alive with Easter Dirt Cake, a playful dessert blending chocolate crumbs and creamy layers. Sweet memories and childhood whimsy blend perfectly, drawing you into a nostalgic celebration of seasonal treats.
Ingredients
Main Ingredients:
- 2 3.4 ounces (96 grams) instant chocolate pudding mix
- 3 cups milk
- 1 15.5 ounces (440 grams) package Oreo cookies
- 12 ounces (340 grams) Cool Whip
- 1 8 ounces (226 grams) package cream cheese
Sweeteners and Toppings:
- 1 cup powdered sugar
- 1 cup Easter M&Ms
- 20 PEEP marshmallows
Binding Ingredients:
- 1/2 cup butter, softened
Instructions
- Prepare the creamy foundation by vigorously blending softened butter, cream cheese, and powdered sugar until achieving a silky, whipped consistency that forms the luxurious base of the dessert.
- Create a smooth chocolate pudding by thoroughly whisking milk and instant pudding mix for 2-3 minutes, ensuring no lumps remain and the mixture reaches a thick, velvety texture.
- Merge the pudding with the cream cheese mixture, incorporating them completely by beating until fully integrated, scraping bowl edges to guarantee a uniform blend.
- Introduce thawed Cool Whip by delicately folding it into the pudding mixture, maintaining a light and airy structure while creating a luscious filling.
- Construct the base layer by evenly distributing half of the crushed Oreos across the bottom of a 9×13 dish, then carefully spread the pudding mixture over the cookie foundation, ensuring complete coverage.
- Apply the remaining Oreo crumbs as a top layer, gently pressing to create a compact surface that seals the creamy filling underneath.
- Refrigerate the dessert for a minimum of 2 hours to allow layers to set and flavors to meld, creating a perfectly chilled treat.
- Garnish just before serving by sprinkling Easter M&Ms and edible green grass across the top, then crown each portion with a whimsical Peep marshmallow for a festive finishing touch.
Notes
- Swap heavy cream for Cool Whip to create a lighter, airier texture that melts smoothly in your mouth.
- Consider using gluten-free Oreos or graham crackers to make this dessert accessible for those with gluten sensitivities.
- Prep ingredients at room temperature to ensure smoother blending and prevent lumpy texture in the cream cheese mixture.
- Prep Time: 20 minutes
- Cook Time: 0 minutes
- Category: Desserts, Snacks
- Method: None
- Cuisine: American
Nutrition
- Serving Size: 12
- Calories: 320
- Sugar: 24 g
- Sodium: 300 mg
- Fat: 18 g
- Saturated Fat: 10 g
- Unsaturated Fat: 5 g
- Trans Fat: 0 g
- Carbohydrates: 40 g
- Fiber: 1 g
- Protein: 3 g
- Cholesterol: 30 mg
Clara Thompson
Recipe Developer & Culinary Educator
Expertise
Developing accessible single-serving recipes, Food writing and content creation, Plant-based and allergen-friendly cooking, Culinary education and workshop facilitation
Education
Oregon Culinary Institute (Portland, OR)
Diploma in Culinary Arts
Specialized in plant-based cooking and sustainable kitchen practices.
Portland Community College
Certificate in Food Writing and Media
Focused on recipe writing, food photography, and digital content creation.
Clara’s food journey began with a curiosity for color, texture, and ingredients pulled straight from the garden. Her background in plant-forward cooking and creative writing gives her a unique edge – she makes healthy, flavorful food feel inviting, not intimidating.
She specializes in meals that work for busy lives and different diets, all without sacrificing taste. Clara’s voice comes through in every recipe she writes – clear, kind, and encouraging.