The Most Adorable Easter Egg Truffles Recipe for Spring Joy
Crafting delectable Easter egg truffles promises a delightful adventure in sweet creativity.
Chocolate lovers recognize these bite-sized delights as magical treats that spark joy.
Smooth ganache and rich cocoa combine to create irresistible morsels.
Playful decorations transform ordinary ingredients into extraordinary confections.
Each truffle becomes a miniature masterpiece waiting to surprise and enchant.
Elegant yet simple, these treats require minimal kitchen skills and maximum imagination.
You’ll find yourself falling in love with every decadent bite.
Dive into this recipe and let your culinary magic unfold.
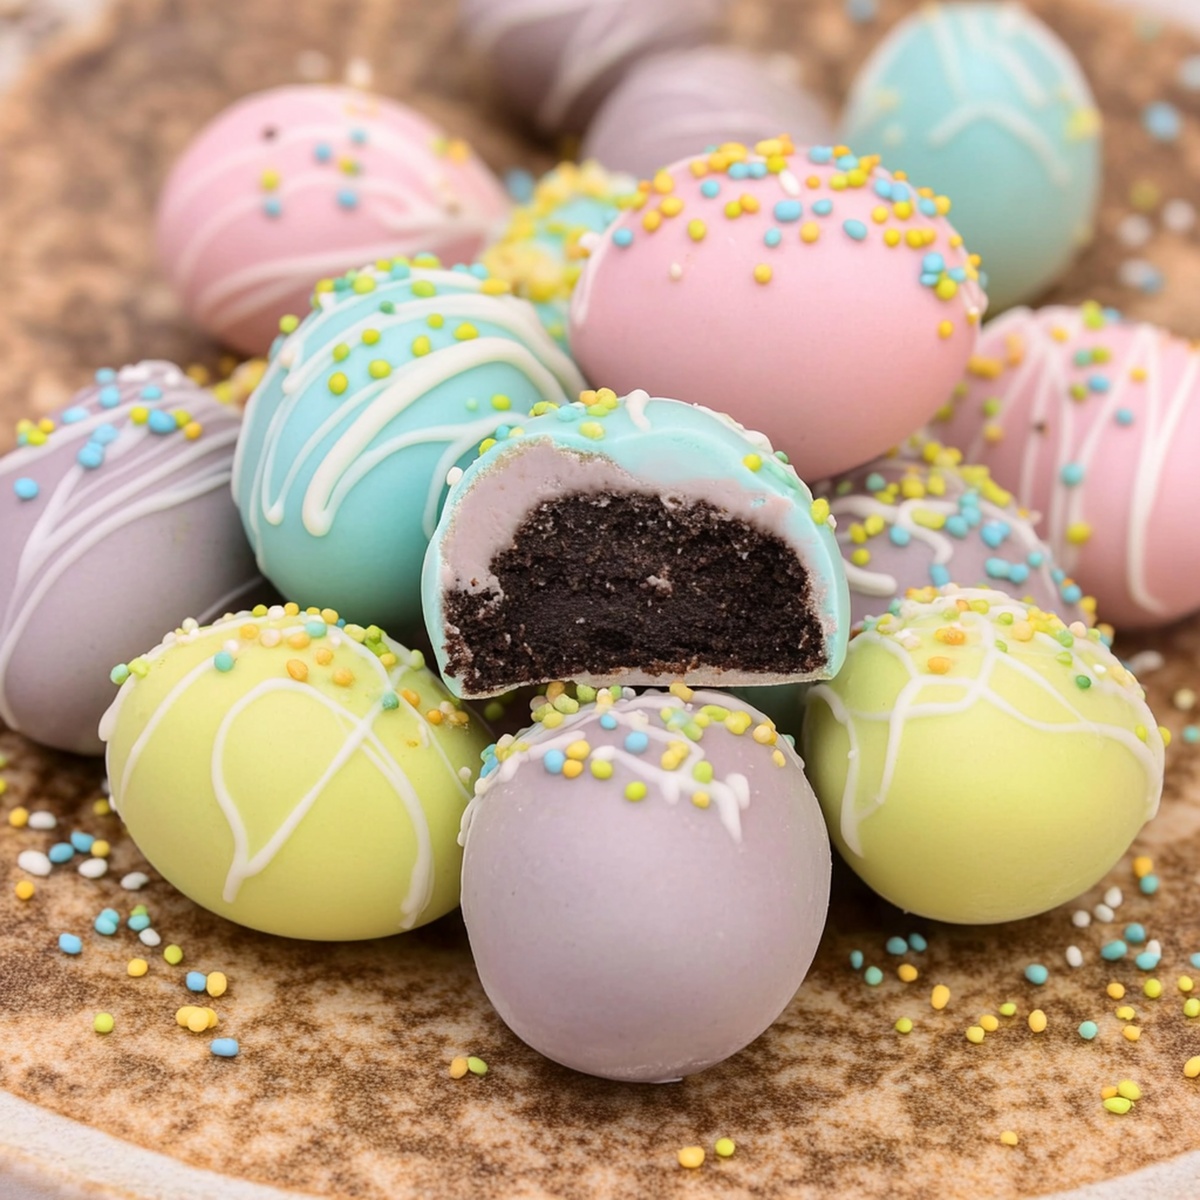
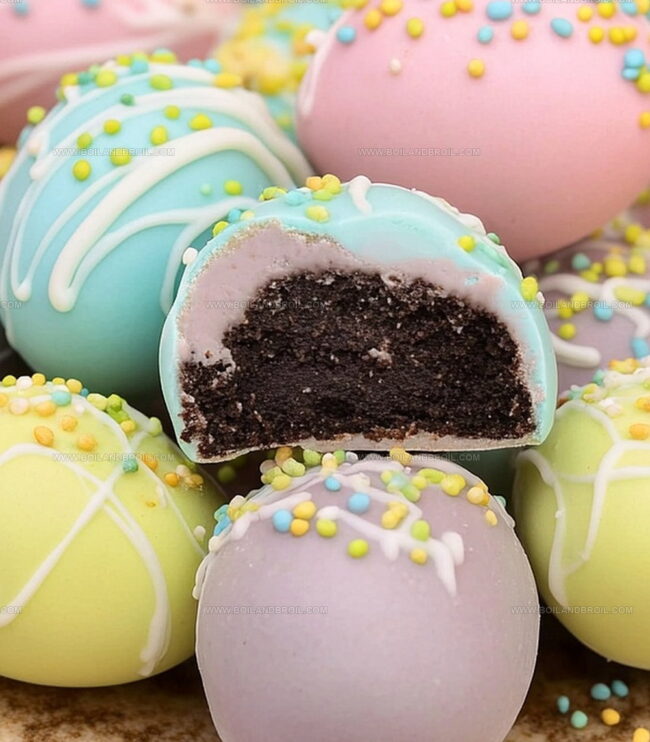
Easter Egg Truffles: Sweet, Bite-Sized Gems

Easter Egg Truffle Ingredient Guide
Chocolate Base:Binding and Flavor Enhancers:Coating Options:How to Mould and Fill Easter Egg Truffles
Step 1: Prepare Chocolate Base
Grab a heatproof bowl and chop dark chocolate into small, even pieces.
In a saucepan, gently warm heavy cream over medium heat until tiny bubbles start to form around the edges, signaling it’s ready to pour.
Step 2: Create Smooth Chocolate Mixture
Slowly cascade the hot cream over the chopped chocolate.
Allow the mixture to rest for five minutes, then whisk thoroughly until the chocolate transforms into a silky, glossy liquid with no lumps.
Step 3: Incorporate Butter
Introduce room-temperature butter to the chocolate mixture.
Stir continuously until the butter melts completely and blends seamlessly, creating a rich, velvety ganache.
Step 4: Chill and Set
Cover the bowl with plastic wrap and place in the refrigerator.
Let the mixture cool and firm up for at least two hours, allowing it to reach a scoopable consistency.
Step 5: Shape Easter Egg Truffles
Using a small scoop or spoon, portion out the chilled chocolate mixture.
Gently shape each portion into an egg-like form using your hands.
For extra flair, roll the truffles in:Step 6: Final Setting
Arrange the shaped truffles on parchment paper.
Allow them to set at room temperature until the outer coating hardens slightly.
Serve and enjoy these decadent Easter-inspired treats.
Pro Tips for Smooth, Melt-in-Your-Mouth Truffles
Storing and Serving Easter Egg Truffles
Pairing Ideas for Truffle Treats
Flavor Variations on Easter Egg Truffles
FAQs
Yes, you can substitute milk chocolate, but the truffles will be sweeter and less intense in flavor. Dark chocolate provides a richer taste that complements the creamy texture.
These Easter egg truffles will stay fresh for up to 7-10 days when stored in an airtight container in the refrigerator. Bring them to room temperature before serving for the best taste and texture.
Use cold hands and work quickly. Scoop the chilled chocolate mixture and gently roll and shape into egg-like forms. You can also use plastic gloves to prevent the mixture from melting too quickly.
Absolutely! Try rolling them in different coatings like crushed nuts, colored sprinkles, or melted white chocolate. You can also drizzle contrasting chocolate over the truffles for a festive look.
Print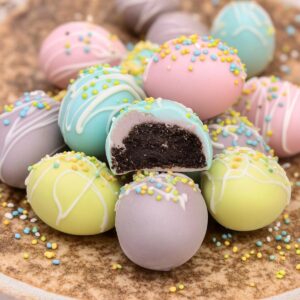
Easter Egg Truffles Recipe
- Total Time: 15 minutes
- Yield: 12 1x
Description
Delightful Easter Egg Truffles bring spring’s sweetness to chocolate lovers’ tables. Creamy chocolate centers wrapped in pastel-colored shells offer a playful twist on traditional Easter treats you’ll adore.
Ingredients
Main Ingredients:
- 8 ounces (226 grams) dark chocolate
- 1/2 cup (120 milliliters) heavy cream
- 2 tablespoons (30 grams) unsalted butter
Coating Ingredients:
- 1/4 cup (30 grams) unsweetened cocoa powder
Additional Ingredients:
- gel food coloring (optional)
Instructions
- Carefully chop dark chocolate into small, uniform pieces and transfer to a heat-resistant mixing bowl.
- Gently warm heavy cream in a saucepan over medium heat until tiny bubbles form around the edges, indicating it’s ready to be poured.
- Slowly pour the hot cream over the chocolate, allowing it to sit undisturbed for approximately five minutes to facilitate smooth melting.
- Whisk the chocolate and cream mixture until a glossy, uniform ganache develops with no visible chocolate chunks.
- Incorporate softened butter into the ganache, stirring until completely integrated and creating a silky texture.
- Seal the mixture and refrigerate for 120 minutes, or until the ganache becomes firm enough to mold without sticking to your hands.
- Using a small scoop or spoon, portion out the chilled ganache and carefully shape into egg-like forms with gentle, consistent pressure.
- Roll the shaped truffles in cocoa powder or dip in melted chocolate for a decorative exterior, ensuring even coating.
- Place the finished truffles on parchment paper, allowing them to set at room temperature for 15-20 minutes before serving.
Notes
- Ensure chocolate is high-quality for rich, smooth truffle texture that elevates the entire dessert experience.
- Use room-temperature butter to guarantee seamless incorporation without potential chocolate separation.
- Chill mixture thoroughly to achieve perfect egg-shaped consistency that holds its form during rolling.
- Consider alternative coatings like crushed nuts, shredded coconut, or festive sprinkles for unique flavor variations and visual appeal.
- Prep Time: 10 minutes
- Cook Time: 5 minutes
- Category: Desserts, Snacks
- Method: Blending
- Cuisine: American
Nutrition
- Serving Size: 12
- Calories: 132
- Sugar: 6 g
- Sodium: 25 mg
- Fat: 10 g
- Saturated Fat: 6 g
- Unsaturated Fat: 4 g
- Trans Fat: 0 g
- Carbohydrates: 9 g
- Fiber: 1 g
- Protein: 2 g
- Cholesterol: 15 mg
Jack Sullivan
Founder & Culinary Storyteller
Expertise
Single-recipe development with a narrative approach, Culinary storytelling and food history, Seasonal and regional ingredient utilization, Home cooking techniques adapted for modern kitchens
Education
New England Culinary Institute (Montpelier, VT)
Certificate in Culinary Arts
Focused on farm-to-table cooking, sustainable practices, and modern plating techniques.
Asheville-Buncombe Technical Community College
Associate Degree in Culinary Arts
Emphasized Southern Appalachian cuisine and local ingredient sourcing.
Jack grew up surrounded by smoky skillets and handwritten recipes in the mountains of North Carolina. His roots in Appalachian cooking shaped the way he sees food – as something that connects people, tells a story, and holds meaning.
With hands-on training and a background in sustainable, regional cooking, Jack started Boil And Broil to make meaningful meals more accessible. He’s all about one-dish recipes that are simple to follow but rich with flavor and history.