
The Best Easter Rice Krispies Recipe for Sweet Holiday Fun
Crafting delightful Easter rice krispies brings pure joy to springtime celebrations.
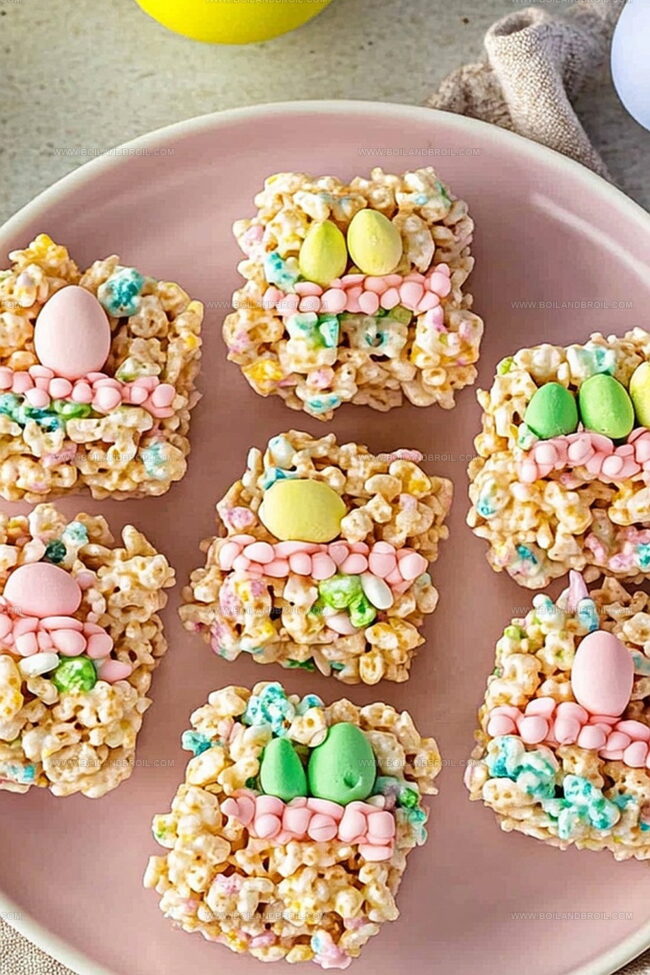
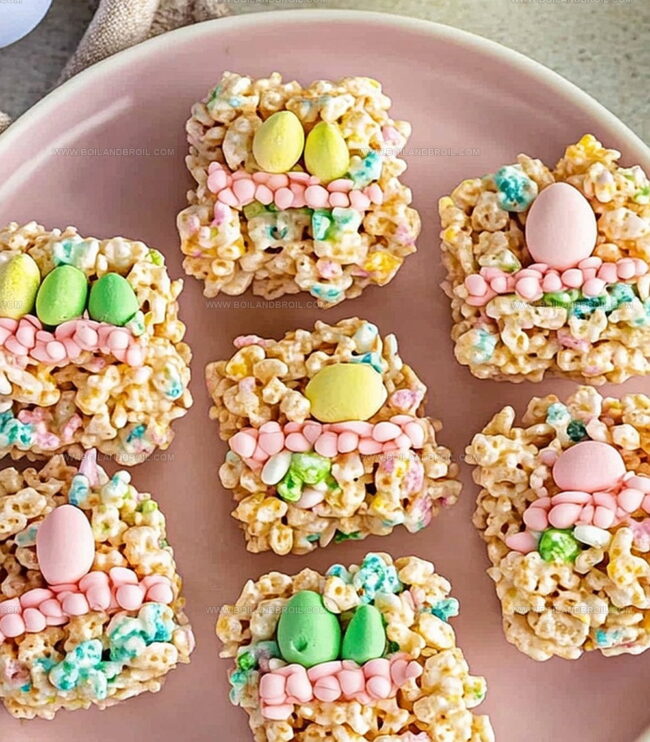
Pastel marshmallows melt into a sweet canvas of childhood memories.
Colorful sprinkles dance across the sticky surface, creating edible art that sparkles with whimsy.
Kids adore helping mix and shape these playful treats, turning kitchen time into a festive adventure.
Soft marshmallow binds crispy rice into delicate shapes that capture the essence of seasonal magic.
Cheerful decorations transform simple ingredients into something truly special.
You’ll want to share these adorable nibbles with everyone around the table.
Festive Easter Rice Krispies Treats
What You Need for Easter Rice Krispies
Base Ingredients:Decorative Ingredients:Preparation Ingredients:Easy Assembly for Rice Krispies Treats
Step 1: Prep the Baking Vessel
Grab your favorite large baking dish and give it a generous coating of nonstick spray or butter to ensure your Easter Rice Krispies won’t stick.
Step 2: Melt the Buttery Base
Place a saucepan on low heat and slowly melt the butter until it’s completely liquid.
Toss in the mini marshmallows and stir continuously until they transform into a silky, smooth mixture that looks like a fluffy cloud.
Step 3: Create the Crispy Blend
Take the pan off the heat and gently fold the Rice Krispies into the marshmallow mixture.
Make sure every single crisp gets a perfect, even coating of the sweet mixture.
Step 4: Add Festive Sparkle
Sprinkle in most of the colorful sprinkles, reserving a few for a decorative topping later.
Stir them throughout the mixture to create a fun, festive look.
Step 5: Shape and Set
Transfer the mixture to your prepared baking dish.
Use a spatula or wax paper to press down and create an even, smooth surface.
Let the treats rest at room temperature for about an hour until they’re completely set.
Step 6: Cut and Celebrate
Once the Rice Krispies have cooled and firmed up, slice them into squares.
Scatter the remaining sprinkles on top for an extra pop of color and fun.
Your Easter treats are ready to delight!
Tips for Fluffy, Colorful Cereal Treats
Storing and Slicing Rice Krispies Treats
Fun Additions to Rice Krispies Treats
Pair Pastel Marshmallow Treats with Complementary Flavors
New Takes on Rice Krispies Creations
FAQs
No, traditional Rice Krispies contain malt, which has gluten. However, you can use gluten-free Rice Krispies cereal to make a gluten-free version of this recipe.
Yes, regular marshmallows work fine. Just cut them into smaller pieces or melt them slowly in the saucepan, stirring frequently to ensure even melting.
Lightly grease your hands with butter or use wax paper to press the mixture evenly into the baking dish without sticking.
Absolutely! Easter Rice Krispies Treats can be made 1-2 days in advance and stored at room temperature in an airtight container, maintaining their soft and chewy texture.
Print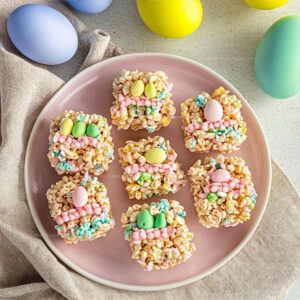
Easter Rice Krispies Recipe
- Total Time: 20 minutes
- Yield: 12 1x
Description
Colorful Easter Rice Krispies treats bring springtime cheer to dessert tables with marshmallow magic and pastel sprinkles. Crispy, sweet, and festive, these delightful squares will charm family and guests alike.
Ingredients
Main Ingredients:
- 6 cups rice krispies cereal
- 4 cups mini marshmallows
- 3 tablespoons unsalted butter
Decoration:
- Easter-themed sprinkles
Instructions
- Prepare a spacious rectangular pan by coating interior surfaces with culinary lubricant for effortless removal.
- Utilize a heavy-bottomed saucepan, gradually melt butter over minimal heat until liquid transforms completely.
- Introduce marshmallows into melted butter, continuously stirring until mixture achieves silky, uniform consistency without lumps.
- Disconnect pan from heating element and gently incorporate Rice Krispies, ensuring comprehensive coating with marshmallow mixture.
- Fold in colorful sprinkles, reserving a portion for decorative garnishing on top of treats.
- Transfer sticky mixture into prepared pan, using a spatula or parchment paper to compress contents evenly and create smooth surface.
- Allow confection to stabilize at ambient temperature for approximately 60 minutes, permitting marshmallow binding and structural setting.
- Once solidified, slice into symmetrical geometric shapes using sharp knife for clean, precise Easter-themed squares.
- Optional: Sprinkle remaining decorative elements atop each individual treat for festive visual appeal.
Notes
- Customize marshmallow consistency by adjusting heat carefully to prevent burning or sticking.
- Experiment with different colored sprinkles to match seasonal themes or personal preferences.
- Use silicone spatulas for easier mixing and cleaner transfer of sticky marshmallow mixture.
- Chill treats briefly in refrigerator for faster setting and firmer texture if you’re short on time.
- Prep Time: 10 minutes
- Cook Time: 10 minutes
- Category: Snacks, Desserts
- Method: No-bake
- Cuisine: American
Nutrition
- Serving Size: 12
- Calories: 150
- Sugar: 14 g
- Sodium: 90 mg
- Fat: 5 g
- Saturated Fat: 3 g
- Unsaturated Fat: 2 g
- Trans Fat: 0 g
- Carbohydrates: 26 g
- Fiber: 0 g
- Protein: 1 g
- Cholesterol: 10 mg
Jack Sullivan
Founder & Culinary Storyteller
Expertise
Single-recipe development with a narrative approach, Culinary storytelling and food history, Seasonal and regional ingredient utilization, Home cooking techniques adapted for modern kitchens
Education
New England Culinary Institute (Montpelier, VT)
Certificate in Culinary Arts
Focused on farm-to-table cooking, sustainable practices, and modern plating techniques.
Asheville-Buncombe Technical Community College
Associate Degree in Culinary Arts
Emphasized Southern Appalachian cuisine and local ingredient sourcing.
Jack grew up surrounded by smoky skillets and handwritten recipes in the mountains of North Carolina. His roots in Appalachian cooking shaped the way he sees food – as something that connects people, tells a story, and holds meaning.
With hands-on training and a background in sustainable, regional cooking, Jack started Boil And Broil to make meaningful meals more accessible. He’s all about one-dish recipes that are simple to follow but rich with flavor and history.