Easy Chili-Cheese Enchiladas Recipe: A Zesty Family Favorite
Crafting delectable chili-cheese enchiladas requires minimal effort and maximum flavor satisfaction.
Simplicity becomes your culinary superpower with this streamlined recipe.
Pantry staples converge into a mouthwatering meal that impresses without complexity.
Cheese melts luxuriously between soft tortillas, creating a comforting embrace of spicy goodness.
Minimal ingredients guarantee maximum enjoyment for hungry diners seeking quick satisfaction.
Weeknight dinners never looked so deliciously effortless.
Dive in and savor each cheesy, chili-infused bite that promises to become a household favorite.
3-Ingredient Chili-Cheese Enchiladas Made Easy
Ingredients for Chili-Cheese Enchiladas
Quick Steps for Chili-Cheese Enchiladas
Step 1: Crank Up the Oven
Preheat your oven to a toasty 375F (190C).
This warm environment will help transform your simple ingredients into a mouthwatering meal.
Step 2: Wake Up the Tortillas
Warm your tortillas to make them super flexible and easy to work with.
You’ve got two options:Step 3: Create Enchilada Magic
Grab your baking dish and get ready to assemble:Step 4: Bake to Perfection
Slide the dish into the preheated oven and bake for 20-25 minutes.
You’re looking for:Step 5: Serve and Enjoy
Let the enchiladas rest for 5 minutes before serving.
Smart Tips for Chili-Cheese Enchiladas
How to Store Chili-Cheese Enchiladas
Perfect Sides with Chili-Cheese Enchiladas

Tasty Variations for Chili-Cheese Enchiladas
FAQs
Yes, you can use canned chili, homemade chili, or even vegetarian chili depending on your preference. Just ensure the chili has a thick consistency for easier rolling.
Warm tortillas are less likely to crack. Heat them briefly in the microwave or on a skillet to make them more flexible and easier to roll without breaking.
Absolutely! You can assemble the enchiladas ahead of time and refrigerate them before baking. Just add an extra 5-10 minutes to the baking time if cooking from cold.
Yes, you can freeze assembled enchiladas before baking. Wrap tightly in plastic wrap and aluminum foil. When ready to eat, thaw overnight in the refrigerator and bake as directed.
Print
Easy 3-Ingredient Chili-Cheese Enchiladas Recipe
- Total Time: 35 minutes
- Yield: 4 1x
Description
Spicy Mexican magic happens when simple Chili-Cheese Enchiladas merge bold flavors with minimal effort. Cheesy comfort wraps create a quick dinner solution that satisfies cravings with authentic southwestern charm.
Ingredients
Proteins:
- 1 can (15 ounces / 425 grams) chili (no beans, or vegetarian chili if preferred)
Bread and Wraps:
- 8 small flour tortillas
Dairy:
- 2 cups shredded cheese (cheddar or a blend of Mexican cheeses)
Instructions
- Prepare the oven by heating it to 375F (190C), creating an ideal environment for baking enchiladas.
- Soften tortillas by gently warming them in the microwave or on a dry skillet for 20-30 seconds per side, ensuring flexibility for easy rolling.
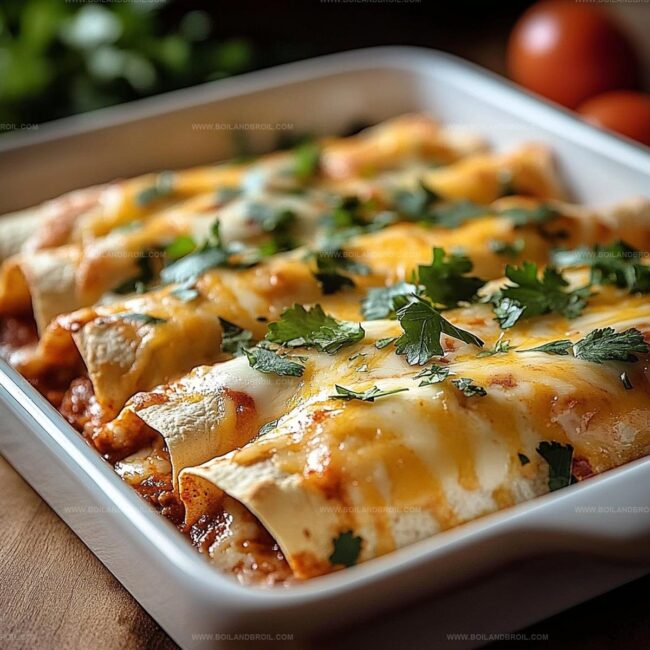
- Create a base layer of chili in a greased 9×13-inch baking dish to prevent sticking and add initial flavor.
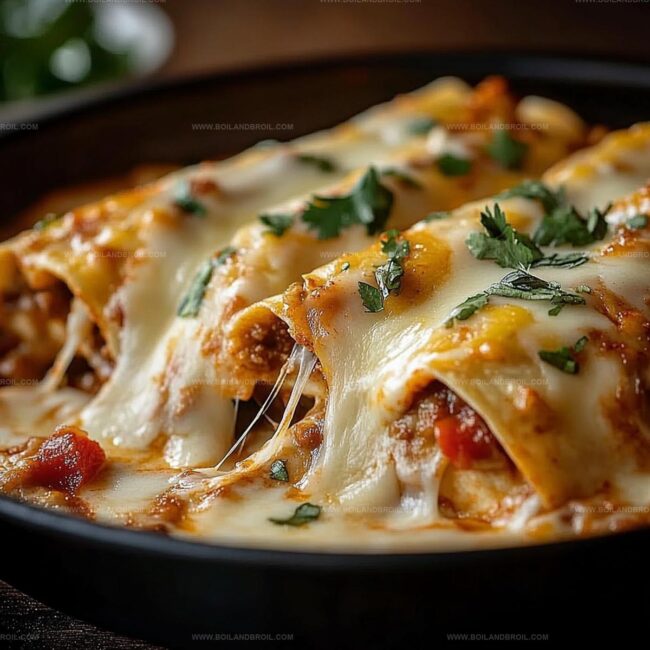
- Craft each enchilada by spreading chili onto the tortilla, generously sprinkling cheese, then carefully rolling into a compact cylinder.
- Arrange rolled enchiladas seam-side down in the prepared baking dish, creating a snug arrangement.
- Drizzle remaining chili over the enchiladas, ensuring complete coverage and added moisture.
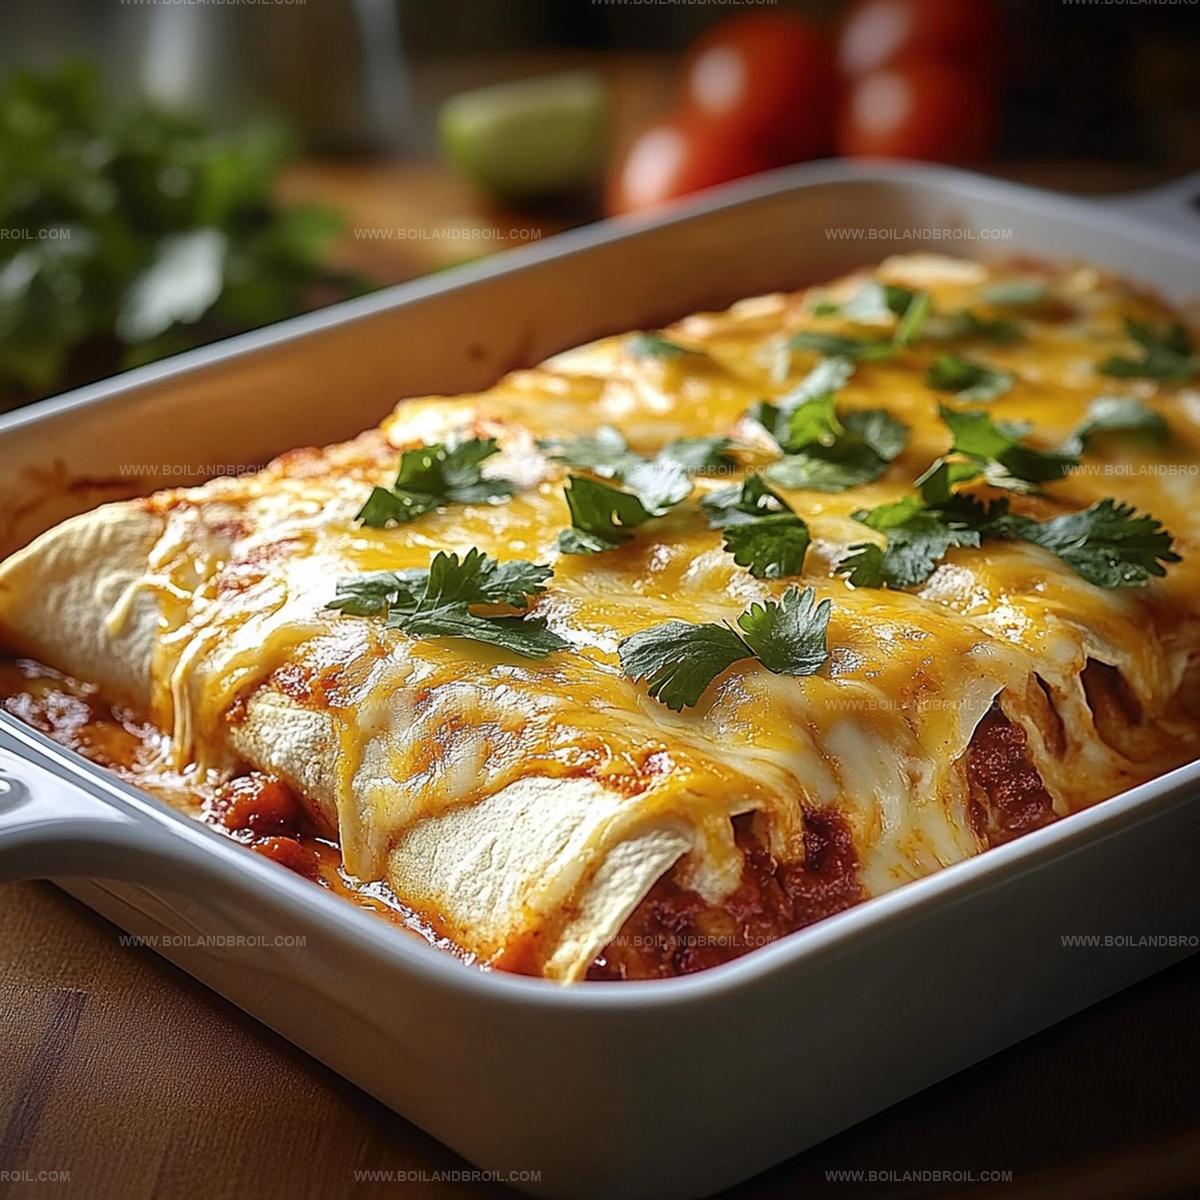
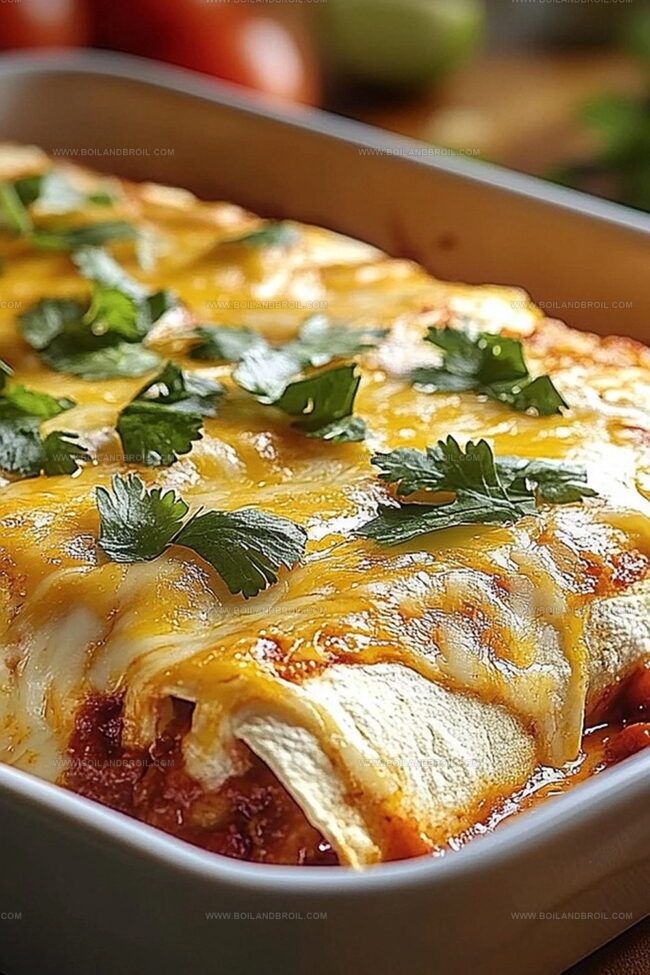
- Generously scatter the remaining cheese across the top, creating a golden, melty surface.
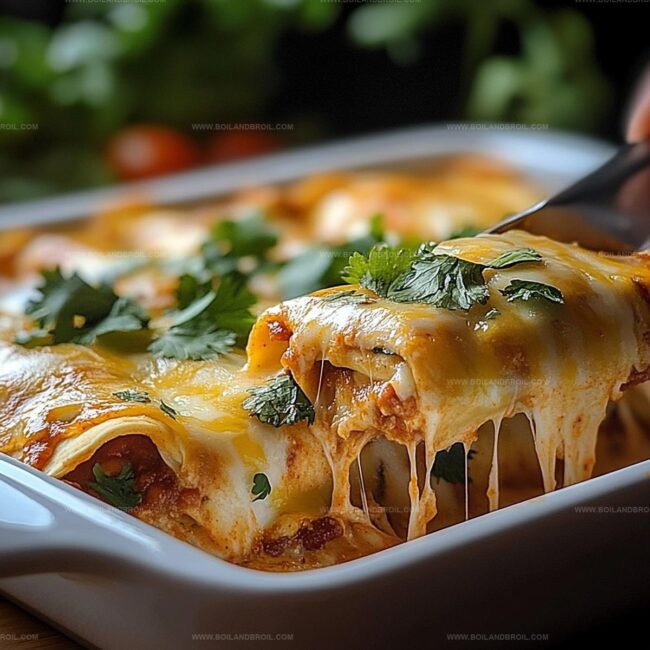
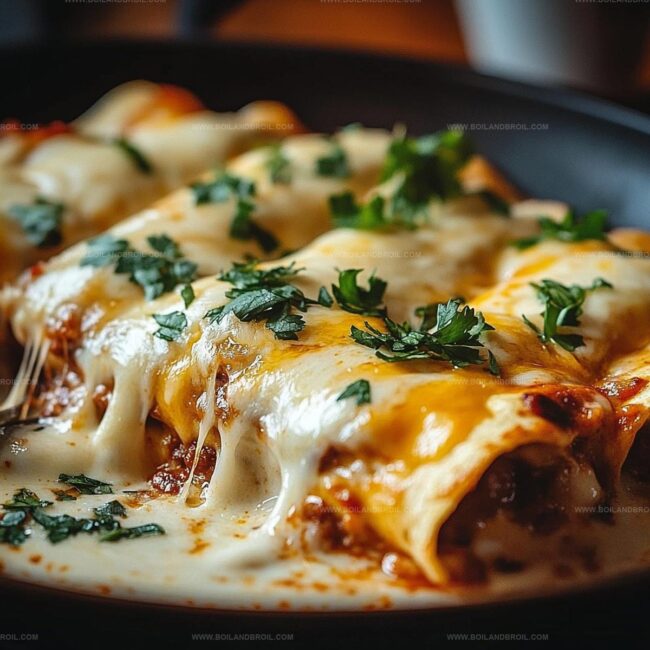
- Bake for 20-25 minutes until the cheese transforms into a bubbling, golden-brown landscape.
- Allow enchiladas to rest for 5 minutes, letting flavors meld and cheese set slightly.
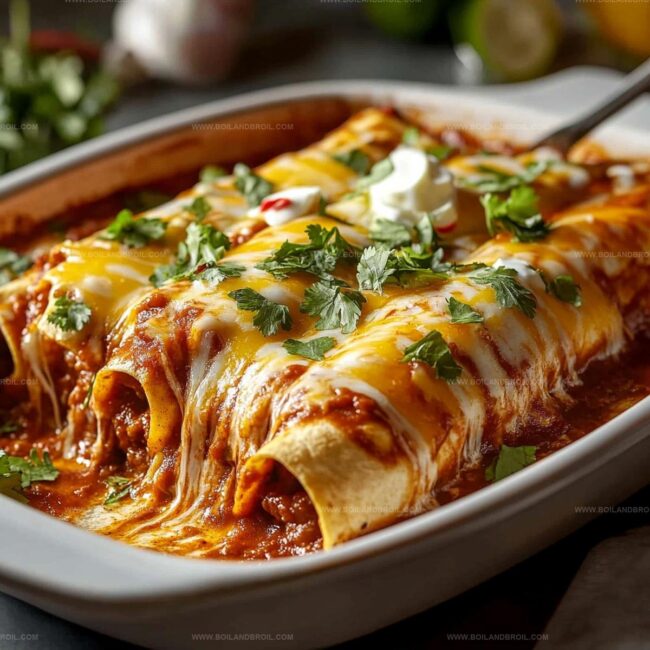
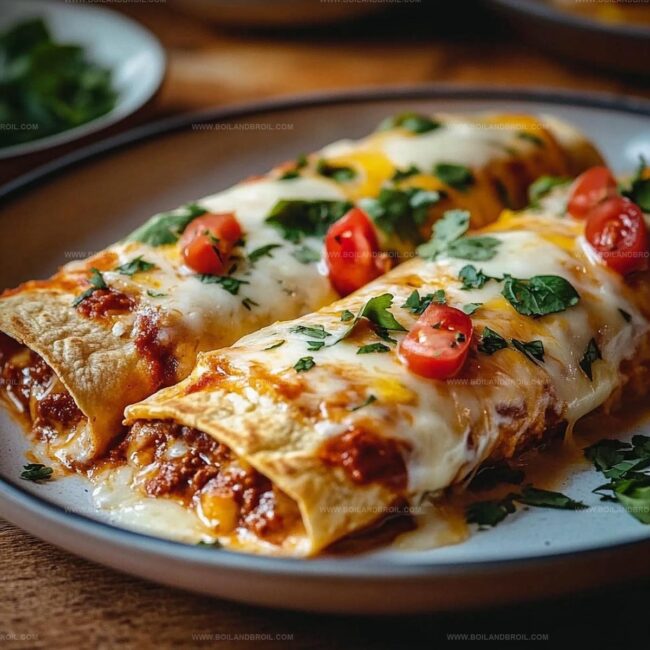
- Serve with optional garnishes like sour cream, fresh cilantro, or a vibrant salsa drizzle to enhance the dish’s visual and flavor profile.
Notes
- Choose tortillas carefully to ensure they don’t crack when rolling, selecting fresh, soft corn or flour tortillas works best.
- Warm tortillas gently to prevent breaking, using a damp paper towel in the microwave helps maintain moisture and flexibility.
- Drain excess liquid from canned chili to prevent soggy enchiladas, helping maintain a crisp texture and preventing sauce from becoming watery.
- Experiment with different cheese varieties like pepper jack or sharp cheddar to add unexpected flavor complexity and enhance the dish’s overall taste profile.
- Prep Time: 10 minutes
- Cook Time: 25 minutes
- Category: Lunch, Dinner, Snacks
- Method: Baking
- Cuisine: Mexican
Nutrition
- Serving Size: 4
- Calories: 450
- Sugar: 2 g
- Sodium: 800 mg
- Fat: 24 g
- Saturated Fat: 12 g
- Unsaturated Fat: 8 g
- Trans Fat: 0 g
- Carbohydrates: 40 g
- Fiber: 3 g
- Protein: 18 g
- Cholesterol: 60 mg
Jack Sullivan
Founder & Culinary Storyteller
Expertise
Single-recipe development with a narrative approach, Culinary storytelling and food history, Seasonal and regional ingredient utilization, Home cooking techniques adapted for modern kitchens
Education
New England Culinary Institute (Montpelier, VT)
Certificate in Culinary Arts
Focused on farm-to-table cooking, sustainable practices, and modern plating techniques.
Asheville-Buncombe Technical Community College
Associate Degree in Culinary Arts
Emphasized Southern Appalachian cuisine and local ingredient sourcing.
Jack grew up surrounded by smoky skillets and handwritten recipes in the mountains of North Carolina. His roots in Appalachian cooking shaped the way he sees food – as something that connects people, tells a story, and holds meaning.
With hands-on training and a background in sustainable, regional cooking, Jack started Boil And Broil to make meaningful meals more accessible. He’s all about one-dish recipes that are simple to follow but rich with flavor and history.