The Perfect Raspberry Thumbprint Cookies Recipe for Sweet Smiles
Sweet raspberry thumbprint cookies bring a burst of fruity joy to your afternoon treat collection.
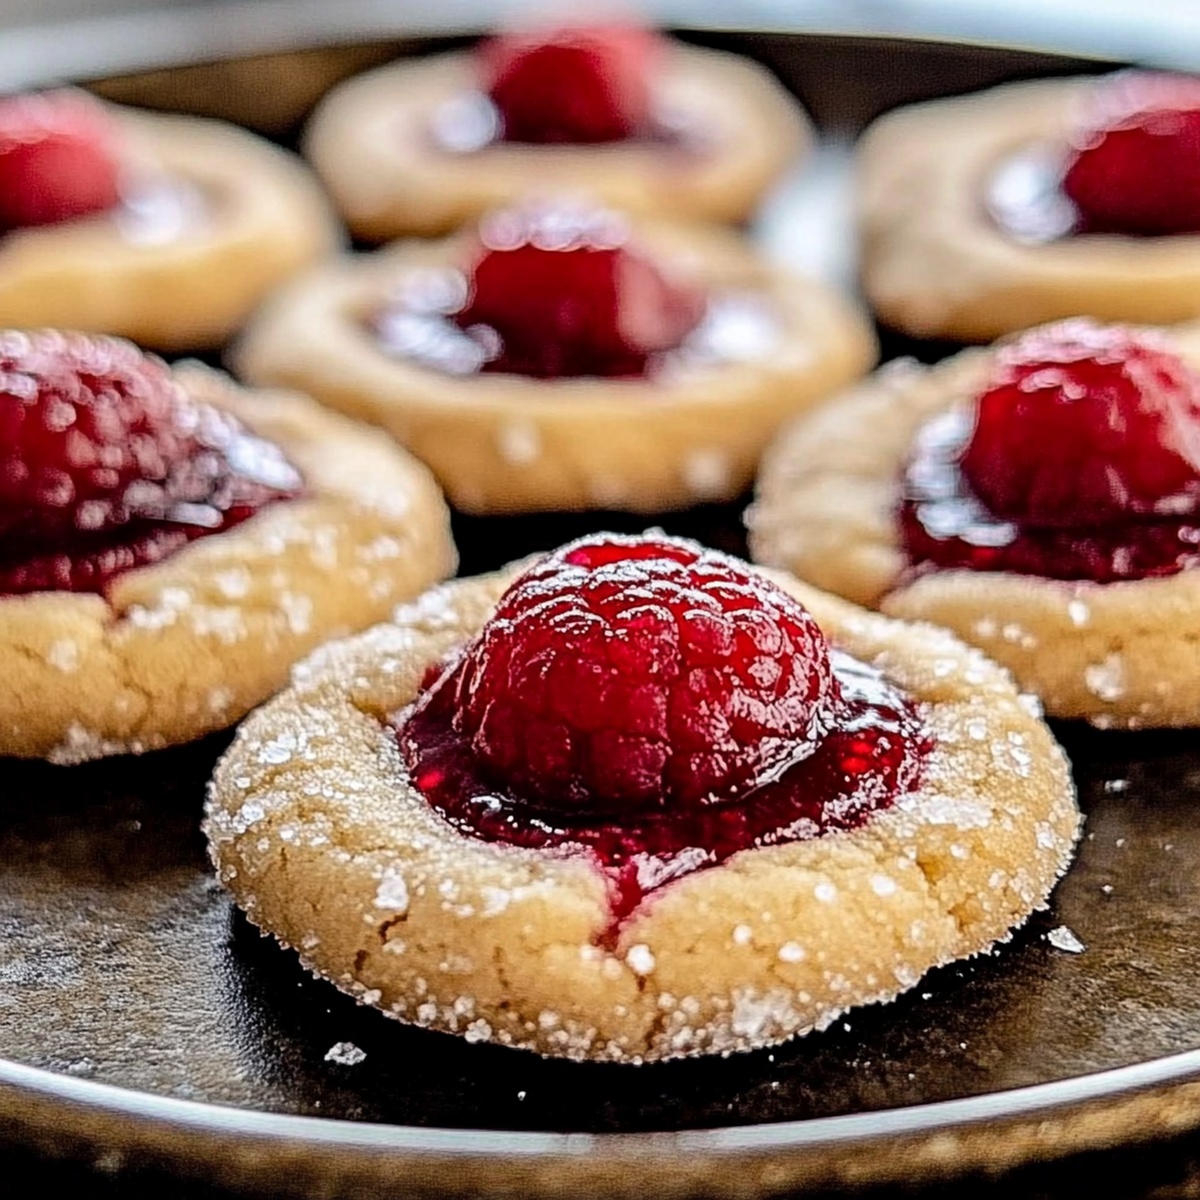
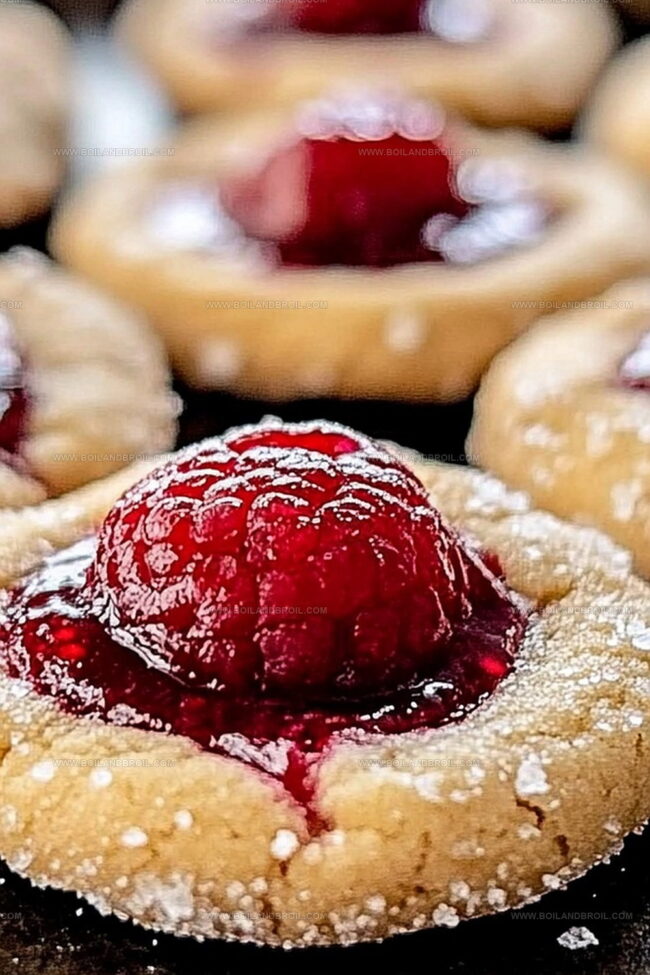
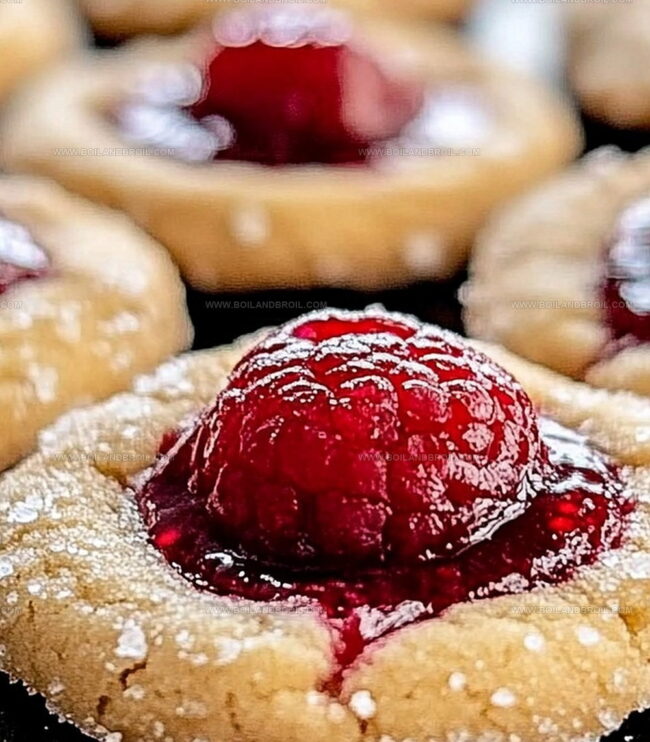
Crumbly butter cookies nestled with vibrant jam create an irresistible combination.
Soft and delicate, these little gems promise a delightful experience for anyone who loves simple desserts.
My grandmother’s classic recipe transforms basic ingredients into something magical.
Baking these cookies fills the kitchen with warm, comforting aromas that invite everyone to gather around.
Rich butter and sweet raspberry jam make these treats perfect for sharing with loved ones.
You’ll want to savor each delectable bite of these homemade delights.
Raspberry Thumbprint Cookies: Berry-Filled Treats
Pantry List for Raspberry Thumbprint Cookies
Base Ingredients:Flavor Enhancers:Filling and Topping:How to Press and Fill Perfect Thumbprint Cookies
Step 1: Warm Up The Oven
Crank up your oven to 350F (175C) and grab a baking sheet.
Cover it with parchment paper to prevent sticking and make cleanup super easy.
Step 2: Whip Up The Base
Grab a large mixing bowl and blend butter and sugar together until they become creamy and light.
You’ll want to mix for about 3 minutes to get that perfect fluffy texture.
Step 3: Add Moisture And Flavor
Drop in the egg yolk and vanilla extract.
Stir everything until the mixture looks smooth and well combined.
Step 4: Bring In The Flour
Slowly add flour to the mixture.
Use low speed on your mixer to blend everything gently.
Stop mixing as soon as the flour is just incorporated – don’t overmix!
Step 5: Shape The Cookies
Roll the dough into cute little balls, each about 1 inch in size.
Place them carefully on the prepared baking sheet.
Use your thumb to make a gentle indentation in the center of each cookie.
Step 6: Fill With Fruity Goodness
Carefully spoon raspberry jam into each thumbprint.
Make sure not to overfill – a small dollop is perfect.
Step 7: Bake To Perfection
Slide the baking sheet into the oven.
Bake for 12-15 minutes until the edges turn a lovely golden color.
Let the cookies cool completely on wire racks before serving.
Pro Tips for Soft Centers and Jam Bliss
Storing and Serving Thumbprint Cookies
Beverage Pairings for Thumbprint Cookie Moments
Flavor Variations on Thumbprint Cookies
FAQs
Gently press your thumb into the cookie dough balls and create a small, deep well. Refrigerate the shaped cookies for 15 minutes before baking to help them hold their shape.
Absolutely! You can substitute raspberry jam with strawberry, apricot, or any other fruit jam you prefer. Just ensure the jam is thick and not too runny.
If the dough feels too soft, chill it in the refrigerator for 30 minutes. This will help firm up the butter and make the dough easier to handle and shape into balls.
Use a small cookie scoop or tablespoon to measure out equal amounts of dough. This helps create uniform cookies that bake evenly and look professional.
Print
Easy Raspberry Thumbprint Cookies Recipe
- Total Time: 25 minutes
- Yield: 24 1x
Description
Buttery, melt-in-your-mouth raspberry thumbprint cookies bring sweet nostalgia to classic baking traditions. Homemade goodness fills each tender cookie with delightful raspberry jam, creating irresistible treats you’ll crave again and again.
Ingredients
Main Ingredients:
- 2 cups all-purpose flour
- 1 cup unsalted butter (room temperature)
- 3/4 cup granulated sugar
Binding Ingredients:
- 1 egg yolk
- 1 teaspoon vanilla extract
Filling:
- 1/2 cup raspberry jam
Instructions
- Prepare the oven by heating to 350F (175C) and arrange parchment paper on a baking sheet for optimal cookie release.
- Use an electric mixer to blend butter and sugar until they transform into a creamy, airy texture, approximately 3 minutes.
- Incorporate egg yolk and vanilla extract, mixing until the mixture becomes silky and uniform.
- Slowly fold flour into the mixture at low speed, stopping precisely when ingredients are just combined to maintain a tender cookie texture.
- Craft uniform dough balls measuring roughly 1 inch in diameter, positioning them carefully on the prepared baking sheet.
- Create a delicate well in the center of each cookie using your thumb, ensuring a gentle and consistent indentation.
- Generously fill each thumb-pressed cavity with vibrant raspberry jam, distributing the fruity filling evenly.
- Transfer the cookie sheet to the preheated oven and bake for 12-15 minutes, watching for a subtle golden hue developing around the cookie edges.
- Remove from oven and allow cookies to cool completely on wire racks, enabling them to set and develop a perfect texture before serving.
Notes
- Ensure butter is softened at room temperature for easier creaming and smoother cookie texture.
- Create uniform indentations by using the back of a small measuring spoon instead of your thumb for consistent cookie shapes.
- Experiment with different jam flavors like apricot, strawberry, or mixed berry to customize the cookies according to personal preference.
- Allow cookies to cool completely before storing to prevent moisture buildup and maintain their crisp exterior.
- Prep Time: 10 minutes
- Cook Time: 15 minutes
- Category: Desserts, Snacks
- Method: Baking
- Cuisine: American
Nutrition
- Serving Size: 24
- Calories: 132
- Sugar: 4 g
- Sodium: 1 mg
- Fat: 7 g
- Saturated Fat: 4 g
- Unsaturated Fat: 3 g
- Trans Fat: 0 g
- Carbohydrates: 18 g
- Fiber: 0.5 g
- Protein: 1 g
- Cholesterol: 20 mg
Jack Sullivan
Founder & Culinary Storyteller
Expertise
Single-recipe development with a narrative approach, Culinary storytelling and food history, Seasonal and regional ingredient utilization, Home cooking techniques adapted for modern kitchens
Education
New England Culinary Institute (Montpelier, VT)
Certificate in Culinary Arts
Focused on farm-to-table cooking, sustainable practices, and modern plating techniques.
Asheville-Buncombe Technical Community College
Associate Degree in Culinary Arts
Emphasized Southern Appalachian cuisine and local ingredient sourcing.
Jack grew up surrounded by smoky skillets and handwritten recipes in the mountains of North Carolina. His roots in Appalachian cooking shaped the way he sees food – as something that connects people, tells a story, and holds meaning.
With hands-on training and a background in sustainable, regional cooking, Jack started Boil And Broil to make meaningful meals more accessible. He’s all about one-dish recipes that are simple to follow but rich with flavor and history.