Easy Garlic Butter Cheese Bombs: A Heavenly Pull-Apart Recipe
Crafting these irresistible garlic butter cheese bombs promises a mouthwatering adventure for comfort food enthusiasts.
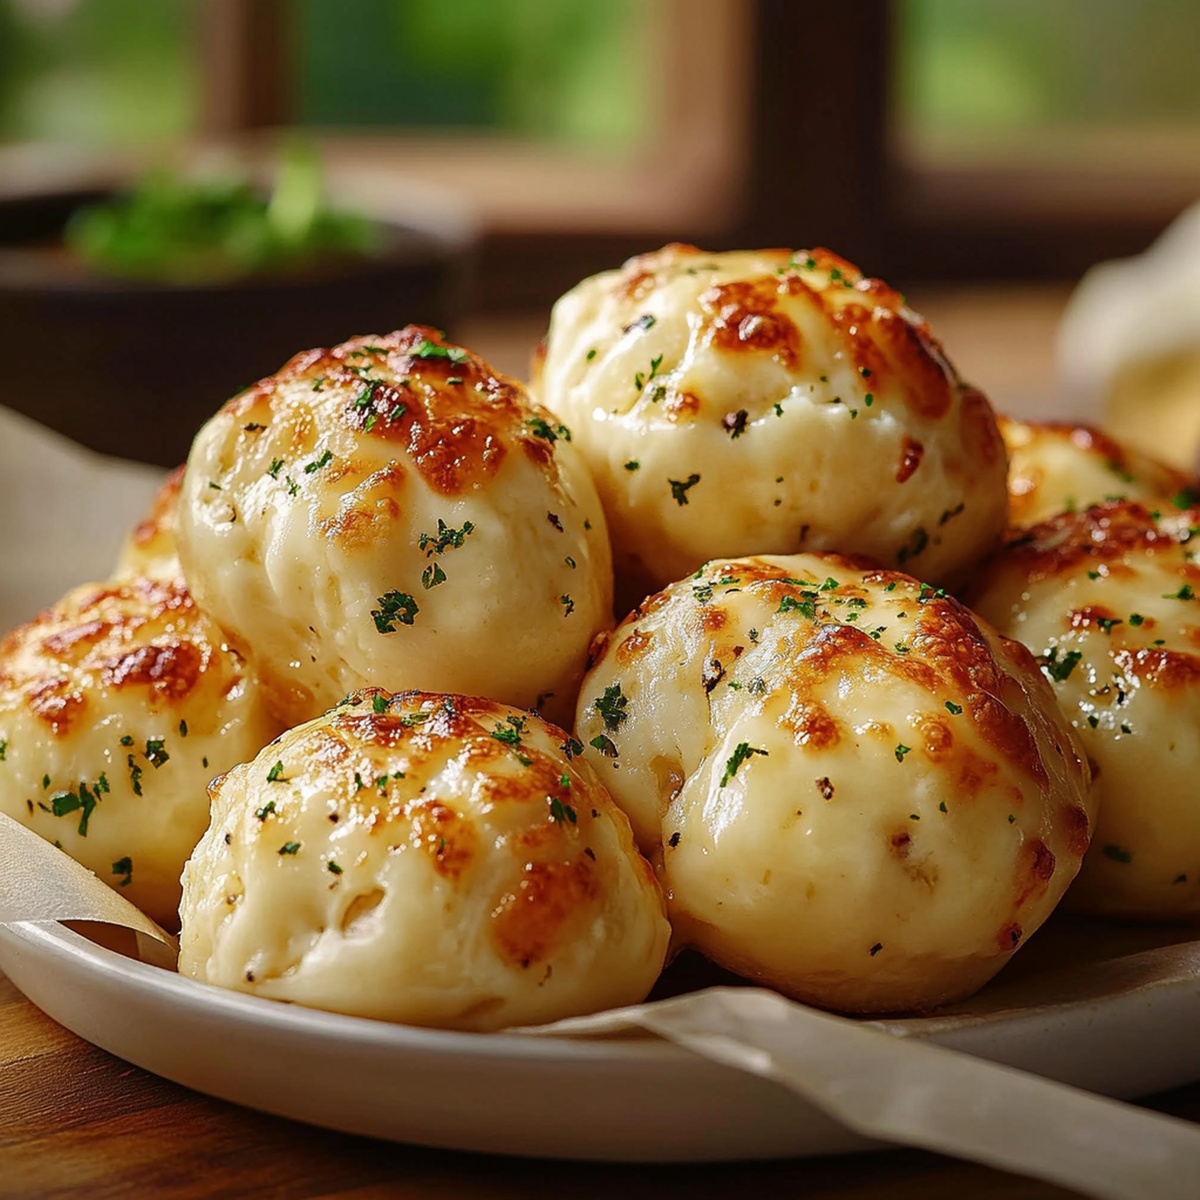
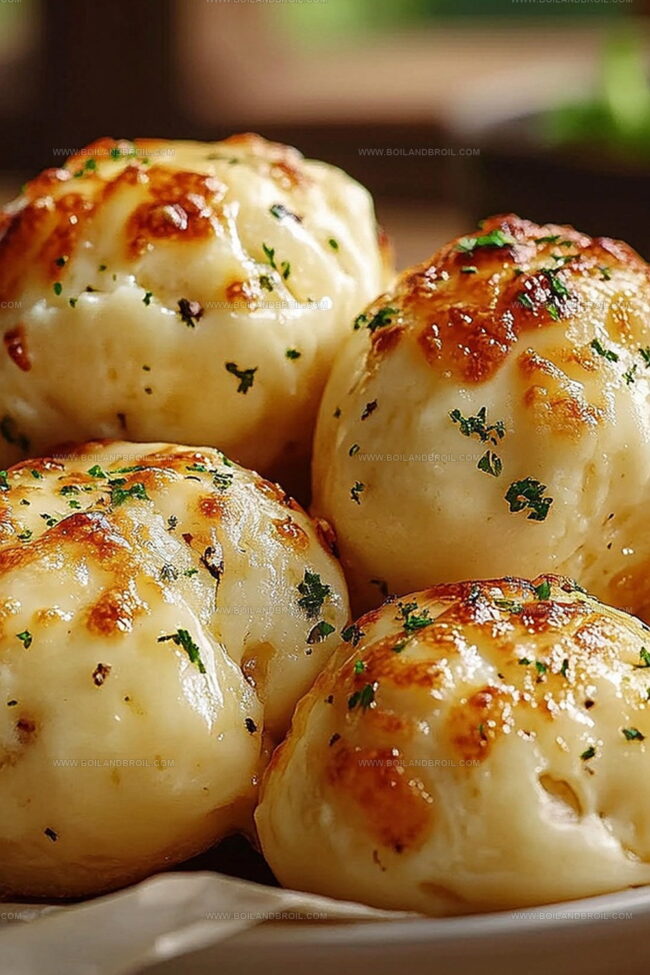
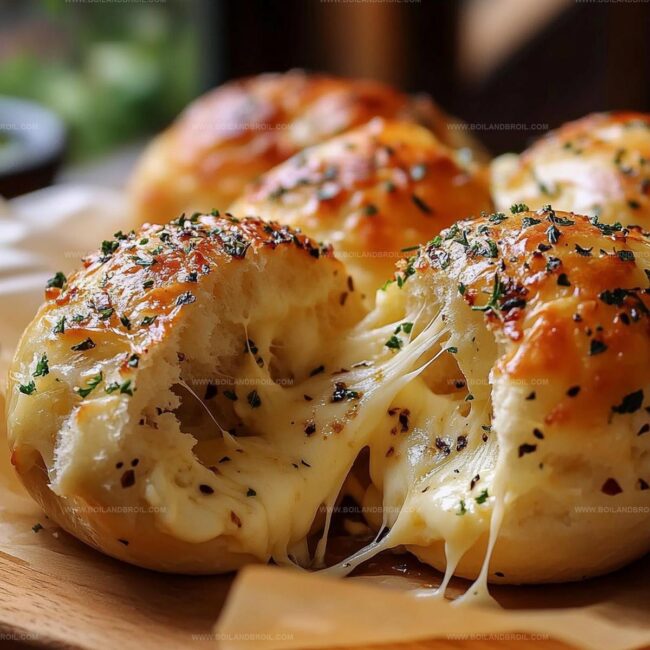
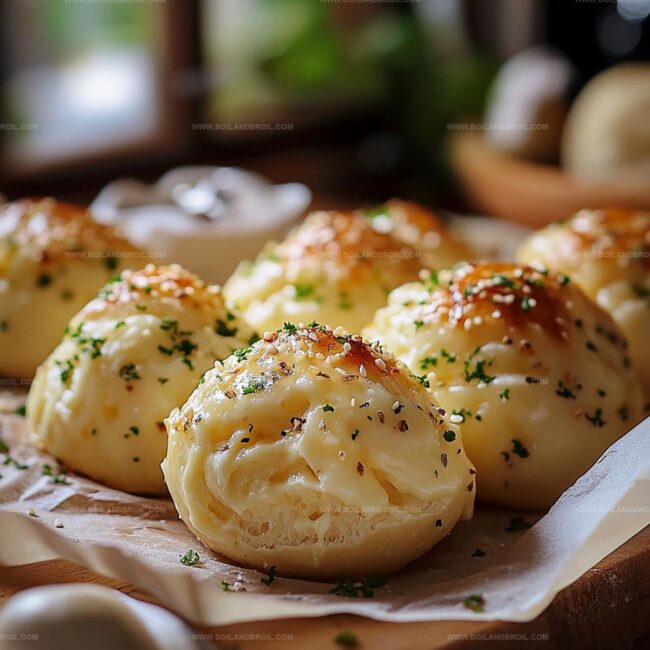
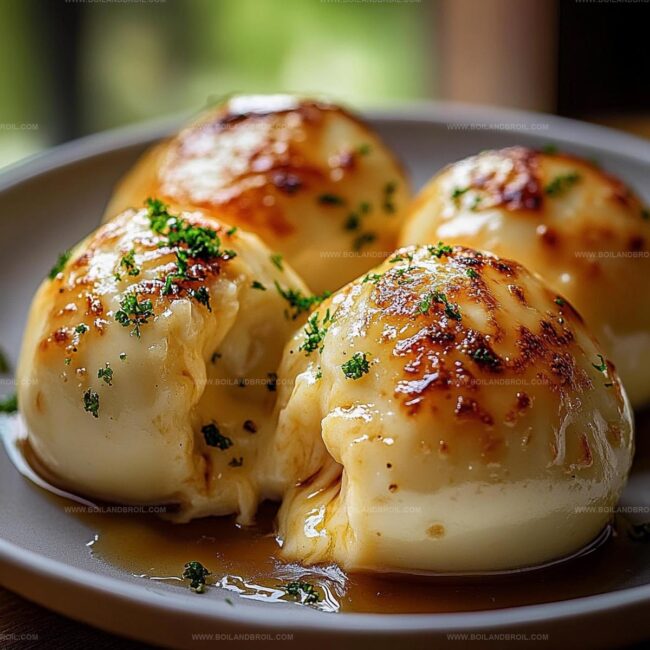
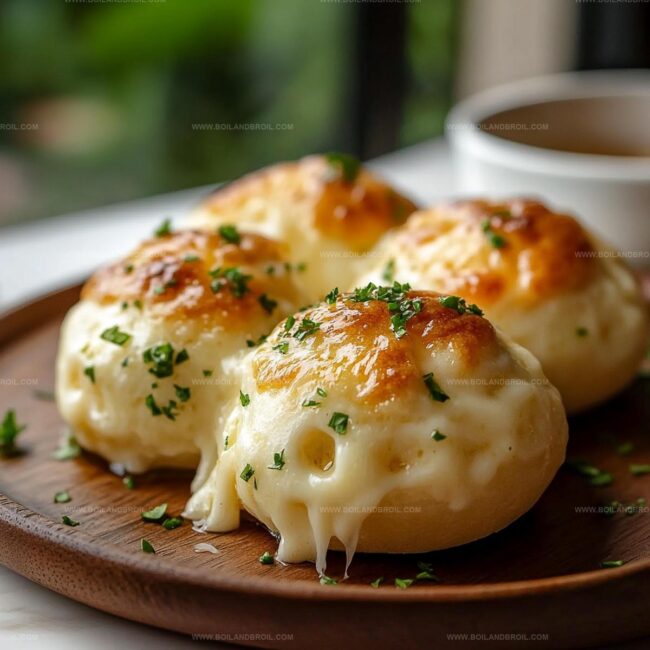
Golden, puffy pastries filled with melted cheese beckon from your kitchen counter.
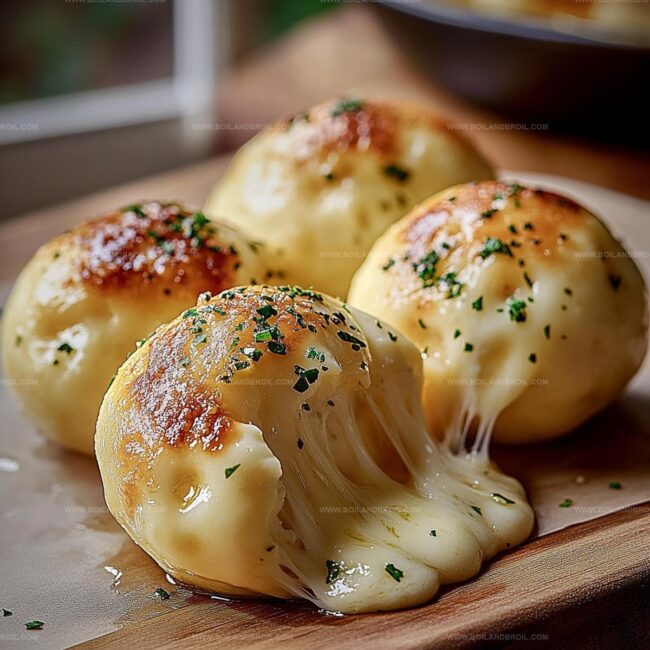
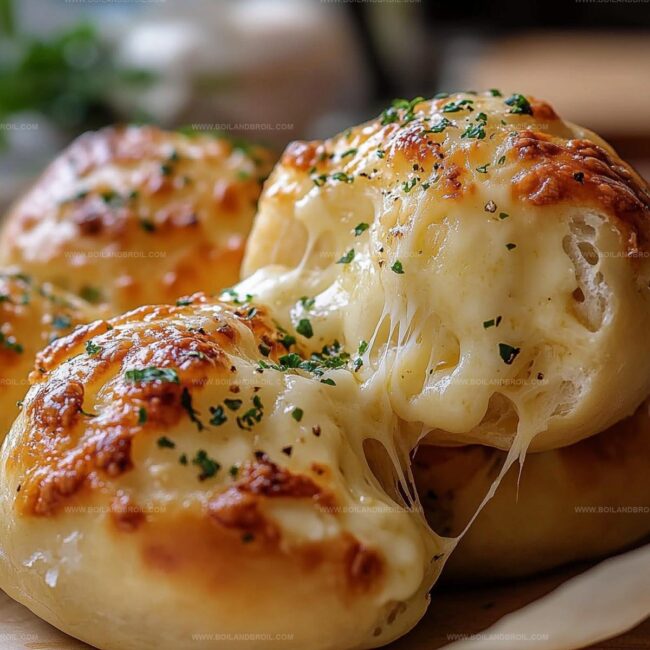
Crisp exteriors give way to luscious, molten centers that surprise and delight.
butter and garlic create an aromatic symphony that makes everyone lean closer.
Simple ingredients combine into something magical, transforming ordinary bread dough into extraordinary appetizers.
Minimal effort yields maximum flavor, making these bombs perfect for casual gatherings or spontaneous snack cravings.
You’ll want to savor every gooey, cheesy bite of this crowd-pleasing treat.
Garlic Butter Cheese Bombs That Ooze with Flavor
Ingredients in Garlic Butter Cheese Bombs
How to Make Gooey Cheese Bombs Easily
Step 1: Prep the Oven
Turn on the oven to 375°F (190°C).
Grab a baking dish and lightly grease it or line with parchment paper to prevent sticking.
Step 2: Shape the Dough
Crack open the biscuit package and separate each biscuit.
Gently press and flatten each one into a small, tender circle using your fingers or the palm of your hand.
Step 3: Create Cheesy Centers
For each biscuit circle:Place a generous dollop of cheese right in the middle.
Carefully fold the edges over the cheese, pinching and sealing to create a perfect little ball.
Make sure no cheese peeks out!
Step 4: Craft Flavor-Packed Butter Sauce
In a small mixing bowl, blend:Whisk everything together until the ingredients dance and combine smoothly.
Step 5: Dress the Bombs
Arrange the cheese-stuffed dough balls in your prepared baking dish.
Using a pastry brush, lovingly coat each bomb with the garlic butter mixture, ensuring every inch gets some delicious flavor.
Step 6: Bake to Golden Perfection
Slide the baking dish into the preheated oven.
Bake for 12-15 minutes until the bombs turn a gorgeous golden brown and the cheese inside transforms into a molten, gooey paradise.
Step 7: Serve and Devour
Allow the bombs to cool for a few minutes – if you can resist!
Serve warm and watch everyone’s eyes light up with pure culinary joy.
Baking Tips for Cheese Bombs with Garlic Butter
Store Garlic Cheese Bombs Without Drying

Serve Garlic Butter Cheese Bombs Like This
Twist Ideas for Garlic Butter Cheese Bombs
FAQs
Yes, you can substitute mozzarella with cheddar, provolone, or monterey jack cheese for different flavor profiles.
Fresh minced garlic provides the best flavor, but garlic powder works as a convenient alternative. Use about 1/2 teaspoon of garlic powder if substituting.
Yes, these cheese bombs are vegetarian-friendly. They contain no meat and can be easily prepared using standard vegetarian ingredients like biscuit dough, cheese, and butter.
You can prepare the bombs up to the point of brushing with garlic butter and refrigerate them for a few hours before baking. Just add a few extra minutes to the baking time if they’re cold from the refrigerator.
Print
Garlic Butter Cheese Bombs A Gooey, Cheesy Delight Recipe
- Total Time: 30 minutes
- Yield: 8 1x
Description
Garlic butter cheese bombs deliver molten magic straight from Italian kitchens, promising irresistible comfort in every golden, crispy bite. Melted mozzarella and herbed butter create an indulgent experience you won’t forget.
Ingredients
Main Ingredients:
- 1 can refrigerated biscuit dough
- 1 cup shredded mozzarella cheese
Filling and Topping Ingredients:
- 1/4 cup unsalted butter (melted)
- 3 garlic cloves (minced)
- 1 tablespoon chopped parsley
Seasoning:
- 1/2 teaspoon Italian seasoning
- 1/4 teaspoon salt
Instructions
- Prepare the oven by heating to 375F (190C) and readying a baking dish with a light grease coating or parchment paper lining.
- Carefully unfold each biscuit from the package and gently press into thin, uniform circular shapes using fingertips.
- Position a generous dollop of mozzarella at the center of each flattened dough circle, then carefully gather and pinch the edges together, creating a seamless sealed ball.
- Craft a fragrant garlic butter infusion by whisking together warm melted butter, finely chopped garlic, Italian seasoning, a pinch of salt, and freshly chopped parsley in a compact mixing bowl.
- Arrange the cheese-encased dough spheres within the prepared baking vessel, then generously brush each with the aromatic garlic butter mixture, ensuring complete coverage.
- Transfer the baking dish to the preheated oven and bake for 12-15 minutes, watching for a rich golden-brown exterior and ensuring the internal cheese becomes luxuriously molten.
- Remove from oven and allow a brief cooling period to prevent immediate burning, then serve while warm for maximum flavor and gooey texture enjoyment.
Notes
- Customize the cheese selection by experimenting with cheddar, pepper jack, or gouda for unique flavor profiles.
- Ensure biscuit edges are completely sealed to prevent cheese from leaking during baking.
- Use room temperature butter for easier mixing and more even coating of the garlic butter sauce.
- Transform these bombs into gluten-free version by selecting gluten-free biscuit dough or making homemade dough with alternative flour.
- Prep Time: 15 minutes
- Cook Time: 15 minutes
- Category: Appetizer, Snacks
- Method: Baking
- Cuisine: American
Nutrition
- Serving Size: 8
- Calories: 180
- Sugar: 1 g
- Sodium: 200 mg
- Fat: 13 g
- Saturated Fat: 8 g
- Unsaturated Fat: 4 g
- Trans Fat: 0 g
- Carbohydrates: 14 g
- Fiber: 0 g
- Protein: 4 g
- Cholesterol: 30 mg
Jack Sullivan
Founder & Culinary Storyteller
Expertise
Single-recipe development with a narrative approach, Culinary storytelling and food history, Seasonal and regional ingredient utilization, Home cooking techniques adapted for modern kitchens
Education
New England Culinary Institute (Montpelier, VT)
Certificate in Culinary Arts
Focused on farm-to-table cooking, sustainable practices, and modern plating techniques.
Asheville-Buncombe Technical Community College
Associate Degree in Culinary Arts
Emphasized Southern Appalachian cuisine and local ingredient sourcing.
Jack grew up surrounded by smoky skillets and handwritten recipes in the mountains of North Carolina. His roots in Appalachian cooking shaped the way he sees food – as something that connects people, tells a story, and holds meaning.
With hands-on training and a background in sustainable, regional cooking, Jack started Boil And Broil to make meaningful meals more accessible. He’s all about one-dish recipes that are simple to follow but rich with flavor and history.