
Creamy Homemade Eggnog Recipe for Winter Joy
Creamy, rich eggnog with a homemade eggnog recipe promises to be the ultimate holiday indulgence.
Winter celebrations sparkle with this classic beverage that warms every festive gathering.
Silky smooth and luxuriously decadent, this traditional drink captures the essence of seasonal cheer.
Generations have savored this nostalgic recipe passed down through cherished family traditions.
Blending fresh ingredients creates a luscious experience that store-bought versions can never match.
Each sip delivers a perfect balance of sweetness and spice that dances on your palate.
Prepare to delight your senses with this irresistible holiday classic that will become your new seasonal favorite.
What Makes Homemade Eggnog So Good
Eggnog Ingredient List You’ll Need
Dairy Base:Egg Components:Sweeteners and Flavors:Spices:Steps to Prepare Homemade Eggnog
Step 1: Warm the Dairy Base
In a medium saucepan, combine:Heat the mixture over medium heat, whisking frequently.
Watch for steam to rise without letting bubbles form.
Move slowly to prevent scorching or skin formation on the liquid.
Step 2: Blend Egg Yolks and Sugar
Grab a large bowl and whisk egg yolks.
Gradually add sugar, about two tablespoons at a time.
Keep whisking until the mixture transforms into a pale yellow, silky smooth consistency.
Step 3: Gently Combine Hot and Cold Mixtures
Carefully ladle about one-third cup of hot dairy mixture into egg mixture.
Whisk continuously while adding.
Slowly incorporate around three-quarters of the heated liquid.
Move slowly to prevent egg scrambling.
Step 4: Cook to Safe Temperature
Return the combined mixture to the saucepan.
Cook over medium-low heat, whisking constantly.
Heat until the mixture reaches 160°F or thickens enough to coat the back of a spoon.
This step ensures food safety and creates a luxurious texture.
Step 5: Enhance with Vanilla
Remove from heat and stir in vanilla extract.
The aroma will fill your kitchen with warmth and holiday cheer.
Step 6: Chill and Garnish
Allow the eggnog to cool slightly.
Refrigerate if desired.
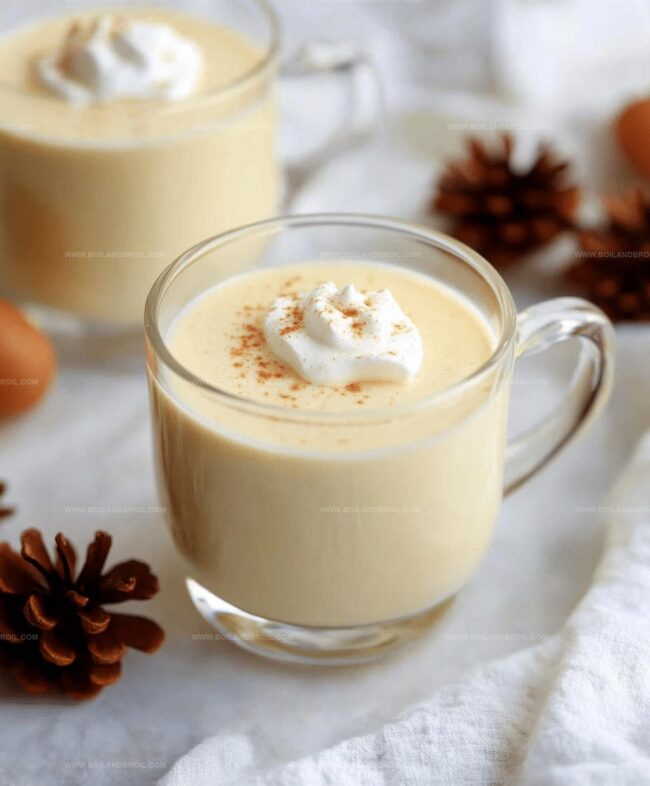
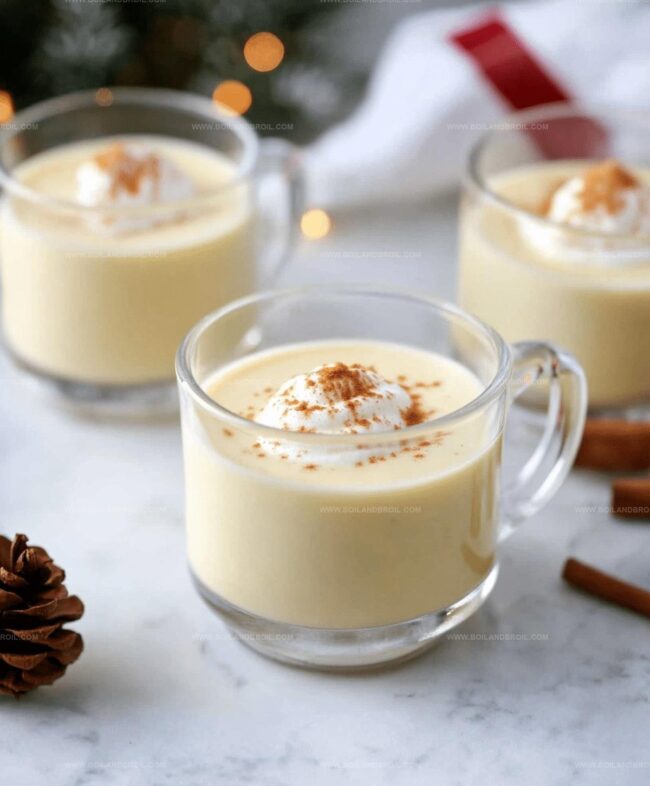
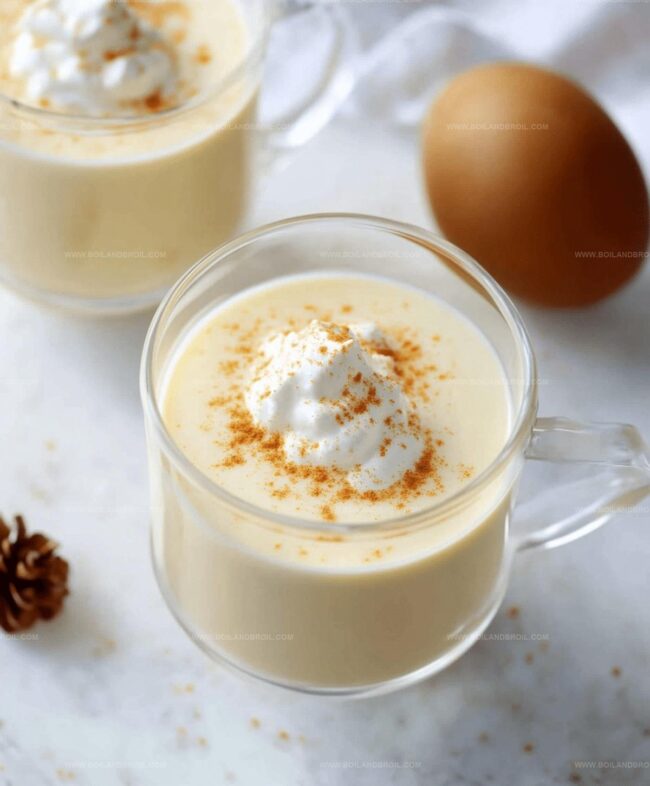
When serving, top with whipped cream and a sprinkle of nutmeg or cinnamon for a festive finish.
Eggnog-Making Tips for Beginners
Storing and Serving Eggnog with Ease
What Goes Well with Eggnog
Savor Festive Flavor Companions: Eggnog Pairings
Whisper Sweet Cookies: Pair with classic sugar cookies or gingerbread. Their buttery, warm spices perfectly complement the rich, creamy eggnog. The crisp texture and subtle sweetness balance the drink’s luxurious thickness.
Match Cozy Spirits: Spike the eggnog with bourbon, rum, or brandy for an adult version. Each spirit adds unique depth – bourbon brings caramel notes, rum introduces tropical warmth, while brandy offers elegant smoothness. Choose based on personal preference and mood.
Create Nutty Garnish: Top with toasted pecans or almonds for delightful crunch. These nuts enhance the eggnog’s existing spices and provide textural contrast. Their earthy undertones marry beautifully with the drink’s creamy base, elevating the entire tasting experience.
Design Dessert Duo: Serve alongside bread pudding or classic apple pie. These traditional desserts share similar warm spice profiles, creating a harmonious flavor connection. The rich, custardy textures of both eggnog and desserts complement each other wonderfully.
Eggnog Variations Worth Trying
FAQs
Tempering prevents the eggs from scrambling when added to hot liquid. By slowly introducing the hot milk to the egg mixture while whisking, you gradually raise the egg temperature without cooking them, creating a smooth and creamy base for the eggnog.
The eggnog is safe when it reaches 160°F or thickens enough to coat the back of a spoon. This temperature kills potential harmful bacteria in raw eggs, ensuring a safe and delicious drink.
Whole milk and cream provide the rich, creamy texture that defines traditional eggnog. Using low-fat milk might result in a thinner, less luxurious consistency. For the best results, stick to the original recipe.
If you don’t have a thermometer, look for visual cues. The mixture should thicken and coat the back of a spoon. When you run your finger through the coating, it should leave a clear path that doesn’t immediately fill back in.
Clara Thompson
Recipe Developer & Culinary Educator
Expertise
Developing accessible single-serving recipes, Food writing and content creation, Plant-based and allergen-friendly cooking, Culinary education and workshop facilitation
Education
Oregon Culinary Institute (Portland, OR)
Diploma in Culinary Arts
Specialized in plant-based cooking and sustainable kitchen practices.
Portland Community College
Certificate in Food Writing and Media
Focused on recipe writing, food photography, and digital content creation.
Clara’s food journey began with a curiosity for color, texture, and ingredients pulled straight from the garden. Her background in plant-forward cooking and creative writing gives her a unique edge – she makes healthy, flavorful food feel inviting, not intimidating.
She specializes in meals that work for busy lives and different diets, all without sacrificing taste. Clara’s voice comes through in every recipe she writes – clear, kind, and encouraging.