Easy Golden Homemade Popcorn Chicken Recipe Everyone Will Love
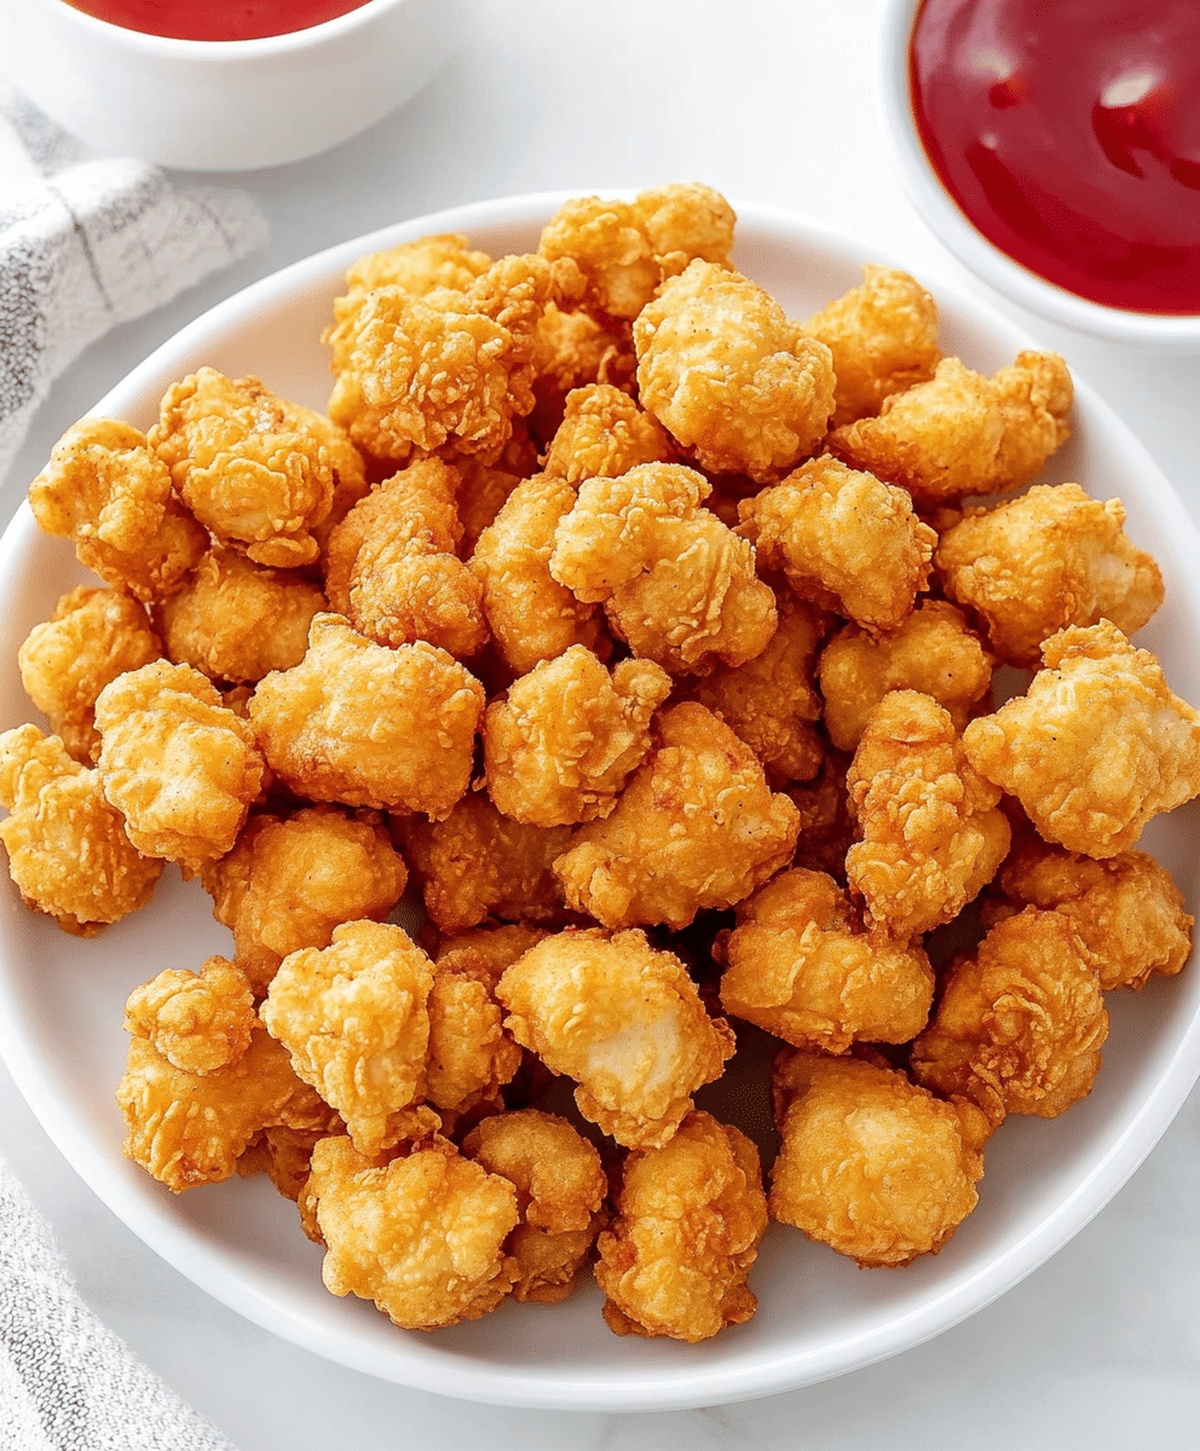
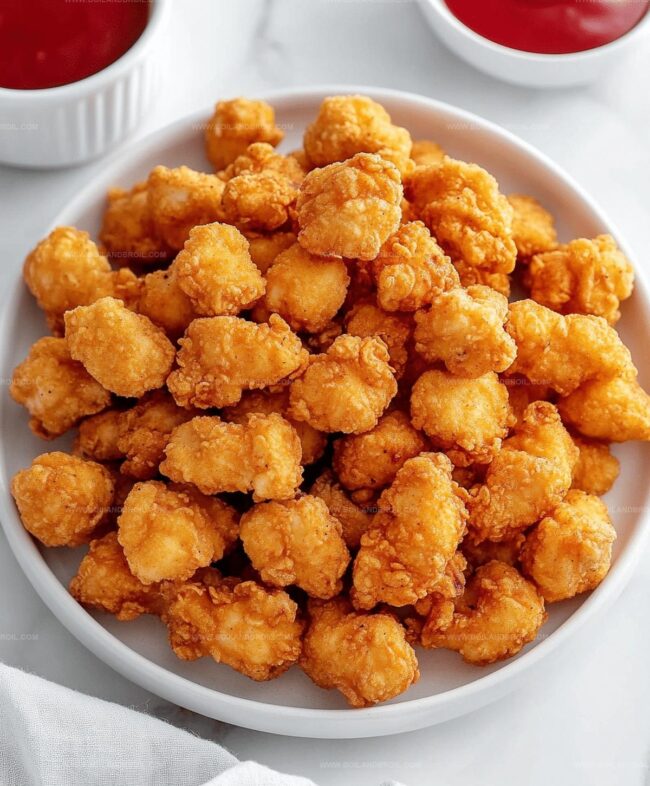
Crispy and golden chicken bites dance with a perfectly seasoned homemade popcorn chicken recipe that brings restaurant-style magic right to your kitchen.
These bite-sized morsels promise a delightful crunch in every single piece.
Juicy chicken transforms into irresistible nuggets with a simple coating technique that seals in flavor and texture.
Each morsel promises a satisfying crackle when you take a bite, making them an instant crowd-pleaser.
The secret lies in the perfectly balanced breading that clings to tender chicken chunks.
You’ll love how quickly these pop-able pieces come together with minimal effort.
Serve these delectable chicken bites as a snack, appetizer, or main course that will have everyone asking for seconds.
How to Make Popcorn Chicken

Step 1: Prepare Chicken Pieces
Slice boneless, skinless chicken breasts into bite-sized chunks.
Use a sharp knife to create uniform pieces that will cook evenly.
Gently pat the chicken dry with paper towels to ensure a perfect crispy coating.
Step 2: Create Flavor-Packed Coating Stations
Set up three separate shallow dishes for a delicious breading process:Carefully coat each chicken piece by first rolling in seasoned flour, then dipping in buttermilk, and finally covering completely with panko breadcrumbs.
Press gently to help breadcrumbs adhere securely.
Step 3: Heat Cooking Oil
Pour vegetable or canola oil into a deep pot or dutch oven, filling about 2-3 inches deep.
Use a cooking thermometer to heat oil to exactly 350°F.
Maintaining the right temperature prevents greasy chicken and ensures a perfectly crisp exterior.
Step 4: Fry Chicken Pieces
Carefully lower chicken pieces into hot oil in small batches.
Avoid overcrowding the pot to maintain consistent oil temperature.
Fry each batch for 2-3 minutes until golden brown and completely cooked through.
Use a slotted spoon to remove chicken and place on a wire rack or paper towel-lined plate to drain excess oil.
Step 5: Final Touch and Serving
Sprinkle hot chicken pieces with a light dusting of salt immediately after frying.
Serve alongside an array of dipping sauces like ranch, honey mustard, or barbecue sauce.
Enjoy the crispy, juicy chicken while it’s hot and fresh!
Popcorn Chicken Pro Cooking Tips
How to Store Popcorn Chicken Easily
What Goes with Popcorn Chicken
Twist Ideas for Popcorn Chicken Flavor
FAQs
Buttermilk helps tenderize the chicken and creates a tangy, flavorful coating that helps the breading stick better. It also adds moisture to the meat, ensuring your popcorn chicken stays juicy.
Panko breadcrumbs are recommended because they create an extra crispy exterior. However, you can substitute with regular breadcrumbs, though the texture might be slightly less crunchy.
The chicken should reach an internal temperature of 165°F. The outside will be golden brown, and when you cut into a piece, the meat should be white throughout with no pink areas.
Drain the fried chicken on a wire rack instead of paper towels. This prevents the bottom from getting soggy and helps maintain the crisp texture all around the chicken pieces.
Why Popcorn Chicken Is a Crowd Favorite
Ingredients for Popcorn Chicken
Main Protein:Dredging Station Ingredients:Cooking Ingredients:Optional Serving Components: Print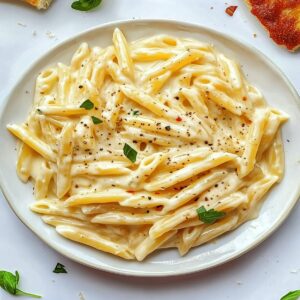
Creamy Pasta Recipe
- Total Time: 17 minutes
- Yield: 4 1x
Description
Comfort meets indulgence in this creamy pasta symphony, where silky noodles dance with rich, velvety sauce. Culinary magic unfolds as each forkful promises a delightful escape that will transport you straight to pasta paradise.
Ingredients
Main Ingredients:
- 8 ounces (226 grams) pasta (spaghetti, fettuccine, or penne)
- 1 cup (240 milliliters) heavy cream
- 1 cup (100 grams) freshly grated Parmesan cheese
Flavor Enhancers:
- 2 cloves garlic (minced)
- 2 tablespoons (30 milliliters) olive oil
- Salt and pepper to taste
Garnish:
- Fresh herbs (basil or parsley)
Instructions
- Prepare a generously salted water bath in a large pot, immersing pasta until it reaches tender perfection, typically 8-10 minutes. Carefully extract and preserve one cup of starchy liquid before draining completely.
- Heat olive oil in a skillet over medium flame, introducing minced garlic and allowing it to dance and release its aromatic essence for approximately two minutes.
- Cascade heavy cream into the skillet, nurturing a gentle simmer. Gradually incorporate Parmesan cheese, stirring until a velvety, uniform sauce emerges. Modulate the texture using reserved pasta water if necessary.
- Transfer drained pasta directly into the skillet, executing a thorough coating process to ensure each strand becomes luxuriously enrobed in the creamy concoction. Optionally, sprinkle fresh herbs for an elegant herbal whisper.
- Artfully plate the pasta, crowning the dish with an additional snowfall of Parmesan cheese, elevating both visual appeal and flavor complexity.
Notes
- Pasta Water Magic: Save that starchy liquid gold when draining pasta, as it helps create a silkier, more clingy sauce with perfect consistency.
- Garlic Caution: Watch carefully while sautéing to prevent burning, which can turn the flavor bitter and harsh.
- Cheese Selection: Use freshly grated Parmesan for maximum flavor and smoother melting compared to pre-packaged options.
- Diet-Friendly Swaps: Replace heavy cream with Greek yogurt or coconut milk for lighter versions, and use gluten-free pasta for celiac-friendly adaptation.
- Prep Time: 5 minutes
- Cook Time: 12 minutes
- Category: Dinner, Lunch
- Method: Boiling
- Cuisine: Italian
Nutrition
- Serving Size: 4
- Calories: 600
- Sugar: 2 g
- Sodium: 300 mg
- Fat: 38 g
- Saturated Fat: 20 g
- Unsaturated Fat: 14 g
- Trans Fat: 0 g
- Carbohydrates: 50 g
- Fiber: 2 g
- Protein: 18 g
- Cholesterol: 80 mg
Clara Thompson
Recipe Developer & Culinary Educator
Expertise
Developing accessible single-serving recipes, Food writing and content creation, Plant-based and allergen-friendly cooking, Culinary education and workshop facilitation
Education
Oregon Culinary Institute (Portland, OR)
Diploma in Culinary Arts
Specialized in plant-based cooking and sustainable kitchen practices.
Portland Community College
Certificate in Food Writing and Media
Focused on recipe writing, food photography, and digital content creation.
Clara’s food journey began with a curiosity for color, texture, and ingredients pulled straight from the garden. Her background in plant-forward cooking and creative writing gives her a unique edge – she makes healthy, flavorful food feel inviting, not intimidating.
She specializes in meals that work for busy lives and different diets, all without sacrificing taste. Clara’s voice comes through in every recipe she writes – clear, kind, and encouraging.