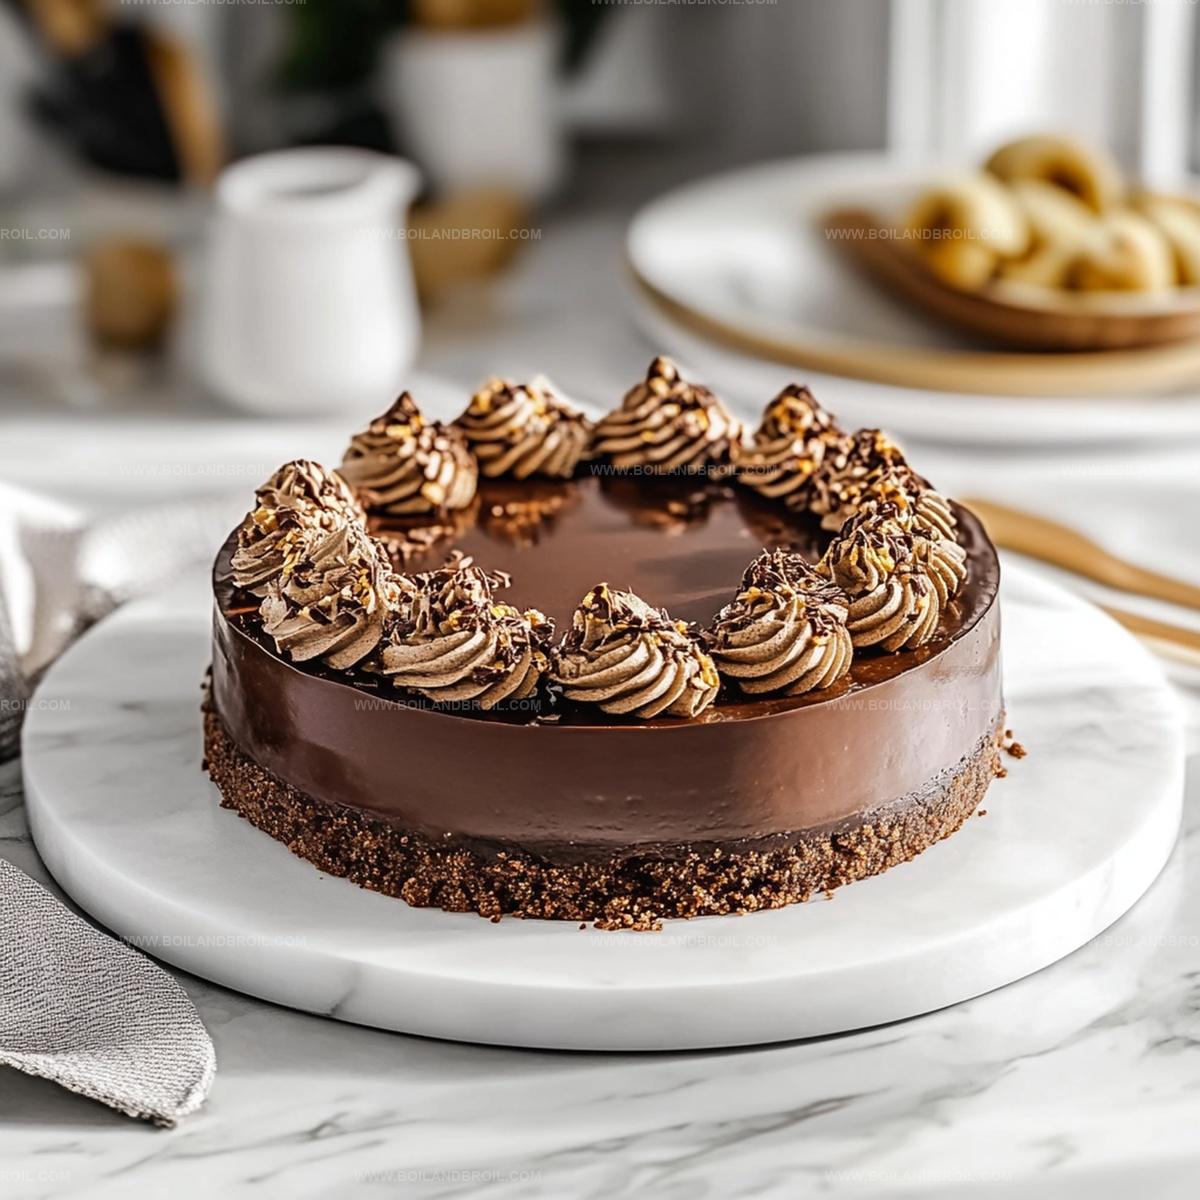
Sweet Dreams: No-Bake Espresso Chocolate Cheesecake Recipe
Creamy and decadent, this no-bake espresso chocolate cheesecake promises pure indulgence without heating up your kitchen.
Rich coffee notes dance through velvety cream cheese layers that melt effortlessly on your tongue.
chocolate lovers will swoon over the intense cocoa depth complementing smooth espresso undertones.
Each silky bite delivers a luxurious experience that feels simultaneously elegant and comforting.
Minimal effort combines with maximum flavor in this simple yet sophisticated dessert.
Cold preparation means less stress and more enjoyment for anyone seeking a stunning sweet treat.
Ready to impress without breaking a sweat?
This cheesecake waits to become your next culinary triumph.
FAQs
The espresso provides a rich, deep coffee flavor that enhances the chocolate notes. Use freshly brewed espresso that’s cooled to room temperature for the most robust taste.
While you can substitute instant coffee, it won’t provide the same depth of flavor. If using instant coffee, dissolve it in hot water and let it cool completely before adding to the mixture.
Absolutely! The espresso-chocolate combination creates a dessert that’s perfect for coffee enthusiasts, delivering a bold and sophisticated flavor profile that goes beyond traditional cheesecake.
You’ll only need a springform pan, electric mixer, and basic mixing bowls. The no-bake method makes it accessible for home bakers of all skill levels.
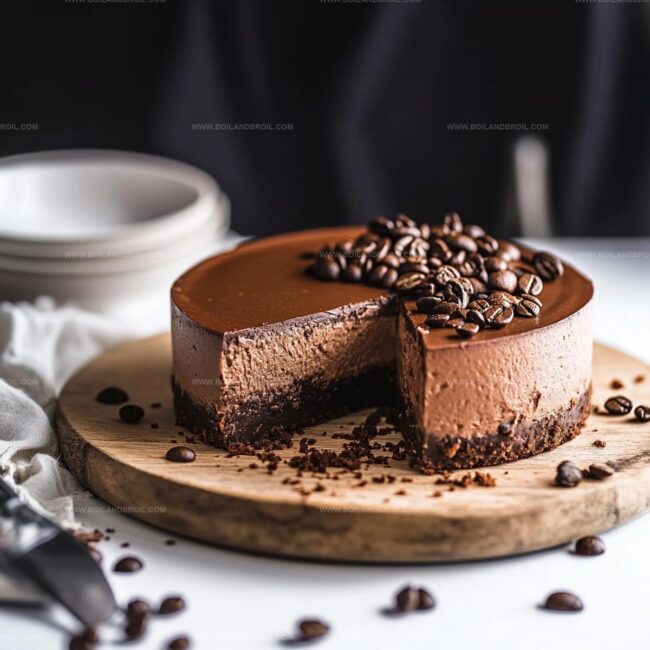
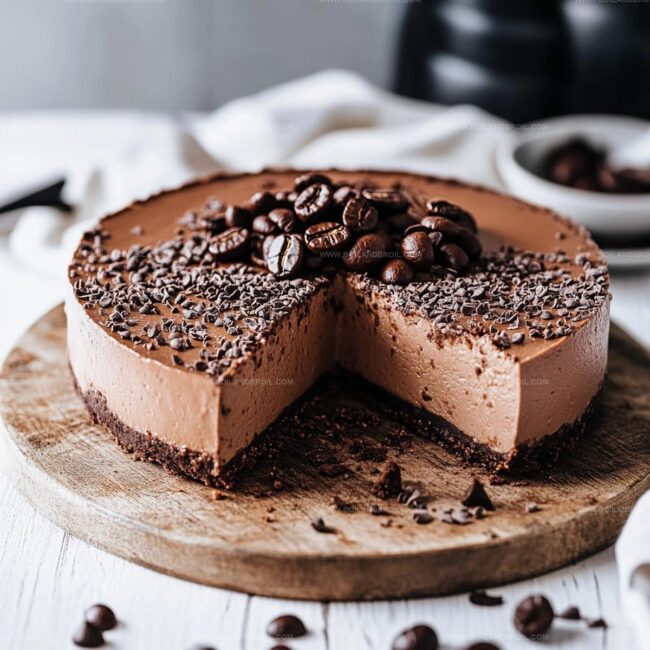
Espresso Chocolate Cheesecake No-Bake Appeal Notes
Ingredient List for No-Bake Espresso Chocolate Cheesecake
Base Ingredients:Flavor Enhancers:Optional Garnish:How to Assemble No-Bake Espresso Chocolate Cheesecake
Step 1: Create Chocolatey Crust
Grab a bowl and mix chocolate graham cracker crumbs with melted butter until the mixture looks like damp beach sand.
Press this delightful blend firmly into the bottom of a springform pan, creating a smooth, even layer.
Pop the pan into the refrigerator to chill while you prepare the filling.
Step 2: Whip Up Creamy Filling
Using an electric mixer, beat cream cheese until silky smooth.
Gradually blend in powdered sugar and cocoa powder, creating a rich chocolate base.
Splash in cooled espresso and vanilla extract, mixing until the mixture becomes velvety.
In a separate bowl, whip heavy cream until it forms beautiful peaks.
Gently fold the whipped cream into the chocolate mixture, being careful to keep the mixture light and airy.
Step 3: Build Your Cheesecake Masterpiece
Pour the luscious filling over the chilled crust, smoothing the top with a spatula to create a perfect surface.
Cover the cheesecake with plastic wrap and let it rest in the refrigerator for 4-6 hours or overnight, allowing the flavors to meld and the texture to set perfectly.
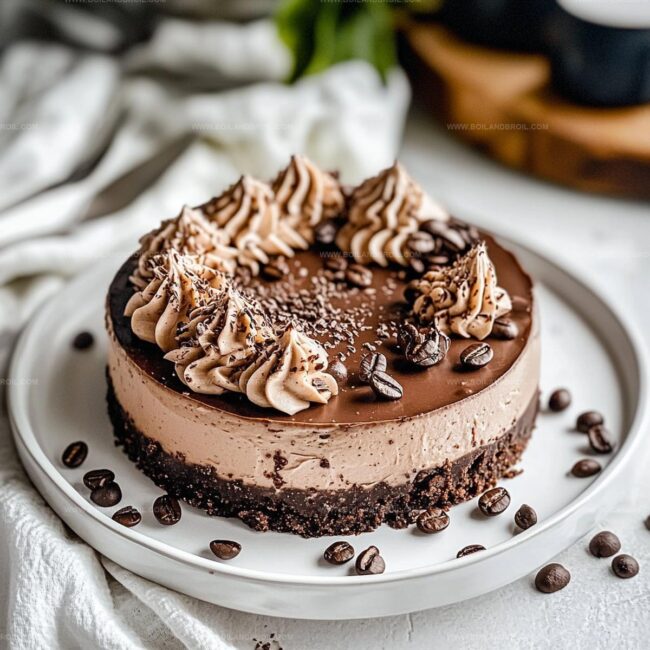
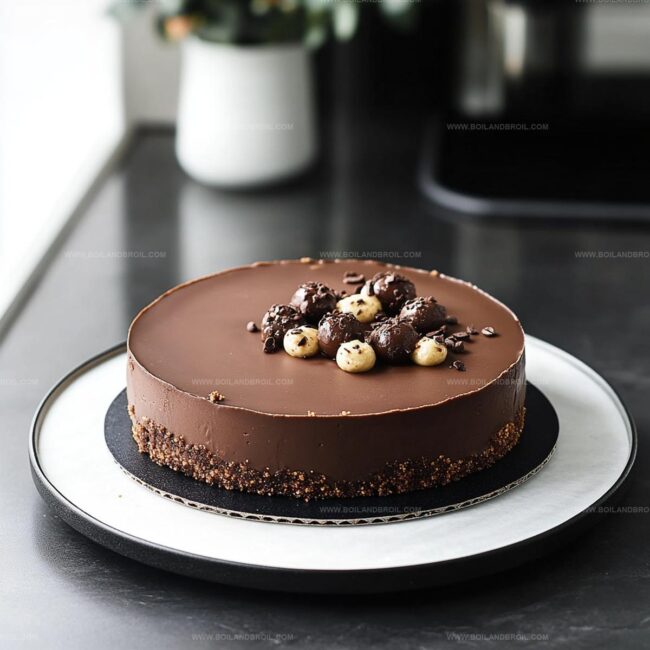
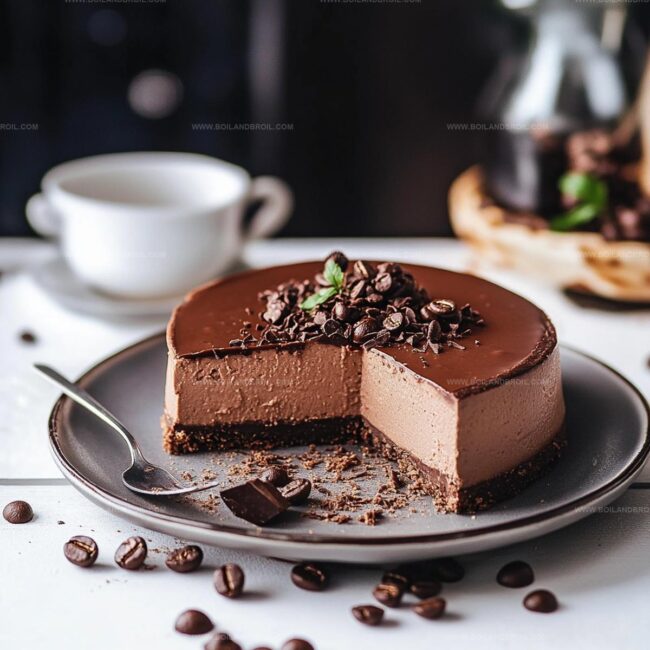
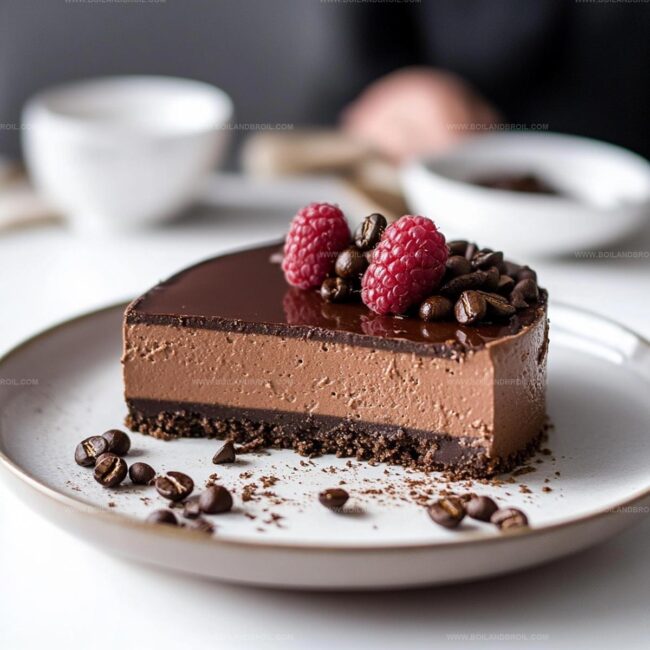
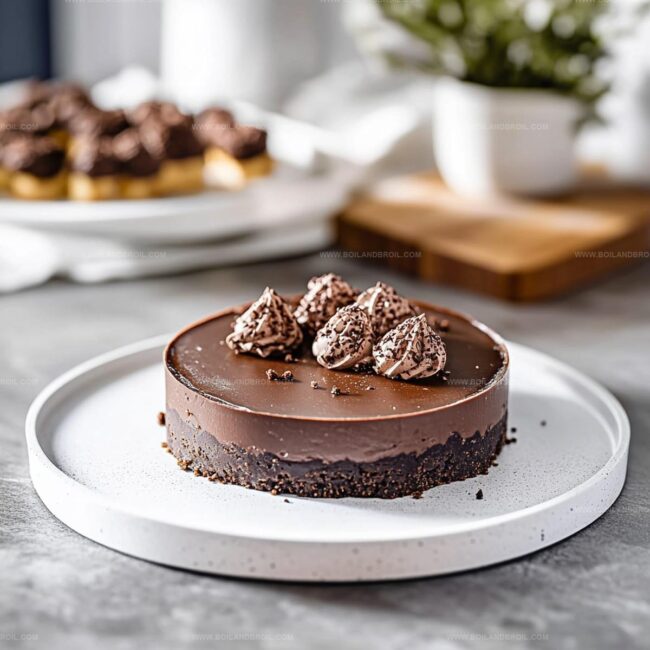
Step 4: Serve and Indulge
Remove the cheesecake from the springform pan.
Sprinkle with chocolate shavings, dust with cocoa powder, or add a dollop of whipped cream.
Slice into this heavenly dessert and savor each decadent bite!
Tips for Perfecting No-Bake Espresso Chocolate Cheesecake
Keeping No-Bake Espresso Chocolate Cheesecake Fresh
Pairings to Serve with No-Bake Espresso Chocolate Cheesecake
Flavor Twists for No-Bake Espresso Chocolate Cheesecake

Irresistible No-Bake Espresso Chocolate Cheesecake Recipe
- Total Time: 15 minutes
- Yield: 8 1x
Description
Creamy espresso chocolate cheesecake emerges as a luxurious dessert without baking. Rich coffee-infused layers melt seamlessly with chocolate, creating pure indulgence you cannot resist.
Ingredients
Main Ingredients:
- 16 ounces (454 grams) cream cheese, softened
- 1 cup powdered sugar
- 1 cup heavy cream
- 1 cup strong brewed espresso or coffee, cooled
- 1/2 cup unsweetened cocoa powder
Crust Ingredients:
- 1 1/2 cups chocolate graham cracker crumbs
- 1/2 cup unsalted butter, melted
- 2 tablespoons granulated sugar (optional)
Garnish Ingredients:
- 1 teaspoon vanilla extract
- Chocolate shavings
- Cocoa powder
- Whipped cream
- Espresso beans
Instructions
- Create a rich, textured base by thoroughly blending chocolate graham cracker crumbs with melted butter and optional sugar until the mixture resembles damp earth.
- Transfer the crumb mixture into a 9-inch springform pan, firmly pressing to create a compact, even foundation. Refrigerate for 15 minutes to solidify.
- Using an electric mixer, whip cream cheese until silky and completely smooth at room temperature.
- Gradually incorporate powdered sugar and cocoa powder, mixing until the texture becomes uniform and lump-free.
- Stream in cooled espresso and vanilla extract, blending until the mixture achieves a consistent, glossy appearance.
- In a separate bowl, whip heavy cream until it forms sturdy, peaked waves that hold their shape.
- Delicately fold whipped cream into the chocolate mixture, maintaining the cream’s airy structure while ensuring complete integration.
- Elegantly pour the filling over the chilled crust, using a spatula to create a perfectly leveled surface.
- Seal with plastic wrap and allow the cheesecake to set in the refrigerator for 4-6 hours, preferably overnight at 40°F.
- Carefully release from the springform pan and adorn with chocolate shavings, cocoa dusting, or dollops of whipped cream.
- Serve thoroughly chilled for maximum flavor and optimal texture.
Notes
- Use room temperature cream cheese to prevent lumps and ensure a smooth, creamy filling that blends effortlessly.
- Dissolve instant espresso powder in a small amount of hot water before cooling to intensify the coffee flavor without adding excess liquid.
- Fold whipped cream gently to maintain its airy texture, using a bottom-up motion to preserve the cheesecake’s light and fluffy consistency.
- Substitute graham crackers with gluten-free alternatives like almond flour or gluten-free cookie crumbs for a celiac-friendly version of this decadent dessert.
- Prep Time: 15 minutes
- Cook Time: 0 minutes
- Category: Desserts
- Method: Chilling
- Cuisine: Italian
Nutrition
- Serving Size: 8
- Calories: 445
- Sugar: 30 g
- Sodium: 250 mg
- Fat: 34 g
- Saturated Fat: 20 g
- Unsaturated Fat: 12 g
- Trans Fat: 0 g
- Carbohydrates: 36 g
- Fiber: 2 g
- Protein: 5 g
- Cholesterol: 100 mg
Jack Sullivan
Founder & Culinary Storyteller
Expertise
Single-recipe development with a narrative approach, Culinary storytelling and food history, Seasonal and regional ingredient utilization, Home cooking techniques adapted for modern kitchens
Education
New England Culinary Institute (Montpelier, VT)
Certificate in Culinary Arts
Focused on farm-to-table cooking, sustainable practices, and modern plating techniques.
Asheville-Buncombe Technical Community College
Associate Degree in Culinary Arts
Emphasized Southern Appalachian cuisine and local ingredient sourcing.
Jack grew up surrounded by smoky skillets and handwritten recipes in the mountains of North Carolina. His roots in Appalachian cooking shaped the way he sees food – as something that connects people, tells a story, and holds meaning.
With hands-on training and a background in sustainable, regional cooking, Jack started Boil And Broil to make meaningful meals more accessible. He’s all about one-dish recipes that are simple to follow but rich with flavor and history.