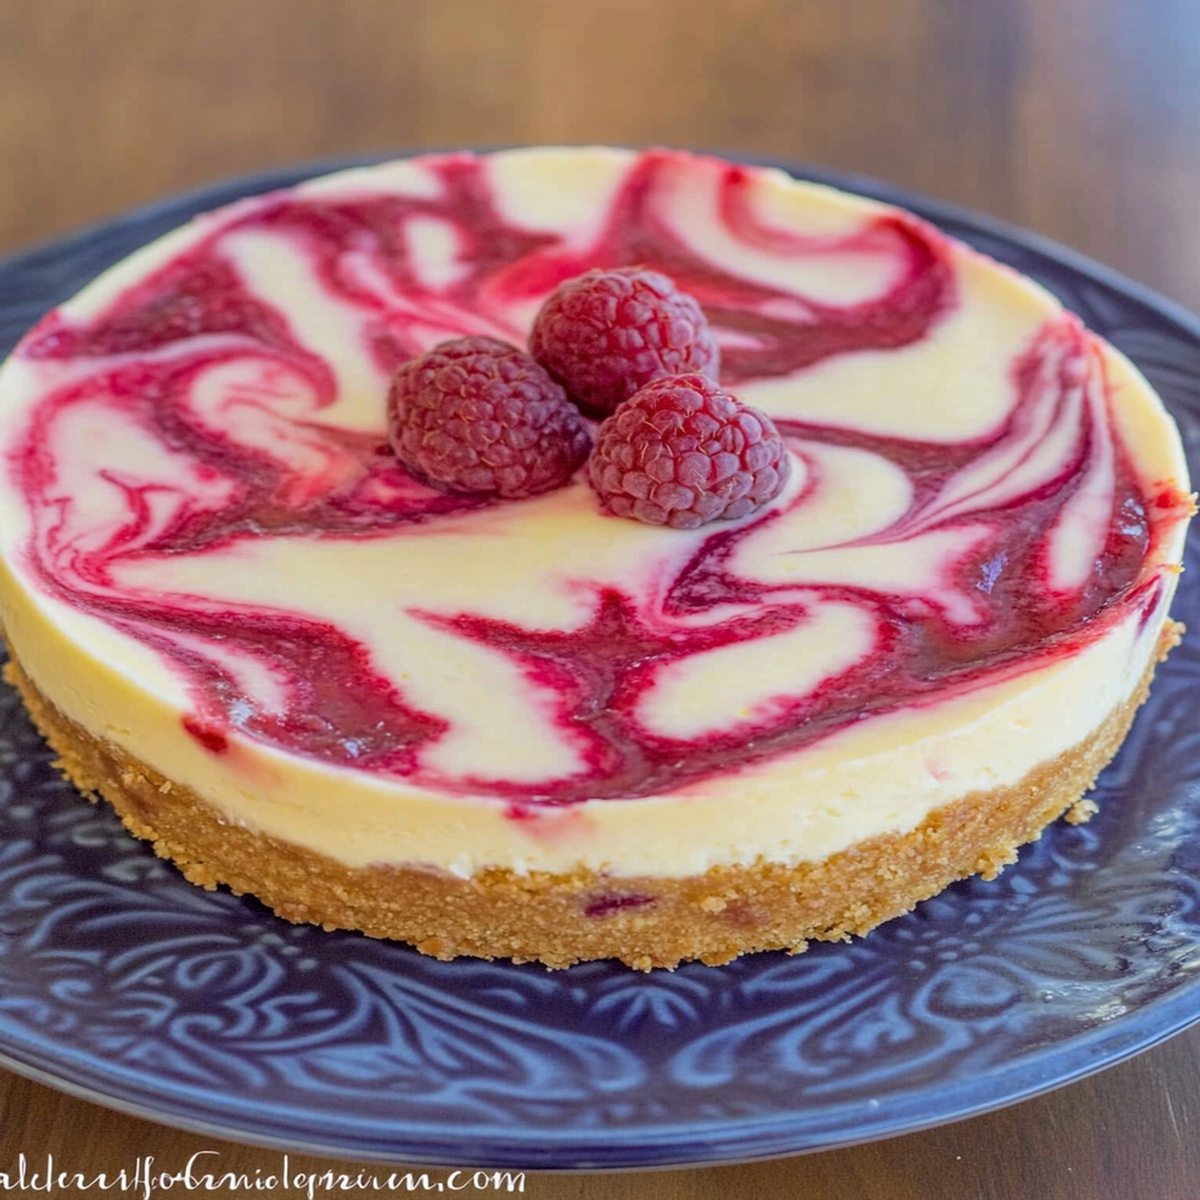
Dreamy No-Bake Raspberry Lemon Swirl Cheesecake Recipe
Creamy no-bake raspberry lemon swirl cheesecake promises a delightful dessert adventure without firing up the oven.
Cool summer treats rarely taste this elegant and simple.
Tangy raspberries dance alongside bright citrus notes, creating a luxurious palette of flavors.
Smooth cream cheese provides a rich, velvety foundation for this dreamy confection.
Minimal ingredients and zero baking mean you can whip up this impressive dessert in minutes.
Each forkful delivers a perfect balance of sweet and tart sensations.
Prepare to dazzle everyone with this effortless yet stunning culinary creation.
Why You’ll Crave No-Bake Raspberry Lemon Swirl Cheesecake
Everything in No-Bake Raspberry Lemon Swirl Cheesecake
Crust:Cheesecake Filling:Raspberry Sauce:Making No-Bake Raspberry Lemon Swirl Cheesecake: Directions
Step 1: Create Buttery Cracker Crust
Crush graham crackers into fine crumbs and mix with melted butter until the mixture resembles wet sand.
Press the crumbly blend firmly into the bottom of a springform pan, creating an even, compact layer that will serve as the delicious foundation for your cheesecake.
Step 2: Whip Creamy Cheesecake Base
Grab a large mixing bowl and beat cream cheese until ultra-smooth and velvety.
Slowly incorporate sour cream and powdered sugar, blending until the mixture becomes silky and free of lumps.
The goal is a luxurious, cloud-like texture that will melt in your mouth.
Step 3: Simmer Vibrant Raspberry Sauce
In a saucepan, combine:Heat the ingredients over medium flame, stirring occasionally.
Cook until the sauce thickens and becomes glossy, which typically takes 5-7 minutes.
The sauce should have a rich, concentrated flavor and syrupy consistency.
Step 4: Layer First Cheesecake Level
Pour approximately half of the creamy cheesecake filling over the prepared crust.
Drizzle half of the warm raspberry sauce across the surface.
Using a knife, create gentle swirling patterns to produce a beautiful marbled effect.
Step 5: Add Final Cheesecake Layer
Repeat the layering process with remaining cheesecake filling and raspberry sauce.
Swirl again with a knife, creating mesmerizing patterns that will delight both eyes and taste buds.
Step 6: Chill and Set
Cover the cheesecake with plastic wrap and refrigerate for a minimum of four hours, though overnight chilling produces the most phenomenal results.
The cooling time allows flavors to meld and texture to set perfectly.
Kitchen Tips for Swirl Cheesecake Magic
Keeping Raspberry Lemon Swirl Cheesecake Fresh
Pairing Up No-Bake Raspberry Lemon Swirl Cheesecake
New Ways to Swirl Your No-Bake Raspberry Lemon Cheesecake
FAQs
Yes, frozen raspberries work perfectly for the raspberry sauce. Just thaw them completely and drain excess liquid before cooking.
Since this is a no-bake cheesecake, cracking isn’t an issue. Make sure to beat the cream cheese until smooth and avoid overmixing the ingredients.
Absolutely! Use gluten-free graham crackers or substitute with almond flour and ground nuts for the crust to make it gluten-free.
The cheesecake will stay fresh for up to 5 days when stored in an airtight container in the refrigerator. Cover it tightly with plastic wrap to maintain its texture and flavor.
Print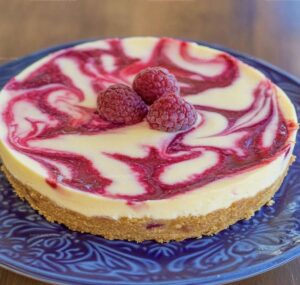
No-Bake Raspberry Lemon Swirl Cheesecake Recipe
- Total Time: 27 minutes
- Yield: 8 1x
Description
Creamy no-bake raspberry lemon swirl cheesecake delivers a tantalizing dance of citrus and berry flavors. Summer dessert dreams come alive with each silky, refreshing slice that promises pure indulgence for sweet enthusiasts.
Ingredients
Main Ingredients:
- 16 ounces (454 grams) cream cheese, softened
- 2 cups (300 grams) fresh raspberries
- 1 cup (240 milliliters) sour cream
Crust Ingredients:
- 1.5 cups (180 grams) graham cracker crumbs
- 0.5 cup (113 grams) unsalted butter, melted
Sweetening and Flavoring Ingredients:
- 1 cup (120 grams) powdered sugar
- 2 tablespoons (30 milliliters) lemon juice
Instructions
- Create a homogeneous mixture of graham cracker crumbs and melted butter, pressing firmly into the bottom of a 9-inch springform pan to form an even, compact base.
- Using an electric mixer, whip cream cheese until silky and free of lumps, then gradually incorporate sour cream and powdered sugar, blending until smooth and creamy.
- Simmer fresh raspberries and lemon juice in a saucepan over medium heat for 5-7 minutes, stirring continuously until the mixture thickens and transforms into a vibrant, glossy sauce.
- Gently pour approximately half of the cream cheese mixture over the graham cracker crust, creating an even layer.
- Drizzle half of the warm raspberry sauce across the cream cheese surface, then use a knife to create elegant, marble-like swirls throughout the layer.
- Repeat the layering process with remaining cream cheese filling and raspberry sauce, crafting additional decorative swirl patterns.
- Carefully seal the springform pan with plastic wrap and refrigerate for a minimum of 4 hours, preferably overnight, allowing the cheesecake to set and develop rich, harmonious flavors.
- Before serving, remove the plastic wrap and release the springform pan’s latch, revealing the beautifully textured no-bake cheesecake.
Notes
- Swap graham crackers with gluten-free alternatives like almond flour or crushed gluten-free cookies for a celiac-friendly version.
- Freeze the crust for 15 minutes before adding filling to ensure a crisp, stable base that won’t crumble when slicing.
- Use room temperature cream cheese and sour cream to prevent lumps and create a smoother, silkier cheesecake texture.
- For a lighter version, replace half the cream cheese with Greek yogurt to reduce calories while maintaining creamy consistency.
- Prep Time: 20 minutes
- Cook Time: 7 minutes
- Category: Desserts
- Method: Chilling
- Cuisine: American
Nutrition
- Serving Size: 8
- Calories: 380
- Sugar: 25g
- Sodium: 200mg
- Fat: 22g
- Saturated Fat: 12g
- Unsaturated Fat: 8g
- Trans Fat: 0g
- Carbohydrates: 39g
- Fiber: 2g
- Protein: 6g
- Cholesterol: 50mg
Jack Sullivan
Founder & Culinary Storyteller
Expertise
Single-recipe development with a narrative approach, Culinary storytelling and food history, Seasonal and regional ingredient utilization, Home cooking techniques adapted for modern kitchens
Education
New England Culinary Institute (Montpelier, VT)
Certificate in Culinary Arts
Focused on farm-to-table cooking, sustainable practices, and modern plating techniques.
Asheville-Buncombe Technical Community College
Associate Degree in Culinary Arts
Emphasized Southern Appalachian cuisine and local ingredient sourcing.
Jack grew up surrounded by smoky skillets and handwritten recipes in the mountains of North Carolina. His roots in Appalachian cooking shaped the way he sees food – as something that connects people, tells a story, and holds meaning.
With hands-on training and a background in sustainable, regional cooking, Jack started Boil And Broil to make meaningful meals more accessible. He’s all about one-dish recipes that are simple to follow but rich with flavor and history.