Fluffy No-bake Strawberry Delight Recipe for Sweet Lovers
Sweet summer memories dance on the palate with this no-bake strawberry delight that promises pure creamy bliss.
Juicy strawberries blend seamlessly into a luscious dessert that requires zero oven time.
No complicated techniques stand between you and this dreamy treat.
Every spoonful bursts with fresh, vibrant flavors that melt effortlessly on your tongue.
The layers of creamy goodness create a dessert so simple yet so irresistible.
Chilled and silky smooth, this recipe transforms ordinary ingredients into an extraordinary summer sensation.
Prepare to indulge in a dessert that will become your new warm-weather favorite.
Why This No-Bake Strawberry Dessert Is a Hit
What You’ll Need for Strawberry Delight
Crust Ingredients:Filling Ingredients:Flavor Enhancers:How to Layer a No-Bake Strawberry Delight
Step 1: Crush Graham Crackers
Pulse graham crackers in a food processor until they become fine crumbs.
Drizzle melted butter over the crumbs and mix thoroughly.
Press the mixture firmly into a 9×9-inch pan, using the bottom of a measuring cup to create an even, compact base.
Chill the crust in the refrigerator while preparing the next components.
Step 2: Prepare Strawberry Pieces
Dice one portion of strawberries into tiny pieces (roughly dime-sized).
Slice the remaining strawberries lengthwise and carefully pat them dry with paper towels to remove excess moisture.
Step 3: Whip Heavy Cream
Place mixing bowl in the freezer for 5-10 minutes to chill.
Beat heavy whipping cream on medium-high speed until soft peaks form.
Gradually add powdered sugar and continue beating until stiff peaks develop.
Set aside.
Step 4: Create Cheesecake Base
In a separate bowl, blend cream cheese, granulated sugar, lemon juice, and vanilla extract until smooth and creamy.
Gently fold in the prepared whipped cream.
Divide the mixture into two portions.
Mix powdered strawberry Jello and diced strawberries into one half to create a pink strawberry layer.
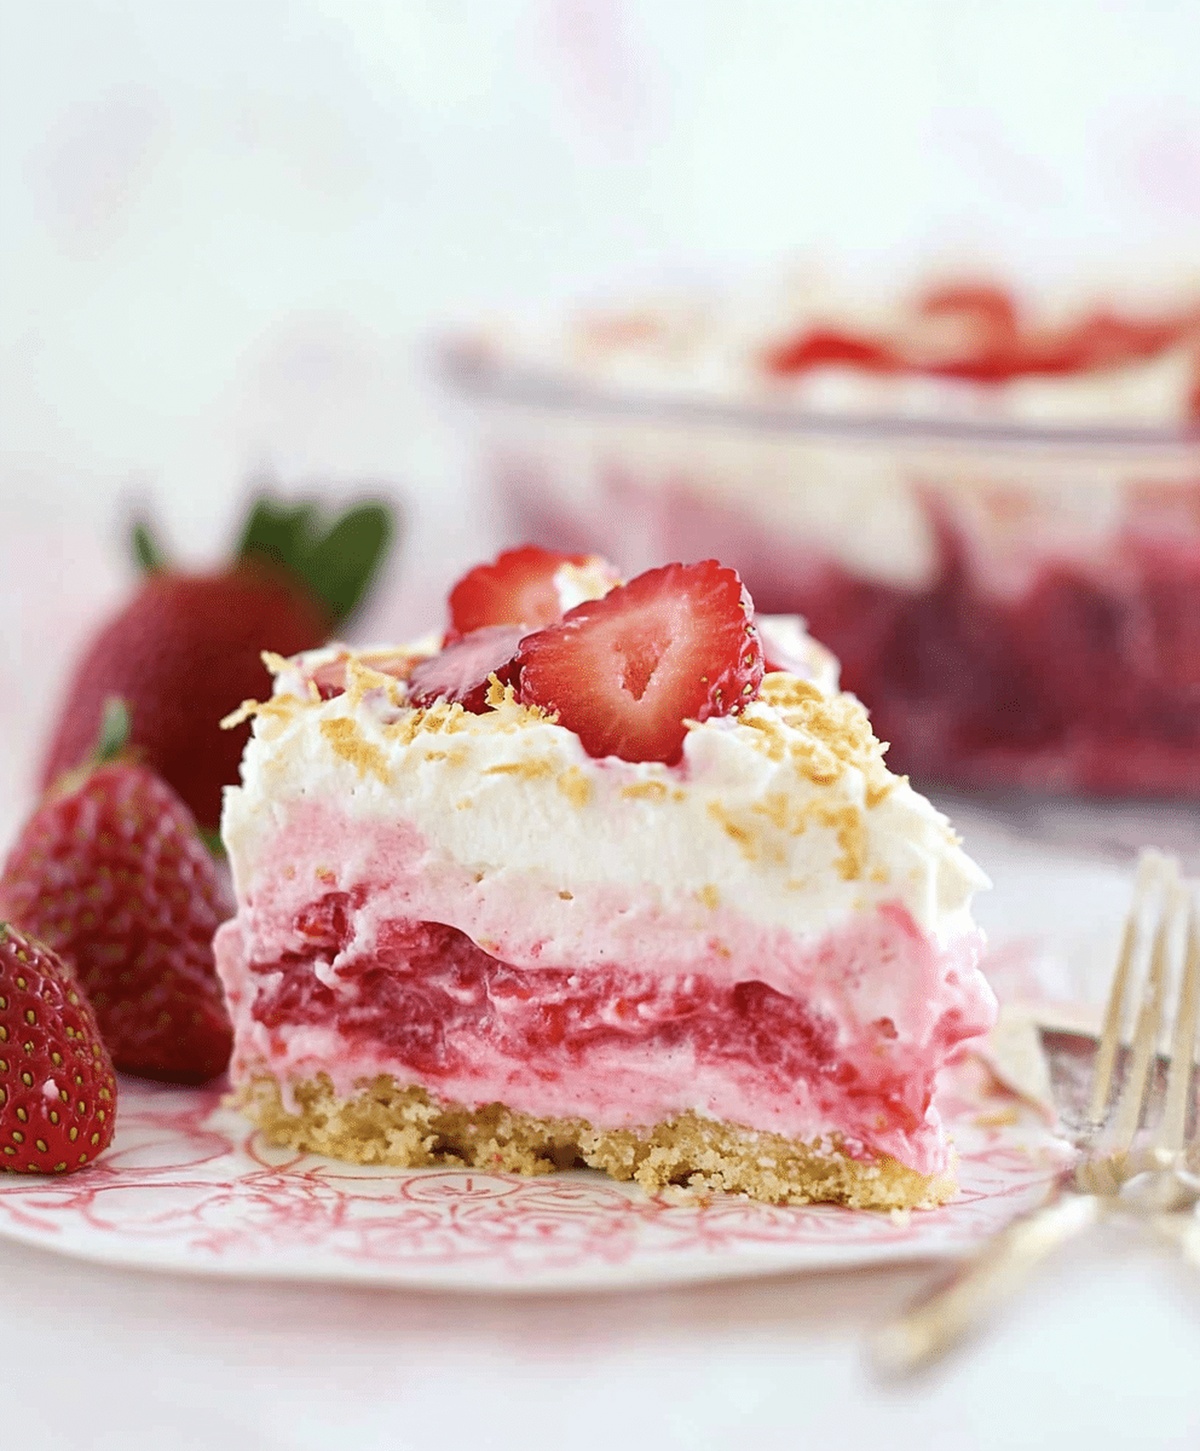
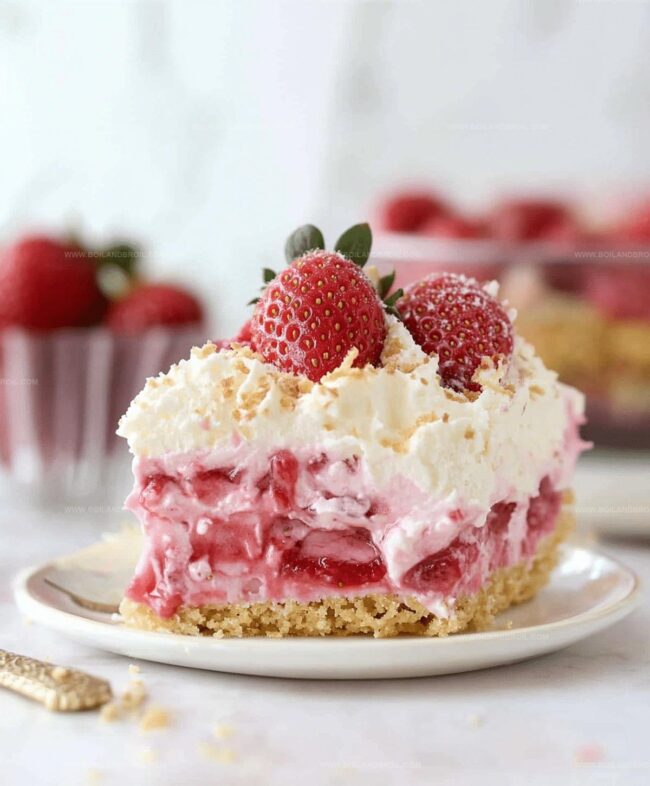
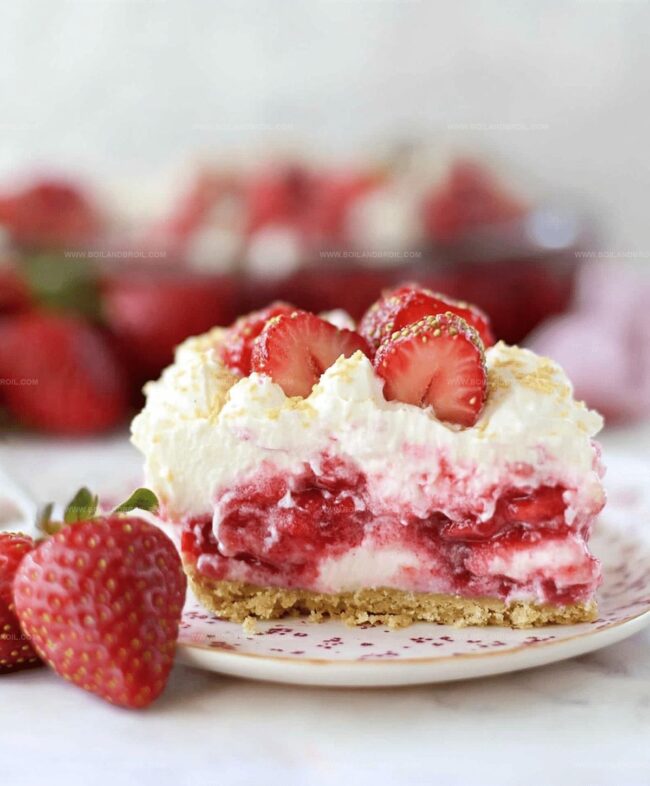
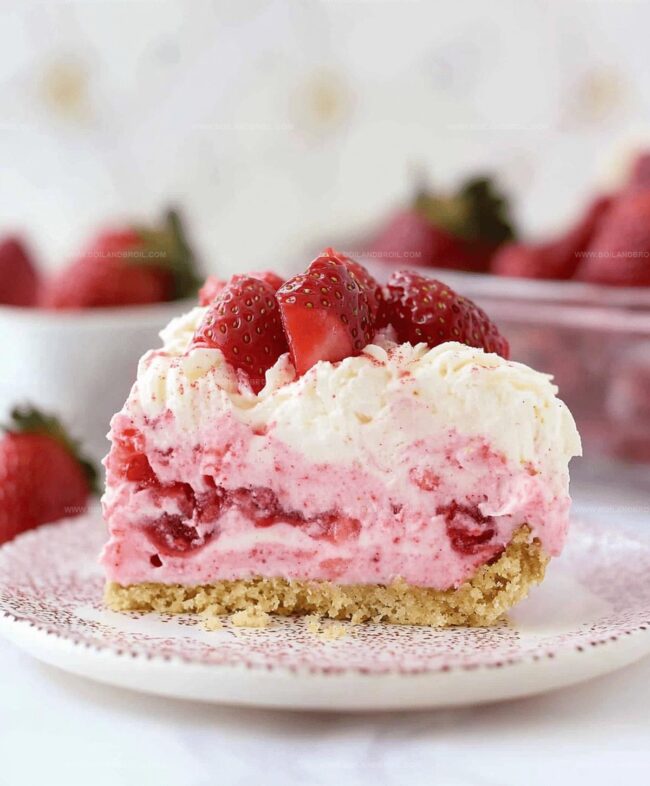
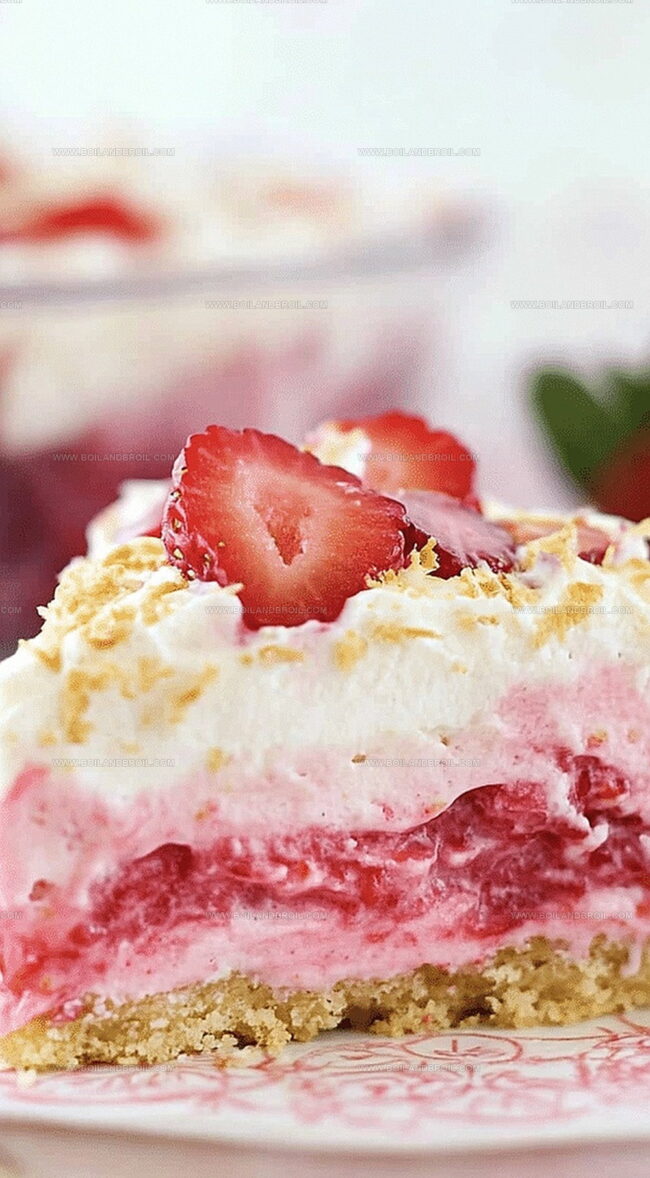
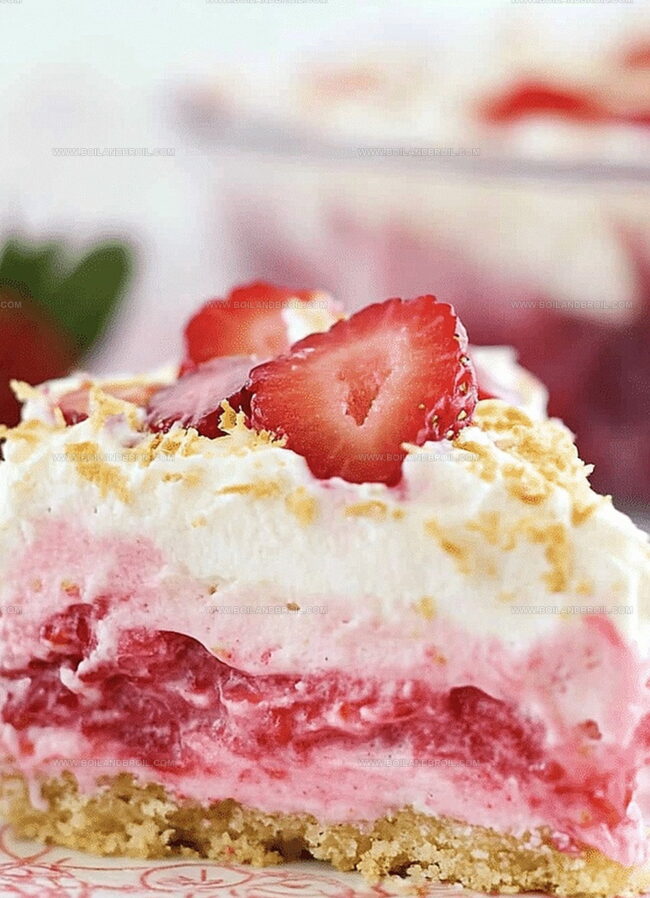
Step 5: Layer the Dessert
Arrange sliced strawberries over the chilled graham cracker crust, slightly overlapping to ensure complete coverage.
Spread the plain cheesecake filling evenly across the strawberries.
Carefully add the strawberry-infused layer on top, taking care not to mix the layers.
Step 6: Finish and Chill
Prepare an additional batch of whipped cream using the previous method.
Top the dessert with whipped cream, either piping decoratively or spreading smoothly.
Cover with plastic wrap and refrigerate for 4-6 hours (preferably overnight) before serving.
Tips for Smooth Layers and Perfect Texture
How to Store and Serve Strawberry Delight
Pairing Options for Strawberry Layered Desserts
Fun No-Bake Variations You Can Try
FAQs
Fresh strawberries work best for this recipe. Frozen strawberries tend to release too much moisture, which can make the dessert watery and compromise the texture of the layers.
You can use digestive biscuits or vanilla wafer cookies as alternatives. Just ensure they’re ground finely and mixed with melted butter to create a solid crust base.
Look for stiff peaks that hold their shape when you lift the beater. The cream should stand up straight and not fall back immediately. Be careful not to overbeat, or it will turn into butter.
Absolutely! This no-bake dessert is perfect for preparing in advance. You can make it up to 2 days before serving, keeping it covered in the refrigerator until you’re ready to enjoy it.
Print
No-bake Strawberry Delight Recipe
- Total Time: 20 minutes
- Yield: 8 1x
Description
Sweet summer memories dance through this no-bake strawberry delight, blending creamy layers with fresh berry magic. Cool dessert lovers will savor each silky spoonful of pure strawberry bliss, creating instant happiness on their palate.
Ingredients
Strawberries and Cream:
- 2 lbs (32 ounces/907 grams) fresh strawberries, washed and dried
- 16 ounces (452 grams) full-fat cream cheese at room temperature
- 1 tablespoon fresh lemon juice
- 1 teaspoon (5 milliliters) pure vanilla extract
Whipped Cream and Sweeteners:
- 2 cups (473 milliliters) heavy whipping cream
- 1/2 cup (65 grams) powdered sugar
- 1/4 cup (48 grams) granulated sugar
- 2 tablespoons strawberry Jello mix
Crust Base:
- 2 cups (240 grams) graham cracker crumbs
- 1/2 cup (113 grams) unsalted butter
Instructions
- Prepare the graham cracker foundation by pulverizing crackers into fine crumbs. Mix thoroughly with melted butter until uniformly coated. Press mixture firmly into a 9×9-inch pan, using a measuring cup to create an even, compact base. Refrigerate while preparing subsequent layers.
- Prepare strawberries by dicing one cup into tiny, uniform pieces. Slice remaining strawberries lengthwise and carefully pat dry to eliminate excess moisture, preventing potential dessert sogginess.
- Create whipped cream by chilling mixing bowl for 5-10 minutes. Whip heavy cream on medium-high speed until soft peaks form. Gradually incorporate powdered sugar, continuing to beat until stiff peaks develop. Set aside temporarily.
- In separate bowl, blend cream cheese, granulated sugar, lemon juice, and vanilla extract until achieving smooth, creamy consistency. Gently fold in whipped cream until fully integrated. Divide mixture in half. Incorporate powdered strawberry Jello mix and diced strawberries into one portion, creating vibrant pink layer.
- Arrange sliced strawberries over chilled crust, slightly overlapping to ensure complete coverage. Spread plain cheesecake filling evenly, smoothing surface with spatula. Carefully layer strawberry-infused cheesecake mixture on top, maintaining distinct layers.
- Prepare additional whipped cream using previous technique. Decorate top by either piping with 1M tip for elegant presentation or spreading evenly for rustic aesthetic. Seal with plastic wrap and refrigerate 4-6 hours (preferably overnight) to allow flavors to meld and texture to set before serving.
Notes
- Chill your tools like mixing bowls and utensils to help whipped cream achieve perfect peaks faster and maintain better texture.
- Pat strawberries completely dry to prevent excess moisture from making the dessert soggy or losing structural integrity.
- Use full-fat cream cheese for maximum richness and smoothest consistency in the cheesecake layers.
- Prep Time: 20 minutes
- Cook Time: 0 minutes
- Category: Desserts, Snacks
- Method: Chilling
- Cuisine: American
Nutrition
- Serving Size: 8
- Calories: 350
- Sugar: 25g
- Sodium: 220mg
- Fat: 24g
- Saturated Fat: 14g
- Unsaturated Fat: 8g
- Trans Fat: 1g
- Carbohydrates: 32g
- Fiber: 1g
- Protein: 3g
- Cholesterol: 70mg
Clara Thompson
Recipe Developer & Culinary Educator
Expertise
Developing accessible single-serving recipes, Food writing and content creation, Plant-based and allergen-friendly cooking, Culinary education and workshop facilitation
Education
Oregon Culinary Institute (Portland, OR)
Diploma in Culinary Arts
Specialized in plant-based cooking and sustainable kitchen practices.
Portland Community College
Certificate in Food Writing and Media
Focused on recipe writing, food photography, and digital content creation.
Clara’s food journey began with a curiosity for color, texture, and ingredients pulled straight from the garden. Her background in plant-forward cooking and creative writing gives her a unique edge – she makes healthy, flavorful food feel inviting, not intimidating.
She specializes in meals that work for busy lives and different diets, all without sacrificing taste. Clara’s voice comes through in every recipe she writes – clear, kind, and encouraging.