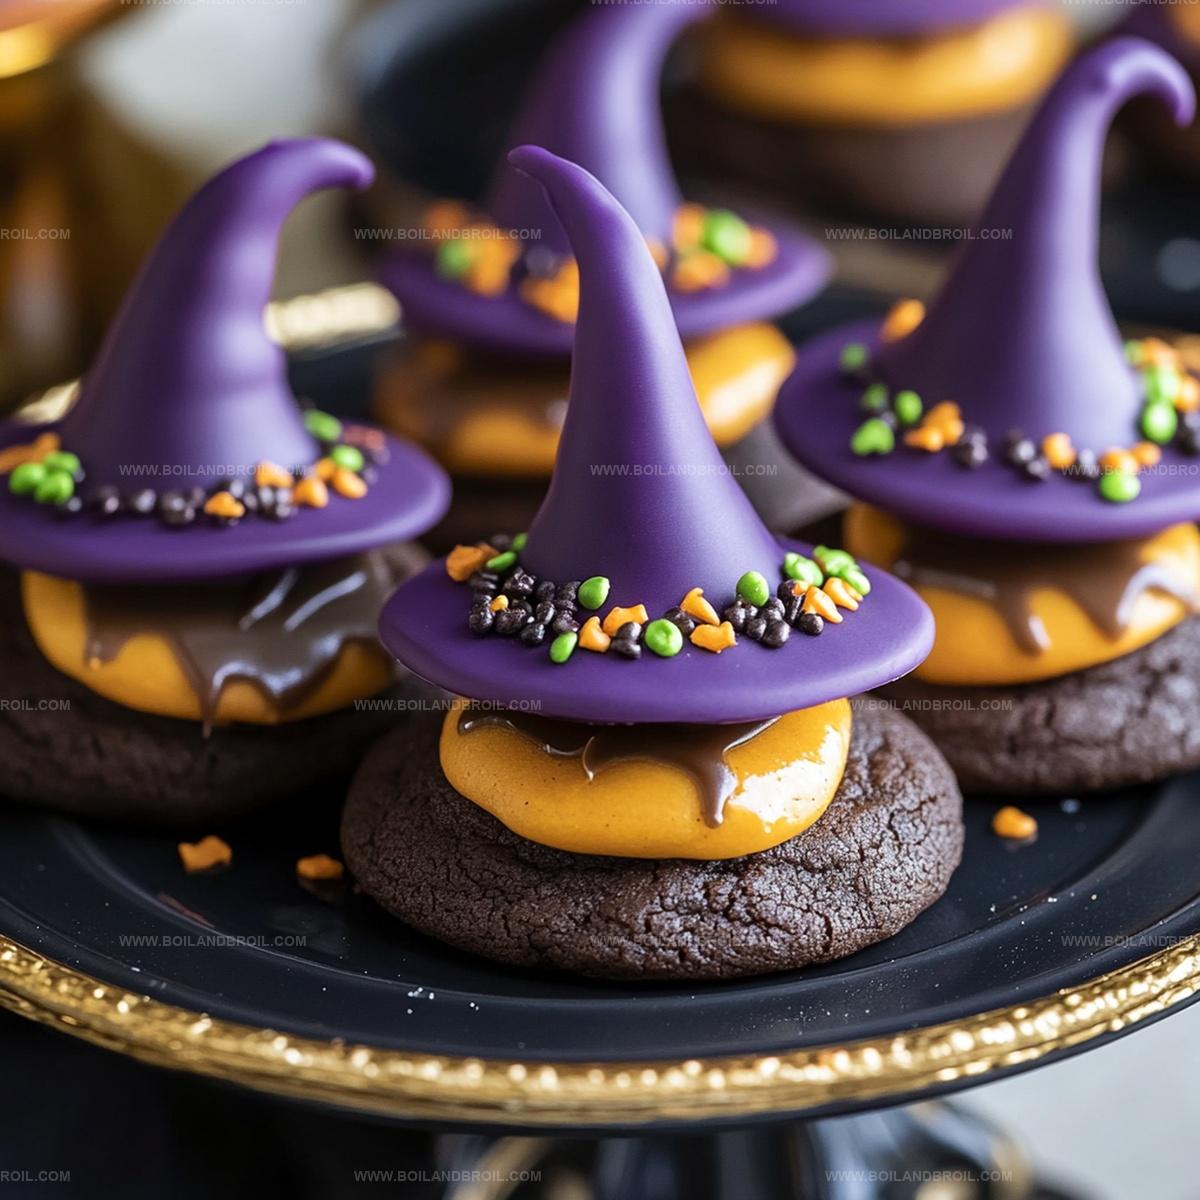
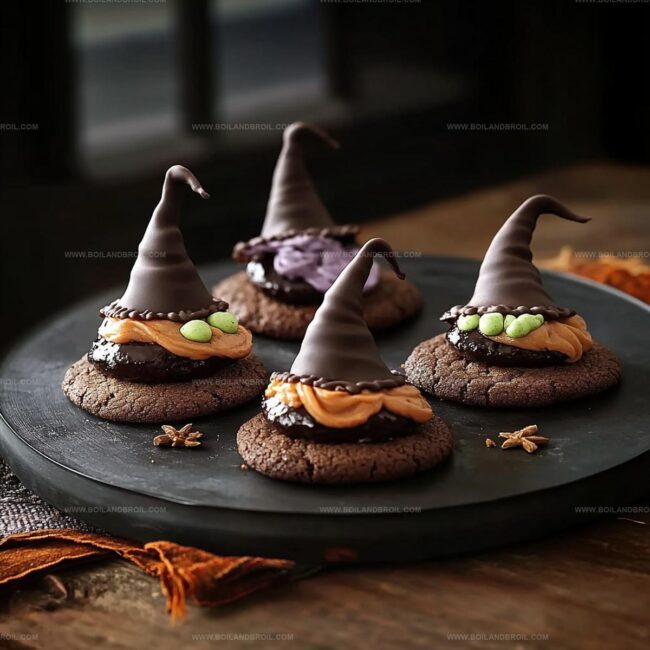
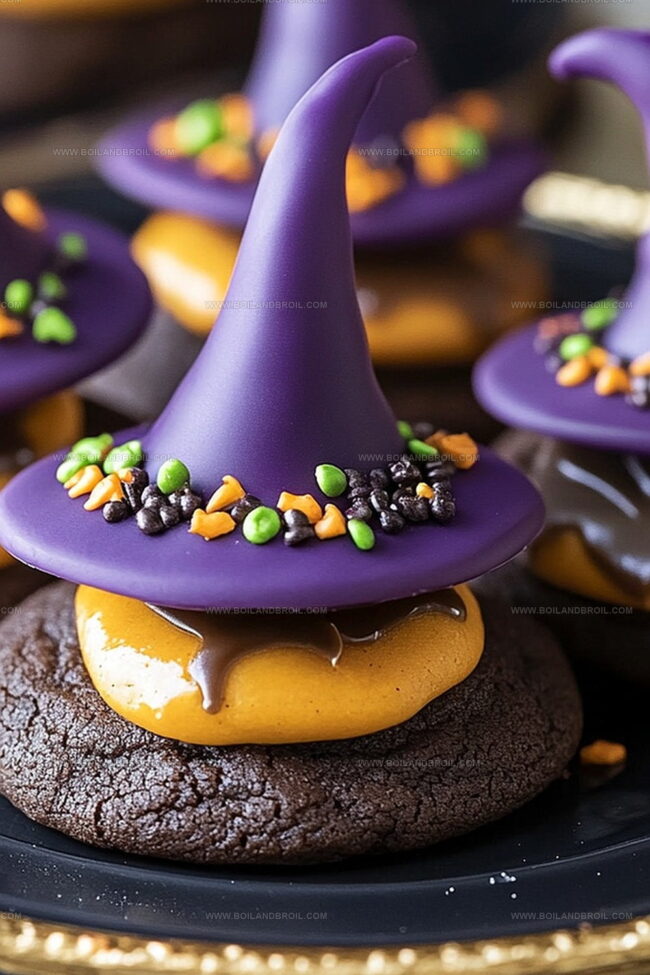
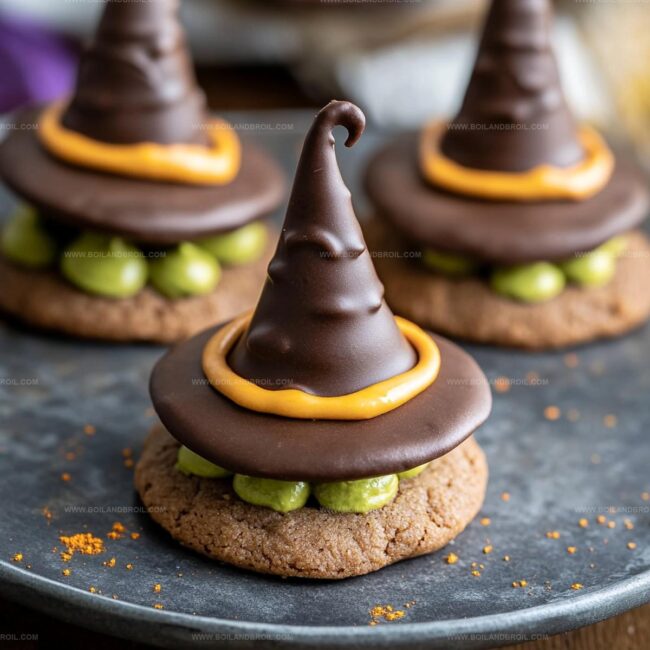
Crafting delightful no-bake witch hat cookies brings Halloween magic right to your kitchen table.
Chocolate-drenched treats stand ready to enchant every sweet tooth.
Magical shapes emerge from simple ingredients scattered across your countertop.
Kids and adults alike will fall in love with these spooky confections.
Minimal effort creates maximum festive impact for seasonal celebrations.
Halloween parties need these whimsical desserts that combine playful design with rich chocolate flavor.
Grab your apron and let’s create some delicious witch hat wonder that will spark smiles and delight everyone gathered around.
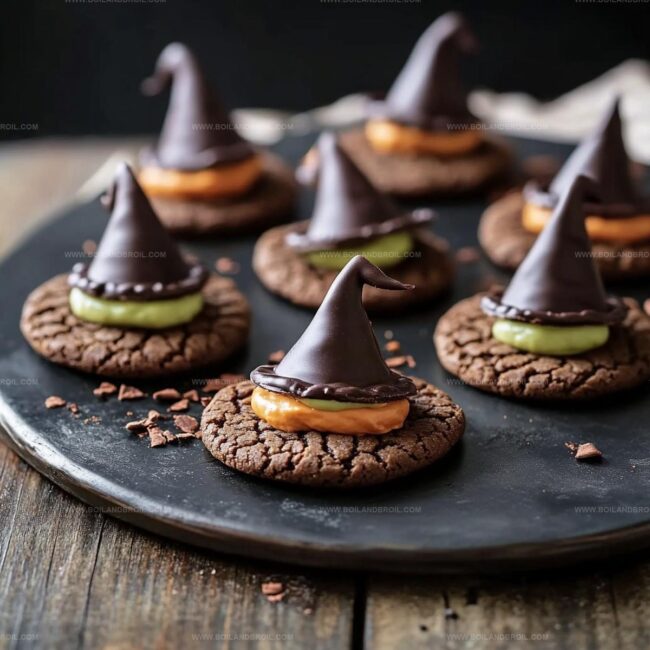
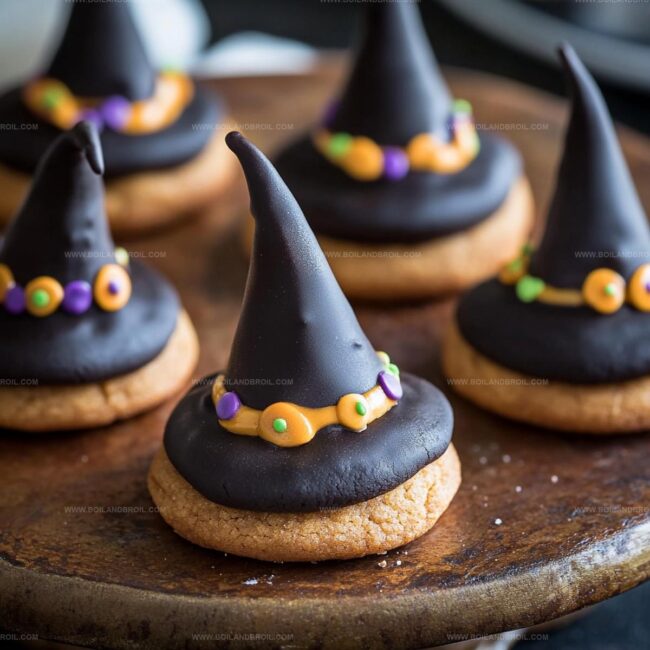
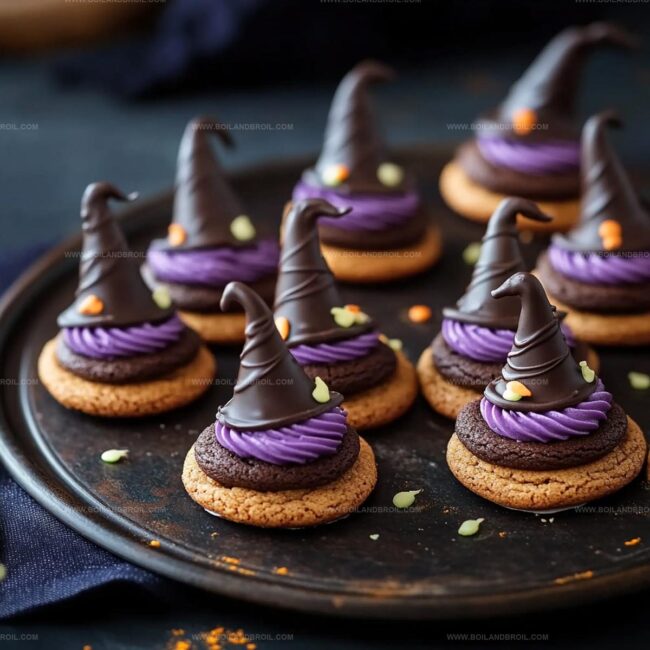
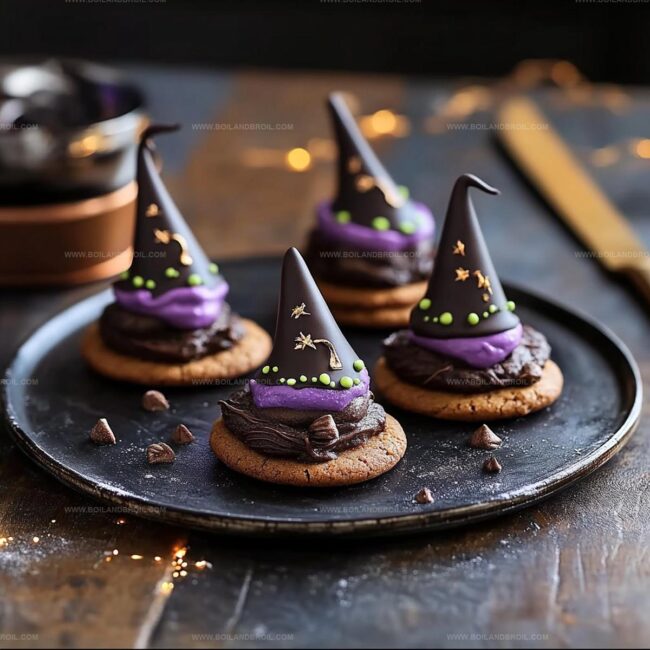
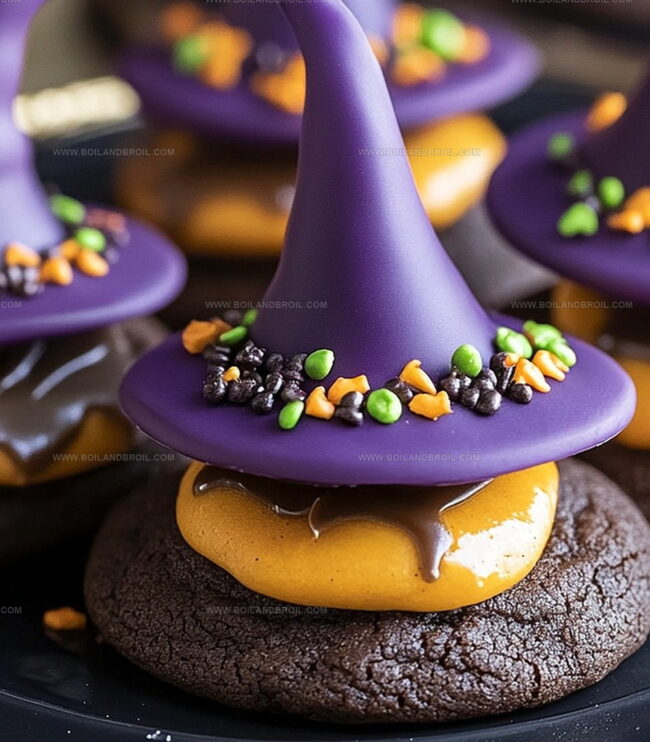
No-Bake Witch Hat Cookies Overview
Enjoy a hassle-free dessert that comes together quickly without needing an oven, making it ideal for busy parents or novice bakers looking for a fun kitchen project.
Engage children in a creative activity where they can personalize each witch hat with colorful icing and playful candy eyes, turning cookie-making into an entertaining experience.
Utilize basic pantry staples like chocolate chips, sugar cones, chocolate cookies, and pre-made icing to craft these charming Halloween treats with minimal shopping and preparation.
What Goes into Witch Hat Cookies
Main Ingredients:
Chocolate Chips: A smooth, meltable chocolate that serves as the adhesive and coating for the witch hat base.
Sugar Cones: Crisp, cone-shaped wafers that create the distinctive witch hat shape.
Chocolate Cookies: Flat, round cookies that form the foundation of the witch hat.
Decorative Ingredients:
Orange Icing: Colorful icing that adds festive Halloween-themed decoration to the witch hats.
Candy Eyes: Small, round edible decorations that bring the witch hats to life with a playful touch.
Binding Ingredients:
Icing: A sticky sweet substance that helps attach the candy eyes to the witch hat.
Assembling No-Bake Witch Hat Cookies
Step 1: Prepare Chocolate Melting Station
Set up a microwave-safe bowl and chocolate chips.
Carefully melt the chocolate in short 30-second bursts, stirring between each interval until the chocolate becomes completely smooth and glossy.
Gently stir to ensure no lumps remain.
Step 2: Craft Witch Hat Base
Chocolate cookies
Sugar cones
Melted chocolate
Dip the pointed end of each sugar cone into the warm melted chocolate, creating a secure coating.
Place the chocolate-dipped cone tip directly onto a chocolate cookie, pressing gently to create the classic witch hat shape.
Allow the chocolate to set and act as a natural adhesive.
Step 3: Transform Hats with Magical Decorations
Orange icing
Candy eyes
Melted chocolate (for additional attachment)
Grab your orange icing and carefully draw whimsical designs, swirls, and patterns across the sugar cone surface.
Strategically place candy eyes using a tiny dab of melted chocolate or icing as glue.
Create unique personalities for each witch hat by varying decorative styles and eye placements.
Step 4: Let Decorations Settle
Allow decorated witch hats to rest at room temperature.
The chocolate will naturally harden, securing all decorative elements.
Once completely set, these playful treats are ready to enchant party guests or serve as delightful Halloween desserts.
Helpful Tips for Witch Hat Cookies
Select high-quality chocolate chips for smooth, glossy melting that ensures a professional finish on your witch hats.
Gently warm sugar cones at room temperature before dipping to reduce the risk of unexpected breakage during chocolate coating.
Stir chocolate chips between 30-second microwave intervals to achieve a perfectly smooth, lump-free chocolate coating without burning.
Use a piping bag or small squeeze bottle for precise orange icing details and neat candy eye placement on the witch hat surface.
Refrigerate decorated witch hat cookies for 10-15 minutes to help chocolate and icing set quickly and maintain structural integrity.
How to Keep Witch Hat Cookies Fresh
Store No-Bake Witch Hat Cookies in an airtight container between layers of parchment paper for up to 5 days in the refrigerator.
Wrap individual cookies in plastic wrap, place in a freezer-safe container, and freeze for up to 3 weeks. Thaw at room temperature for 15-20 minutes before serving.
Keep cookies in a sealed container away from direct sunlight and heat for 2-3 days, ensuring they remain crisp and fresh.
Place cookies in a cool, dry spot with low humidity to maintain their texture and prevent chocolate from melting.
Pairing Ideas for Witch Hat Cookies
Brew Magical Mocktails: Serve sparkling orange soda or a witchy-themed punch that complements the chocolate and sugar cone hat’s sweet flavor profile.
Pair with Seasonal Spice Tea: Offer a warm cinnamon or pumpkin spice tea that echoes the Halloween theme and balances the cookie’s rich chocolate notes.
Create Creamy Chocolate Sidekick: Prepare a cold glass of milk or hot chocolate to enhance the cookie’s chocolatey goodness and provide a smooth drinking experience.
Halloween Spirit Shooter: Mix a kid-friendly non-alcoholic “potion” with orange juice and grenadine that matches the cookie’s playful Halloween design.
No-Bake Witch Hat Variations
Gluten-Free Delight: Replace chocolate cookies with gluten-free chocolate wafers or almond flour cookies for those with gluten sensitivities.
Vegan Magic: Swap chocolate chips for dairy-free dark chocolate and use vegan royal icing made from aquafaba or powdered sugar alternatives.
Nut-Free Option: Substitute sugar cones with waffle cones or rice paper cones for those with nut allergies, ensuring the base remains safe for all.
Low-Sugar Version: Use sugar-free chocolate chips and replace traditional icing with a low-calorie decorating gel to reduce overall sugar content.
FAQs
How do I prevent the sugar cone from breaking while decorating?
Carefully handle the cone and work on a flat surface. Use a gentle touch when applying chocolate and icing to minimize pressure on the fragile cone.
Can I use different types of chocolate for coating?
Yes, you can use milk, dark, or white chocolate depending on your preference. Just ensure the chocolate melts smoothly and has a good coating consistency.
What if I can’t find sugar cones?
Substitute with waffle cones or ice cream cones. Just trim them down to create a pointed witch hat shape if needed.
How do I make the witch hat look more professional?
Use a piping bag for precise icing designs, and choose coordinating colors for a more polished Halloween-themed look.
Developing accessible single-serving recipes, Food writing and content creation, Plant-based and allergen-friendly cooking, Culinary education and workshop facilitation
Education
Oregon Culinary Institute (Portland, OR) Diploma in Culinary Arts
Specialized in plant-based cooking and sustainable kitchen practices.
Portland Community College Certificate in Food Writing and Media
Focused on recipe writing, food photography, and digital content creation.
Clara’s food journey began with a curiosity for color, texture, and ingredients pulled straight from the garden. Her background in plant-forward cooking and creative writing gives her a unique edge – she makes healthy, flavorful food feel inviting, not intimidating.
She specializes in meals that work for busy lives and different diets, all without sacrificing taste. Clara’s voice comes through in every recipe she writes – clear, kind, and encouraging.
Clara Thompson
Recipe Developer & Culinary Educator
Expertise
Developing accessible single-serving recipes, Food writing and content creation, Plant-based and allergen-friendly cooking, Culinary education and workshop facilitation
Education
Oregon Culinary Institute (Portland, OR)
Diploma in Culinary Arts
Specialized in plant-based cooking and sustainable kitchen practices.
Portland Community College
Certificate in Food Writing and Media
Focused on recipe writing, food photography, and digital content creation.
Clara’s food journey began with a curiosity for color, texture, and ingredients pulled straight from the garden. Her background in plant-forward cooking and creative writing gives her a unique edge – she makes healthy, flavorful food feel inviting, not intimidating.
She specializes in meals that work for busy lives and different diets, all without sacrificing taste. Clara’s voice comes through in every recipe she writes – clear, kind, and encouraging.