Tasty PB&J Puffed Cereal Ice Cream Sandwiches Recipe
Sweet memories collide with childhood PB&J nostalgia in these irresistible puffed cereal ice cream sandwiches that promise pure delight.
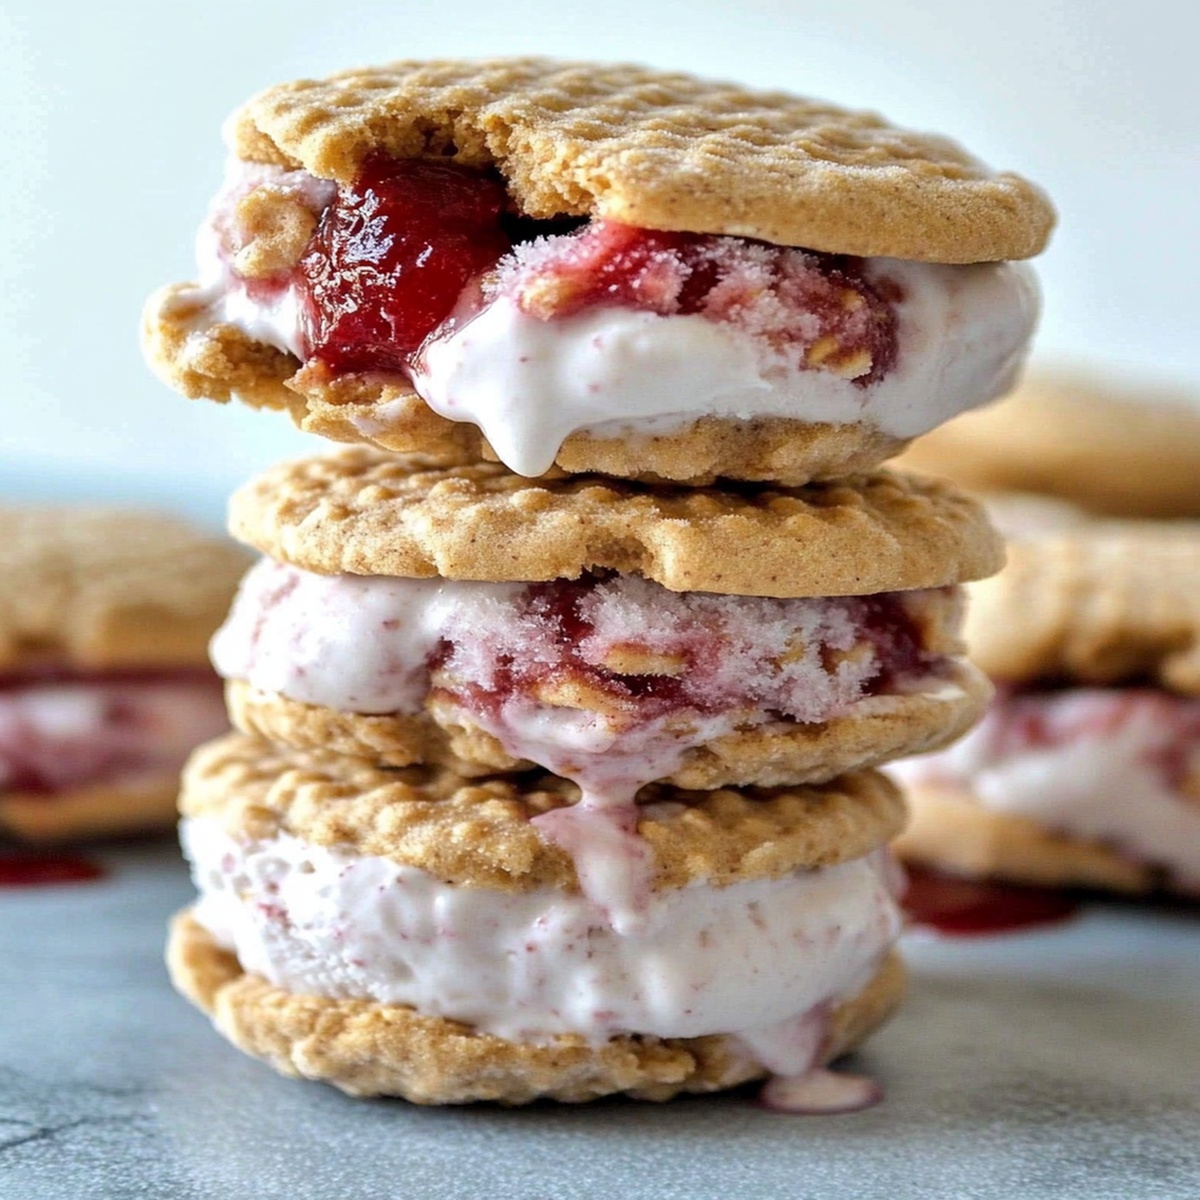
Crunchy peanut butter and jelly flavors dance between crispy cereal layers, creating a playful twist on classic comfort.
Chilled treats never looked so tempting or tasted so incredible.
Creamy ice cream nestles perfectly between golden, sweet-and-salty cereal squares that crackle with every bite.
Homemade goodness meets summer indulgence in this simple yet spectacular dessert.
Forget store-bought – you can craft these magical sandwiches that will make everyone smile with pure joy.
Prepare to become the dessert hero who transforms ordinary snack time into an extraordinary experience.
Why PB&J Cereal Ice Cream Sandwiches Are Irresistible
All About PB&J Cereal Ice Cream Sandwiches Ingredients
Cereal Base:Ice Cream Layer:Optional Garnish:Directions for Crafting PB&J Cereal Ice Cream Sandwiches
Step 1: Prepare Workspace
Grab a baking sheet and line it with parchment paper.
Make sure your kitchen counter is clean and ready for delicious sandwich magic.
Step 2: Create Sticky Cereal Base
In a large mixing bowl, combine puffed cereal and creamy peanut butter.
Mix thoroughly until the cereal becomes coated and slightly sticky.
Use your hands or a spatula to ensure even coverage.
Step 3: Build First Cereal Layer
Spread half of the cereal-peanut butter mixture onto the prepared parchment-lined baking sheet.
Press down firmly and evenly to create a solid base layer that will hold everything together.
Step 4: Add Fruity Spread
Generously spread grape or strawberry jelly across the entire cereal base.
Make sure to cover the surface completely for maximum flavor impact.
Step 5: Layer Creamy Ice Cream
Scoop your favorite vanilla or strawberry ice cream directly onto the jelly layer.
Spread it smoothly and evenly to create a consistent ice cream surface.
Step 6: Top With Remaining Cereal Mixture
Carefully place the remaining cereal-peanut butter mixture on top of the ice cream.
Gently press down to create a complete sandwich structure.
Step 7: Chill and Set
Place the baking sheet in the freezer for at least 2 hours or preferably overnight.
This allows the ice cream to firm up and the layers to bond together perfectly.
Step 8: Slice and Serve
Remove the frozen treat from the freezer and slice into individual squares or rectangles.
Optional: Sprinkle colorful rainbow sprinkles on top for extra fun and visual appeal.
Enjoy immediately and savor the delightful combination of crunchy, sweet, and creamy textures!
Tips to Elevate Your PB&J Cereal Ice Cream Sandwiches
Storing & Reheating PB&J Ice Cream Sandwiches the Smart Way
Best Pairings for PB&J Ice Cream Sandwich Treats
PB&J Sandwich Variations That Kids Love
FAQs
Yes, you can substitute the puffed cereal with similar light, crispy cereals like rice puffs or corn puffs for a similar texture and crunch.
Homemade jam works great and can add a more authentic, fresh flavor, but store-bought jelly is perfectly fine and convenient for this recipe.
You can use wax paper or aluminum foil lightly greased with cooking spray to prevent sticking. Just ensure the surface is non-stick to easily remove the ice cream sandwiches.
Absolutely! You can prepare these sandwiches up to a week in advance and store them in the freezer, wrapped individually in plastic wrap to maintain their shape and prevent freezer burn.
Print
PB&J Puffed Cereal Ice Cream Sandwiches Recipe
- Total Time: 15 minutes
- Yield: 4 1x
Description
Nostalgic PB&J Puffed Cereal Ice Cream Sandwiches deliver childhood memories with a gourmet twist. Creamy peanut butter ice cream nestled between crispy cereal cookies will transport sweet tooths to delightful comfort food paradise.
Ingredients
Main Ingredients:
- 2 cups puffed cereal
- 1/2 cup natural peanut butter
- 1/2 cup jelly (strawberry or grape)
- 2 cups vanilla ice cream
Garnish:
- Sprinkles (optional)
Instructions
- Arrange all components within arm’s reach to streamline the preparation process.
- Thoroughly combine puffed cereal with peanut butter, ensuring a cohesive and slightly tacky texture that holds together effortlessly.
- Meticulously distribute half the cereal mixture across a parchment-lined baking sheet, creating a uniform, compact foundation.
- Delicately spread jelly over the cereal base, covering the surface with a smooth, even layer.
- Carefully position softened ice cream atop the jelly, allowing it to rest evenly across the initial cereal layer.
- Gently crown the ice cream with the remaining cereal mixture, pressing delicately to create a seamless sandwich structure.
- Transfer to the freezer for a minimum of 2 hours, or ideally overnight, until the entire creation becomes completely solidified.
- Remove from freezer and slice into clean, precise squares or rectangles using a sharp knife.
- Optional: Embellish with colorful sprinkles just before serving to add a playful, festive touch.
Notes
- Swap peanut butter for almond or sunflower seed butter to create a nut-free version perfect for school lunches or allergy-sensitive gatherings.
- Experiment with different jam flavors like raspberry, strawberry, or marmalade to customize the sandwich’s taste profile and add unexpected sweetness.
- Use low-sugar or sugar-free ice cream and jam options for a diabetic-friendly alternative that maintains the delightful texture and flavor combination.
- Crush extra cereal and sprinkle around the edges of the ice cream sandwich for added crunch and a more visually appealing presentation.
- Prep Time: 15 minutes
- Cook Time: 0 minutes
- Category: Desserts, Snacks
- Method: Freezing
- Cuisine: American
Nutrition
- Serving Size: 4
- Calories: 290
- Sugar: 18 g
- Sodium: 150 mg
- Fat: 13 g
- Saturated Fat: 4 g
- Unsaturated Fat: 8 g
- Trans Fat: 0 g
- Carbohydrates: 39 g
- Fiber: 2 g
- Protein: 7 g
- Cholesterol: 30 mg
Jack Sullivan
Founder & Culinary Storyteller
Expertise
Single-recipe development with a narrative approach, Culinary storytelling and food history, Seasonal and regional ingredient utilization, Home cooking techniques adapted for modern kitchens
Education
New England Culinary Institute (Montpelier, VT)
Certificate in Culinary Arts
Focused on farm-to-table cooking, sustainable practices, and modern plating techniques.
Asheville-Buncombe Technical Community College
Associate Degree in Culinary Arts
Emphasized Southern Appalachian cuisine and local ingredient sourcing.
Jack grew up surrounded by smoky skillets and handwritten recipes in the mountains of North Carolina. His roots in Appalachian cooking shaped the way he sees food – as something that connects people, tells a story, and holds meaning.
With hands-on training and a background in sustainable, regional cooking, Jack started Boil And Broil to make meaningful meals more accessible. He’s all about one-dish recipes that are simple to follow but rich with flavor and history.