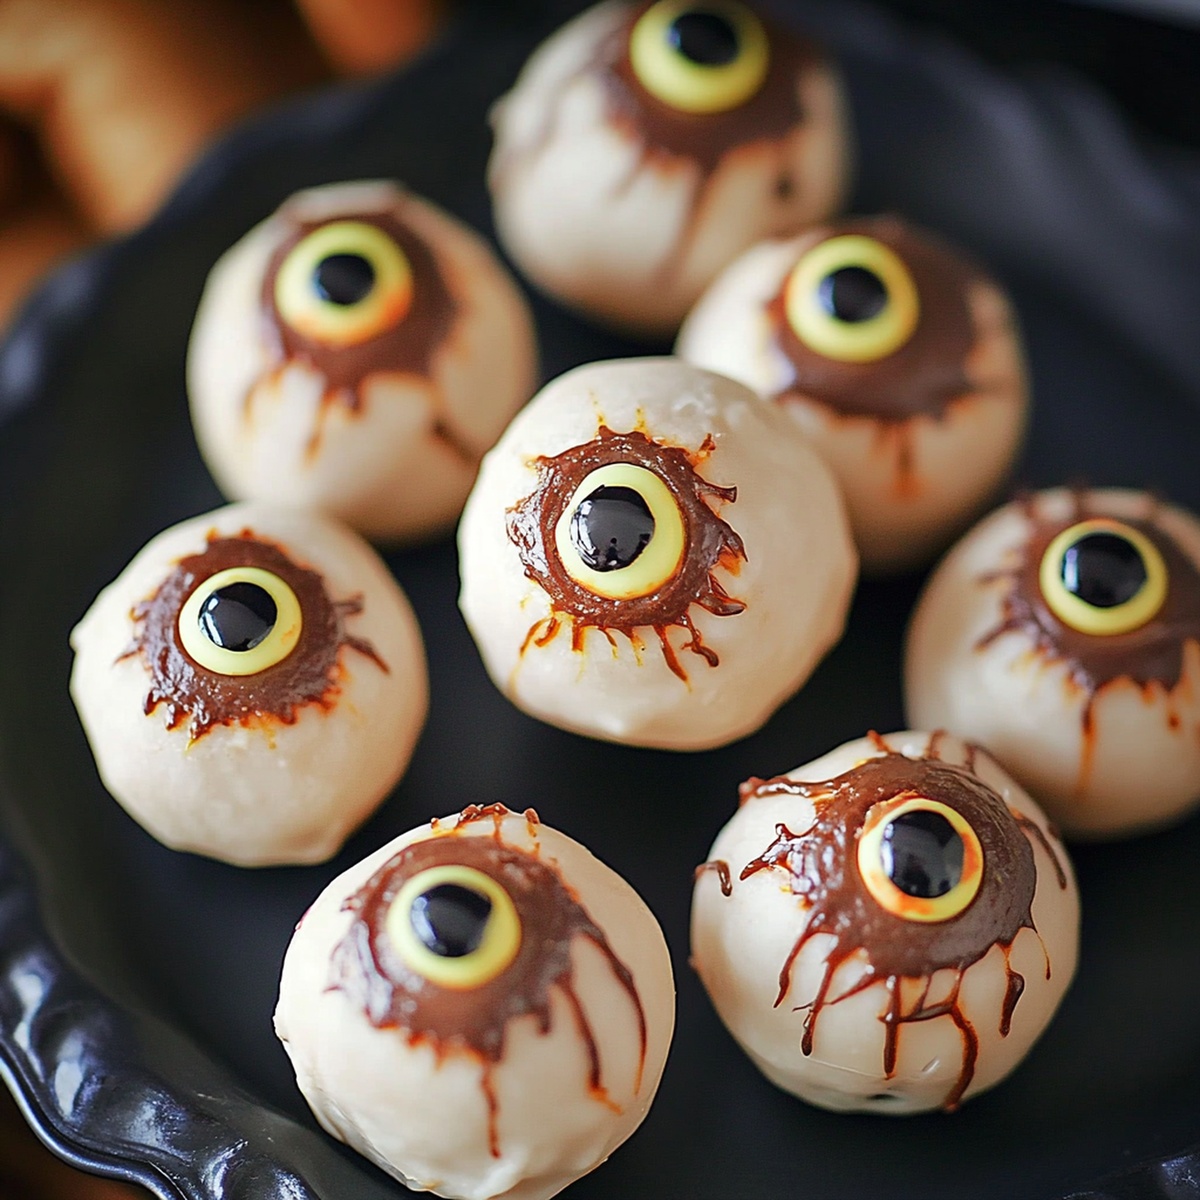
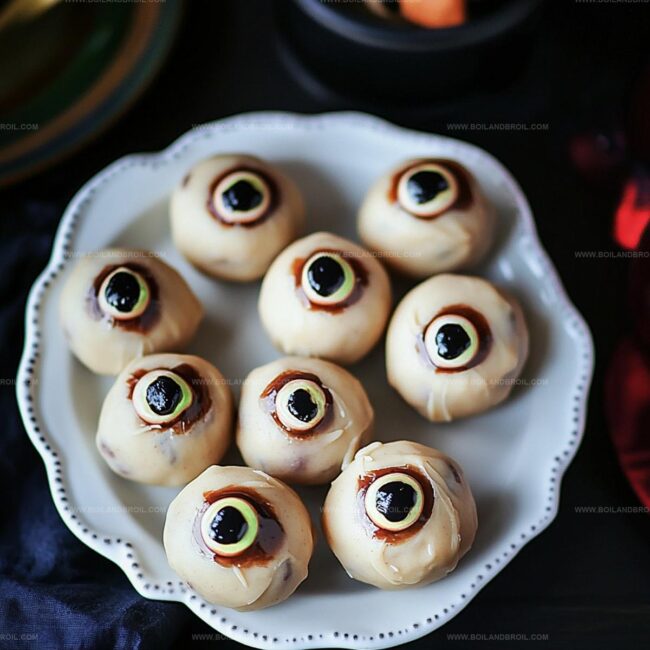
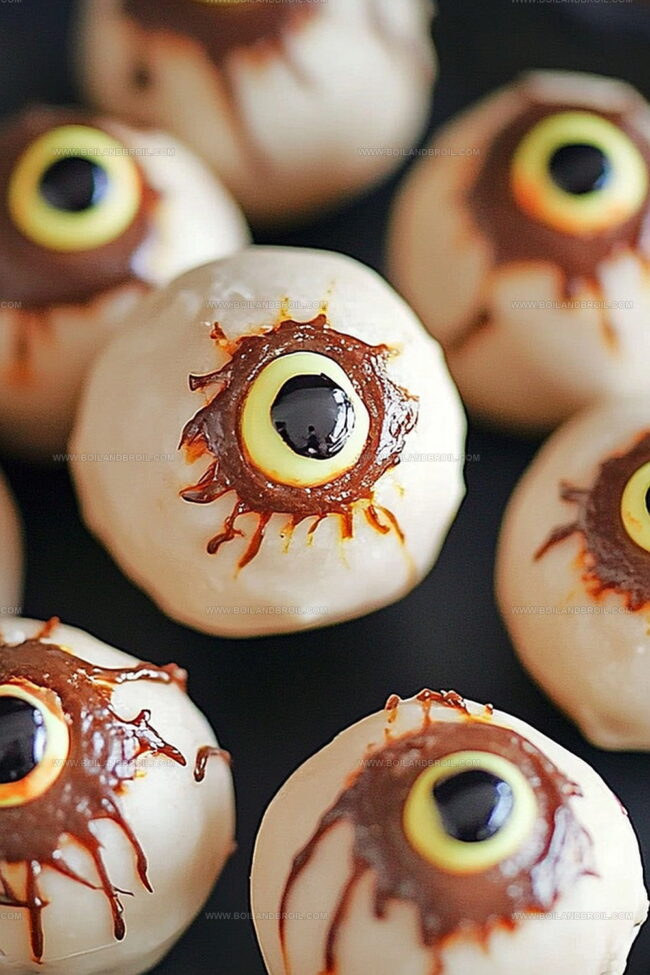
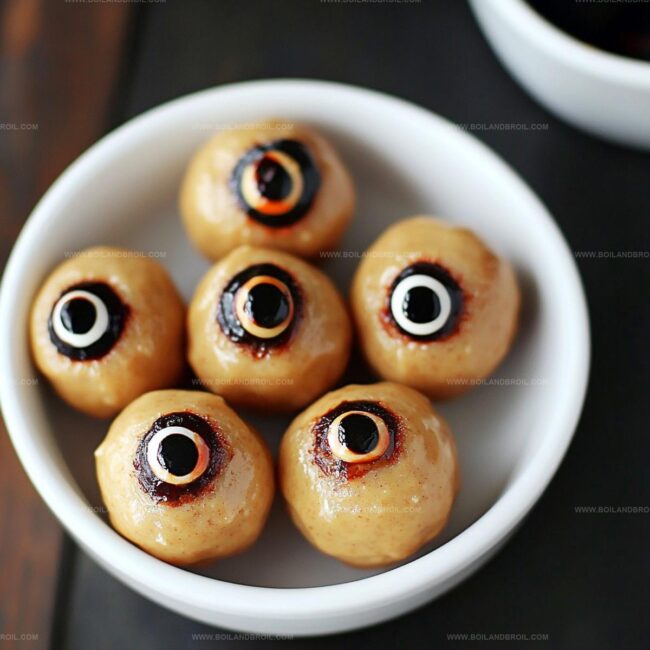
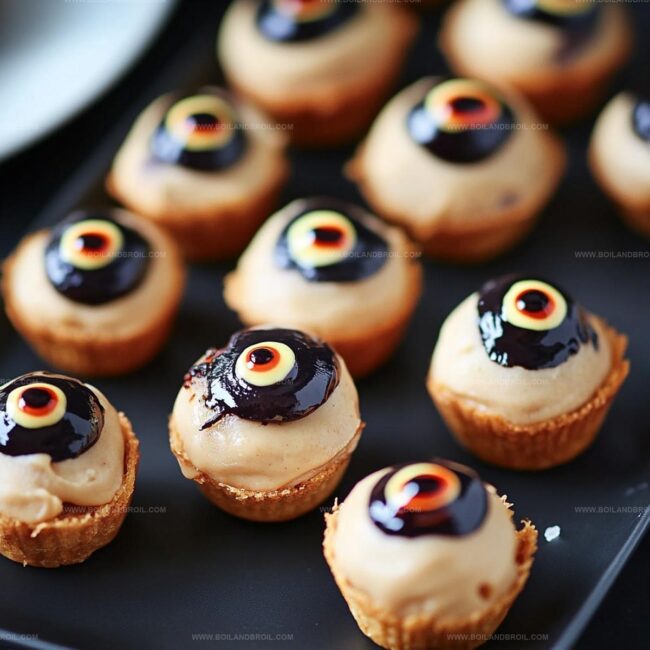
Crafting peanut butter Halloween eyeballs brings an unexpected twist to seasonal treats that will make everyone smile.
Creepy confections often intimidate home bakers, but this recipe simplifies spooky dessert creation.
Chocolate coatings and playful decorations turn simple ingredients into memorable Halloween sweets.
Kids adore helping shape these quirky candies, giggling as they roll smooth peanut butter mixtures into spherical shapes.
White candy melts create realistic eyeball surfaces while chocolate chips or candies craft striking pupils.
Small details like colored sprinkles or edible markers can enhance the ghoulish appearance.
You’ll impress party guests with these wickedly cute confections that combine humor and deliciousness in one bite.
Prepare to shock and delight with these wickedly awesome Halloween treats!
Peanut Butter Halloween Eyeballs Snapshot
Perfect for family bonding, this recipe lets children get creative with decorating and helps develop basic cooking skills while having a blast.
Designed for beginners, this recipe needs just basic mixing and dipping techniques, making it accessible for anyone wanting to create a festive Halloween treat.
Skip the complicated baking process with this simple, chilled dessert that comes together quickly and requires minimal kitchen equipment.
Ingredients for Halloween Eyeballs
Base Ingredients:
Peanut Butter: Creamy base that provides the main flavor and texture for the Halloween treats.
Butter: Softened dairy product that helps bind the filling together.
Powdered Sugar: Sweetens the peanut butter mixture and helps create a smooth consistency.
Vanilla Extract: Adds a subtle depth of flavor to the peanut butter filling.
Coating Ingredients:
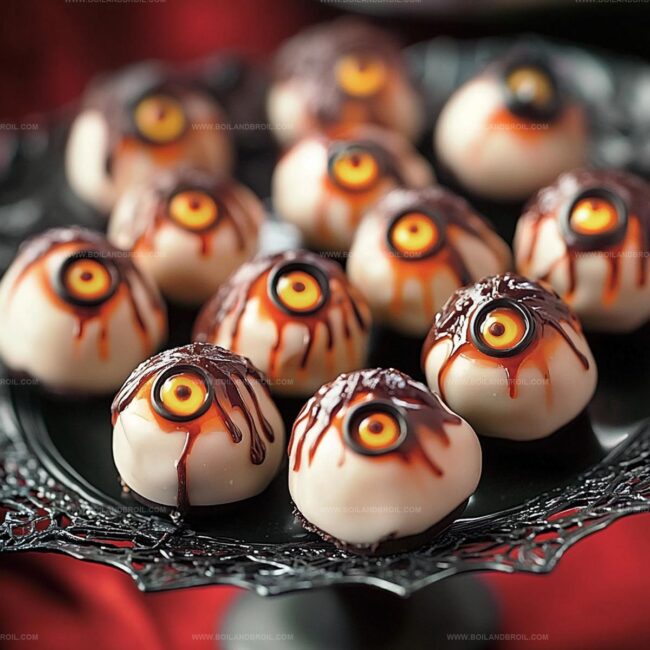
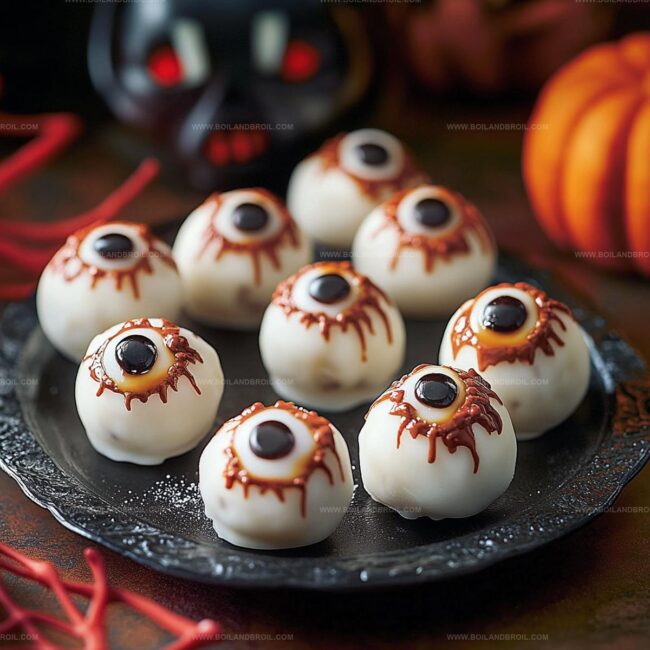
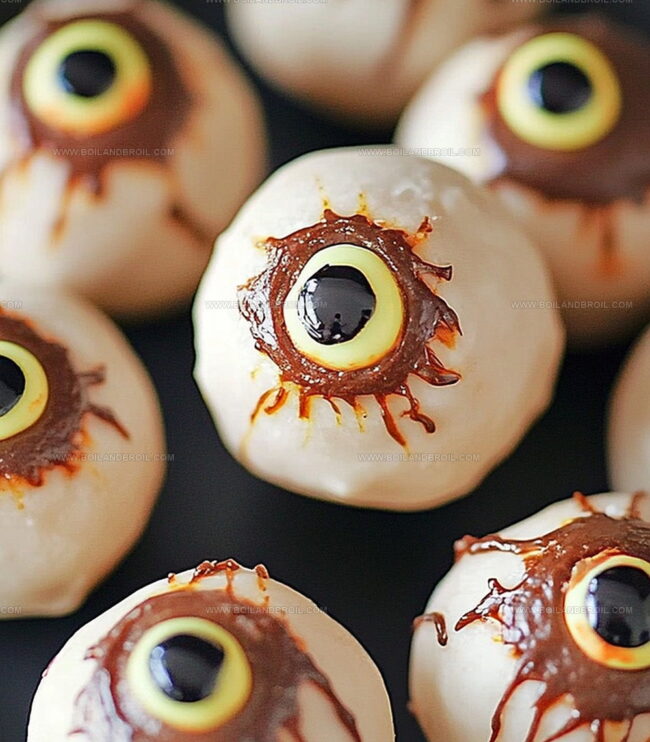
White Chocolate Chips: Provides a smooth, white coating that resembles the eyeball’s base.
Semi-Sweet Chocolate Chips: Creates the dark center and details of the Halloween eyeballs.
Decorative Ingredients:
Red Food Coloring, Black Food Coloring: Adds spooky veins and detailed effects to make the eyeballs look more realistic.
Mini Candy Eyeballs: Optional decorative element to enhance the Halloween theme.
Making Peanut Butter Halloween Eyeballs
Step 1: Whip Up the Creamy Filling
Grab a large mixing bowl and combine peanut butter, softened butter, vanilla extract, and powdered sugar.
Mix thoroughly until the ingredients transform into a smooth, moldable dough that holds together perfectly.
Step 2: Shape Perfectly Round Eyeballs
Roll the peanut butter mixture into small, uniform balls about the size of a golf ball.
Arrange these eerie spheres on a parchment-lined baking sheet.
Pop them into the refrigerator for a quick 30-minute chill to help them firm up.
Step 3: Melt the White Chocolate Coating
Use a microwave-safe bowl to gently melt white chocolate chips.
Heat in short 30-second bursts, stirring between each interval until the chocolate becomes silky smooth and fully liquefied.
Step 4: Dunk and Coat the Eyeballs
Use a fork or skewer to carefully dip each chilled peanut butter ball into the melted white chocolate.
Ensure complete coverage, allowing excess chocolate to drip off.
Return the coated balls to the parchment paper to set.
Step 5: Add Spine-Chilling Details
Melt semi-sweet chocolate chips for creating dramatic eye details.
Using a toothpick or piping bag, add:
A small dark chocolate dot for the pupil
Red food coloring for creepy veins
Optional mini candy eyeballs for extra terror
Step 6: Chill and Solidify
Place the decorated eyeballs in the refrigerator for 15-20 minutes.
This allows the chocolate coating to harden completely and intensifies their ghoulish appearance.
Step 7: Unleash the Spooky Treats
Remove from the refrigerator and serve these wickedly delicious peanut butter Halloween eyeballs that are sure to shock and delight your Halloween guests!
Recipe Tips for Halloween Eyeballs
Refrigerate peanut butter balls for at least 30 minutes to help them hold their shape and make chocolate dipping easier.
Melt chocolate slowly in short microwave intervals, stirring between each to prevent burning and achieve smooth, even coating.
Use a fork or skewer to smoothly dip balls into melted white chocolate, allowing excess to drip off for a clean, professional look.
Experiment with food coloring and different chocolate colors to create unique, realistic-looking eyeball designs that will surprise and entertain guests.
Store completed eyeballs in the refrigerator to maintain their shape and prevent chocolate from melting, ensuring they stay spooky and delicious.
How to Store Halloween Eyeballs
Store in an airtight container for up to 5 days. Keep between parchment paper layers to prevent sticking and maintain the delicate chocolate coating.
Wrap each eyeball individually in plastic wrap, then place in a freezer-safe container. Freeze for 2-3 months for long-term storage. Thaw in the refrigerator overnight before serving.
Keep in a cool, dry place for 1-2 days if serving soon. Avoid direct sunlight or warm areas to prevent chocolate from melting.
Skip reheating these treats. Enjoy them chilled straight from the refrigerator for the best texture and flavor. The chocolate coating and peanut butter filling are meant to be served cold.
Pairing Snacks for Halloween Eyeballs
Pair with Spooky Cocktails: Mix blood-orange martinis or vampire-red sangria to complement the Halloween theme and add a festive adult beverage experience.
Serve with Creepy Sides: Arrange monster-themed fruit skewers or zombie-green guacamole dip to enhance the Halloween eyeball dessert presentation and create a cohesive spooky spread.
Match with Haunting Beverages: Brew dark hot chocolate or create blackberry witch’s brew mocktails that mirror the dessert’s playful and eerie aesthetic for all-ages enjoyment.
Combine with Ghoulish Appetizers: Plate alongside savory finger foods like mummy hot dogs or spider web cheese platters to create a full Halloween-themed menu that delights guests.
Creative Eyeball Variations
Gluten-Free Version: Replace powdered sugar with powdered erythritol or monk fruit sweetener, ensuring all ingredients are certified gluten-free.
Vegan Halloween Eyeballs: Swap butter with coconut oil, use vegan white chocolate chips, and substitute peanut butter with sunflower seed butter for allergen-friendly option.
Low-Sugar Halloween Treat: Use sugar-free white chocolate chips, replace powdered sugar with stevia or monk fruit sweetener, maintaining the creepy eyeball aesthetic.
Nut-Free Alternative: Substitute peanut butter with sunflower seed butter or soy nut butter, keeping the same molding and decorating technique for a safe Halloween snack.
FAQs
Why are these called Halloween Eyeballs?
These treats look like realistic eyeballs with white chocolate coating, dark chocolate center, and red food coloring veins, making them perfectly creepy for Halloween parties and spooky celebrations.
Can kids help make these eyeballs?
Yes! Kids can help roll the peanut butter balls, dip them in chocolate, and add decorative details like food coloring and candy eyes. It’s a fun, creative Halloween activity for the whole family.
How long do these Halloween Eyeballs stay fresh?
When stored in an airtight container in the refrigerator, these peanut butter eyeballs will stay fresh for up to 7 days. Just make sure to keep them chilled to maintain their shape and texture.
Are these eyeballs gluten-free?
While the recipe ingredients appear naturally gluten-free, always check your specific peanut butter, chocolate chips, and powdered sugar brands to confirm they are certified gluten-free if this is a dietary concern.
Developing accessible single-serving recipes, Food writing and content creation, Plant-based and allergen-friendly cooking, Culinary education and workshop facilitation
Education
Oregon Culinary Institute (Portland, OR) Diploma in Culinary Arts
Specialized in plant-based cooking and sustainable kitchen practices.
Portland Community College Certificate in Food Writing and Media
Focused on recipe writing, food photography, and digital content creation.
Clara’s food journey began with a curiosity for color, texture, and ingredients pulled straight from the garden. Her background in plant-forward cooking and creative writing gives her a unique edge – she makes healthy, flavorful food feel inviting, not intimidating.
She specializes in meals that work for busy lives and different diets, all without sacrificing taste. Clara’s voice comes through in every recipe she writes – clear, kind, and encouraging.

Clara Thompson
Recipe Developer & Culinary Educator
Expertise
Developing accessible single-serving recipes, Food writing and content creation, Plant-based and allergen-friendly cooking, Culinary education and workshop facilitation
Education
Oregon Culinary Institute (Portland, OR)
Diploma in Culinary Arts
Specialized in plant-based cooking and sustainable kitchen practices.
Portland Community College
Certificate in Food Writing and Media
Focused on recipe writing, food photography, and digital content creation.
Clara’s food journey began with a curiosity for color, texture, and ingredients pulled straight from the garden. Her background in plant-forward cooking and creative writing gives her a unique edge – she makes healthy, flavorful food feel inviting, not intimidating.
She specializes in meals that work for busy lives and different diets, all without sacrificing taste. Clara’s voice comes through in every recipe she writes – clear, kind, and encouraging.