
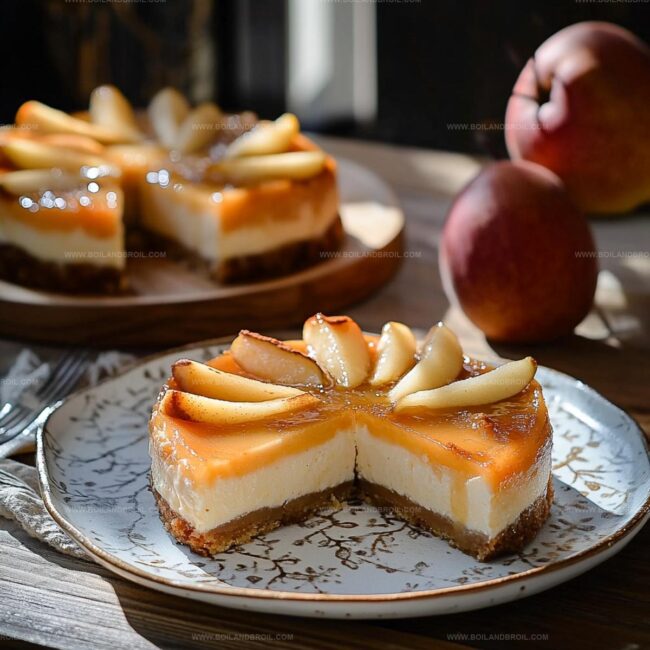
The Ultimate Pear Mousse Cheesecake Bars Recipe for Sweet Lovers
Delectable pear mousse cheesecake bars promise a silky smooth adventure for dessert enthusiasts.
Sweet orchards of italy inspire this delightful treat with ripe, juicy notes.
creamy layers meld together in a harmonious dance of textures and flavors.
Delicate fruit whispers elegance through each decadent bite.
Smooth cream cheese provides a luxurious foundation for the pear gentle sweetness.
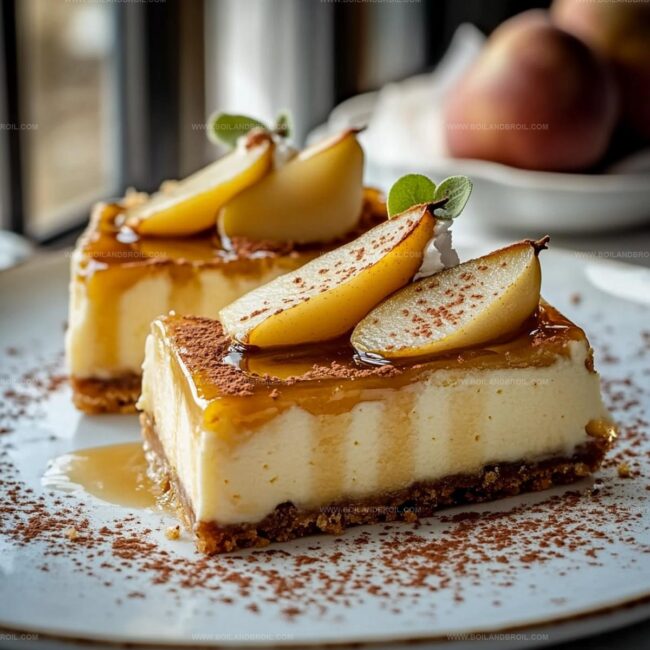
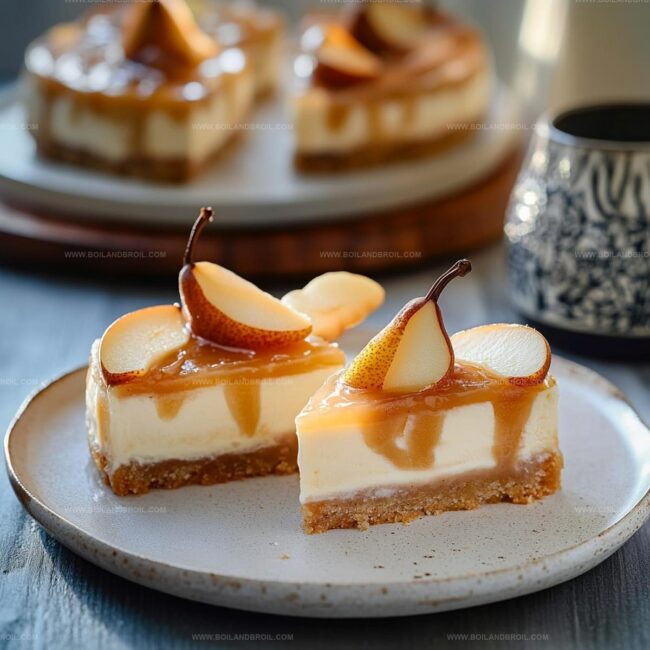
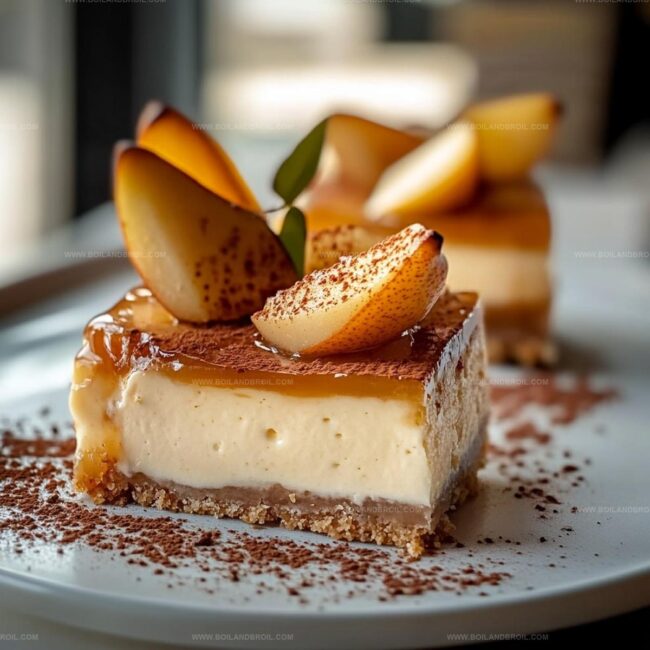
Crumbly graham cracker base adds a satisfying crunch that complements the airy mousse.
You’ll want to savor every single mouthwatering morsel of this irresistible dessert.
Pear Mousse Cheesecake Bars with Fruity Creaminess
What You Need for Pear Mousse Cheesecake Bars
Crust:Cheesecake Layer:Pear Mousse Layer:Pear Mousse Cheesecake Bars in Easy Steps
Step 1: Prepare the Oven and Pan
Warm up your oven to 325°F.
Grab a 9×9-inch baking dish and line it with parchment paper or give it a light coating of cooking spray.
This will make your bars easy to remove later.
Step 2: Create the Crunchy Crust
Grab a mixing bowl and combine:Mix everything until it looks like wet sand.
Press this mixture firmly into the bottom of your prepared pan.
Slide it into the oven and bake for 8-10 minutes until it looks slightly golden.
Pull it out and let it cool completely.
Step 3: Whip Up the Creamy Cheesecake Layer
Take a large mixing bowl and grab your electric mixer.
Beat the cream cheese until it’s silky smooth.
Add in:Blend everything until the mixture is completely smooth and free of lumps.
Pour this dreamy mixture over the cooled crust and smooth the top with a spatula.
Step 4: Bake the Cheesecake Base
Bake the cheesecake for 25-30 minutes.
You want the center to look set but still have a slight jiggle.
Let it cool down to room temperature, then pop it in the refrigerator for at least 2 hours.
Step 5: Craft the Pear Mousse Topping
In a small bowl, sprinkle gelatin over water and let it sit for 5 minutes.
While waiting, blend fresh pears into a silky puree.
In a saucepan, gently heat:Stir until the sugar melts completely.
Add the gelatin and mix until it dissolves.
Take it off the heat and cool slightly.
Stir in:Step 6: Layer and Chill
Pour the pear mousse over the chilled cheesecake layer.
Use a spatula to spread it evenly.
Refrigerate for at least 4 hours or overnight for the best texture.
Step 7: Serve and Enjoy
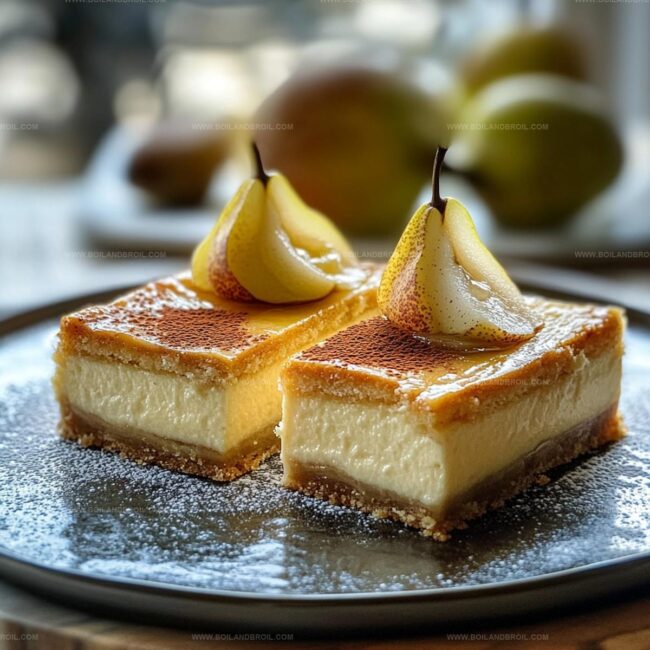
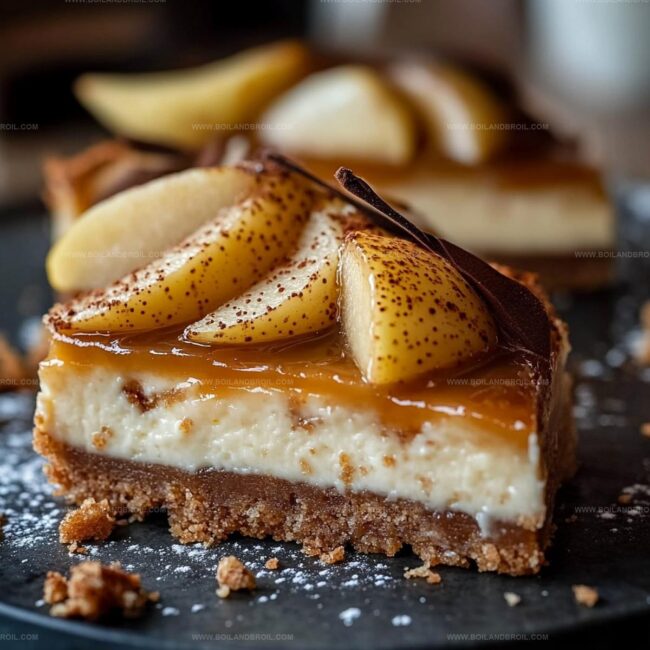
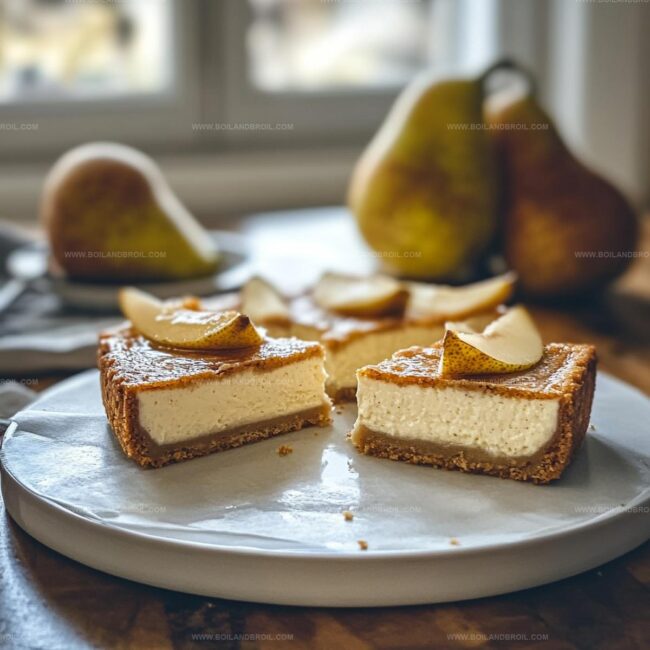
Once the bars are completely set, slice them into perfect squares.
For an extra touch, garnish with thin pear slices or a light sprinkle of cinnamon.
Serve chilled and watch everyone swoon!
Tips for Light and Creamy Pear Mousse Cheesecake Bars
Storage and Reheat for Pear Mousse Cheesecake Bars
Pairing Suggestions for Pear Mousse Cheesecake Bars
Fun Twists on Pear Mousse Cheesecake Bars
FAQs
Fresh pears are blended into a smooth puree and combined with gelatin, heavy cream, and a touch of lemon juice, creating a light, airy mousse with natural fruit flavor and silky texture.
Not at all! The recipe requires basic baking skills like mixing, blending, and using an electric mixer. Each layer is straightforward and can be prepared step by step with clear instructions.
Fresh pears are recommended for the best flavor and texture. Canned pears might be too soft and watery, which could affect the mousse’s consistency and overall taste of the dessert.
The cheesecake needs at least 2 hours to chill, and the pear mousse layer requires an additional 4 hours or overnight for the best set and flavor development.
Print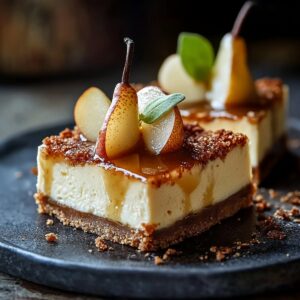
Pear Mousse Cheesecake Bars Recipe
- Total Time: 1 hour 10 minutes
- Yield: 12 1x
Description
Smooth pear mousse cheesecake bars blend creamy richness with delicate autumn fruit essence. Silky layers of sweet and tangy flavors invite dessert enthusiasts to savor a delightful culinary experience that lingers gracefully on the palate.
Ingredients
Crust:
- 1.5 cups graham cracker crumbs
- 1/4 cup (50 grams) granulated sugar
- 1/2 cup (113 grams) unsalted butter, melted
Cheesecake Layer:
- 16 ounces (454 grams) cream cheese, softened
- 1/2 cup (120 milliliters) sour cream
- 1/2 cup (100 grams) granulated sugar
- 2 large eggs, room temperature
- 1 teaspoon vanilla extract
- 1/4 teaspoon salt
Pear Mousse Layer:
- 1.5 cups (375 milliliters) ripe pear, pureed (about 2 medium pears)
- 1/2 cup (120 milliliters) heavy cream
- 1/2 cup (100 grams) granulated sugar
- 1 tablespoon gelatin powder
- 1/4 cup (60 milliliters) water
- 1 teaspoon lemon juice
- 1/2 teaspoon vanilla extract
Instructions
- Prepare the oven to 325F (163C) and line a 9-inch baking dish with parchment paper, ensuring edges are fully covered for easy removal.
- Combine graham cracker crumbs, sugar, and melted butter in a bowl until uniformly moistened. Press the mixture firmly into the pan’s bottom, creating a compact base. Bake for 8-10 minutes until lightly golden, then remove and allow to cool completely.
- Using an electric mixer, whip cream cheese until silky and smooth. Gradually incorporate sour cream, sugar, eggs, vanilla extract, and salt, mixing until the filling achieves a consistent, velvety texture. Gently spread the mixture over the cooled crust, ensuring an even surface.
- Bake the cheesecake layer for 25-30 minutes, watching for a slightly jiggly center that indicates perfect doneness. Transfer to a cooling rack and refrigerate for minimum 2 hours to set thoroughly.
- Sprinkle gelatin over water and let hydrate for 5 minutes. Puree fresh pears until completely smooth. Warm heavy cream and sugar in a saucepan over low heat, stirring until sugar dissolves. Integrate the gelatin mixture, ensuring complete dissolution. Remove from heat and fold in pear puree, lemon juice, and vanilla extract.
- Carefully pour the pear mousse over the chilled cheesecake layer, using a spatula to distribute evenly. Refrigerate for 4-6 hours or overnight to achieve optimal setting and flavor melding.
- Once fully chilled and set, slice into elegant bars. Optionally accent with delicate pear slivers or a light cinnamon dusting for an elevated presentation.
Notes
- Opt for ripe, soft pears to ensure a smooth, flavorful mousse that blends seamlessly into the cheesecake layers.
- Chill ingredients like cream cheese and eggs beforehand to help achieve a smoother, lump-free filling.
- Use room temperature cream cheese to prevent lumps and create a silky-smooth cheesecake texture.
- Wrap the baking pan in aluminum foil to prevent water from seeping in during baking, ensuring a perfectly set cheesecake base.
- Substitute graham crackers with gluten-free alternatives like almond flour or gluten-free cookie crumbs for a celiac-friendly version.
- Reduce sugar content by using natural sweeteners like stevia or monk fruit for a lower-calorie dessert option.
- Prep Time: 30 minutes
- Cook Time: 40 minutes
- Category: Desserts
- Method: Baking
- Cuisine: American
Nutrition
- Serving Size: 12
- Calories: 290
- Sugar: 22 g
- Sodium: 150 mg
- Fat: 18 g
- Saturated Fat: 10 g
- Unsaturated Fat: 7 g
- Trans Fat: 0 g
- Carbohydrates: 30 g
- Fiber: 1 g
- Protein: 4 g
- Cholesterol: 60 mg
Jack Sullivan
Founder & Culinary Storyteller
Expertise
Single-recipe development with a narrative approach, Culinary storytelling and food history, Seasonal and regional ingredient utilization, Home cooking techniques adapted for modern kitchens
Education
New England Culinary Institute (Montpelier, VT)
Certificate in Culinary Arts
Focused on farm-to-table cooking, sustainable practices, and modern plating techniques.
Asheville-Buncombe Technical Community College
Associate Degree in Culinary Arts
Emphasized Southern Appalachian cuisine and local ingredient sourcing.
Jack grew up surrounded by smoky skillets and handwritten recipes in the mountains of North Carolina. His roots in Appalachian cooking shaped the way he sees food – as something that connects people, tells a story, and holds meaning.
With hands-on training and a background in sustainable, regional cooking, Jack started Boil And Broil to make meaningful meals more accessible. He’s all about one-dish recipes that are simple to follow but rich with flavor and history.