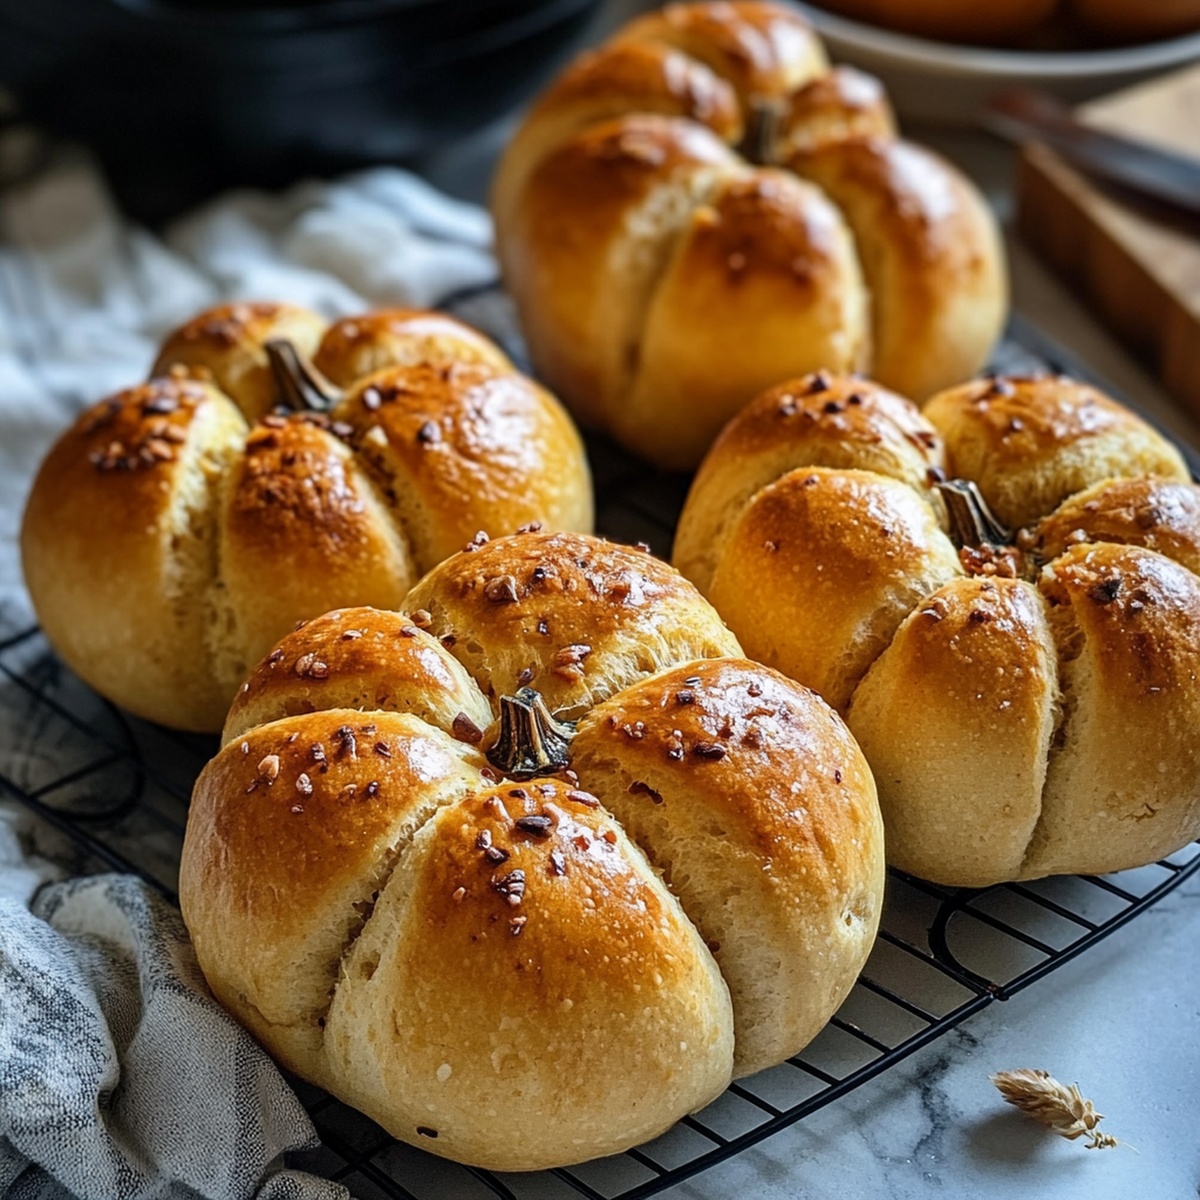
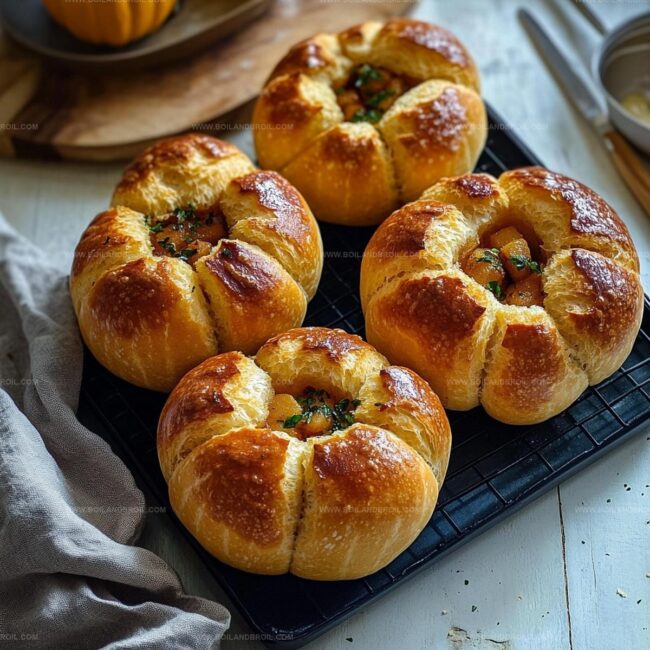
Crafting delightful pumpkin shaped bread bowls brings a touch of autumn magic to your table.
Seasonal creativity transforms ordinary meals into memorable experiences.
Warm, crusty exteriors give way to soft, inviting interiors that spark conversation.
Friends and family will marvel at your culinary artistry.
Rustic charm meets elegant presentation in these edible vessels.
Simple ingredients become extraordinary with a dash of imagination.
Come explore this playful recipe that turns dinner into a festive celebration.
Pumpkin Bread Bowls Rundown
Transform ordinary bread into adorable pumpkin-shaped vessels that capture autumn’s magical essence with minimal effort.
Perfect for bakers of all skill levels, this recipe requires basic ingredients and simple techniques anyone can master without professional training.
Impress guests at fall gatherings, Halloween parties, or cozy family dinners by serving soups and dips in these playful, edible bread bowls that double as festive table decor.
Engage children in a fun kitchen activity where they can help tie twine and create pumpkin shapes, making bread-making an interactive and memorable experience.
Ingredients for Pumpkin Bread Bowls
Main Ingredients:
Flour: The key ingredient that provides structure and texture to the pumpkin bread bowls.
Water: Essential liquid that activates the yeast and helps form the dough.
Yeast: Living microorganism that causes the dough to rise and develop a light, airy texture.
Sugar: Feeds the yeast and adds a subtle sweetness to the bread.
Binding Ingredients:
Olive Oil: Adds moisture and helps create a soft, tender bread texture.
Salt: Enhances the overall flavor of the bread and helps control yeast activity.
Decorative and Finishing Ingredients:
Egg: Creates a golden-brown sheen when brushed on the bread surface.
Kitchen Twine: Used to create the distinctive pumpkin-like sections in the bread.
Pretzel Stick, Green Food Coloring: Optional ingredients to create a realistic pumpkin stem effect.
How to Make Pumpkin Bread Bowls
Step 1: Awaken the Yeast
Mix warm water, sugar, and yeast in a large mixing bowl.
Let the mixture rest and become frothy, allowing the yeast to activate and create a bubbly surface.
Gently stir in olive oil and salt to build depth of flavor.
Gradually incorporate flour, kneading the dough until it becomes smooth and elastic.
The dough should feel soft and supple under your hands.
Cover the bowl and let it rise in a warm spot until it doubles in size, creating a puffy and light texture.
Step 2: Shape Pumpkin-Like Bread
Deflate the risen dough by pressing down gently.
Divide the dough into six equal portions.
Roll each piece into a round ball.
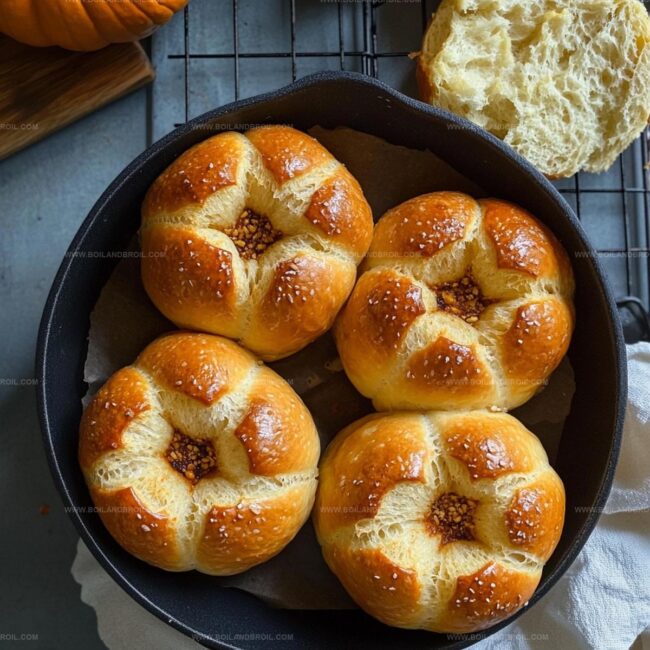
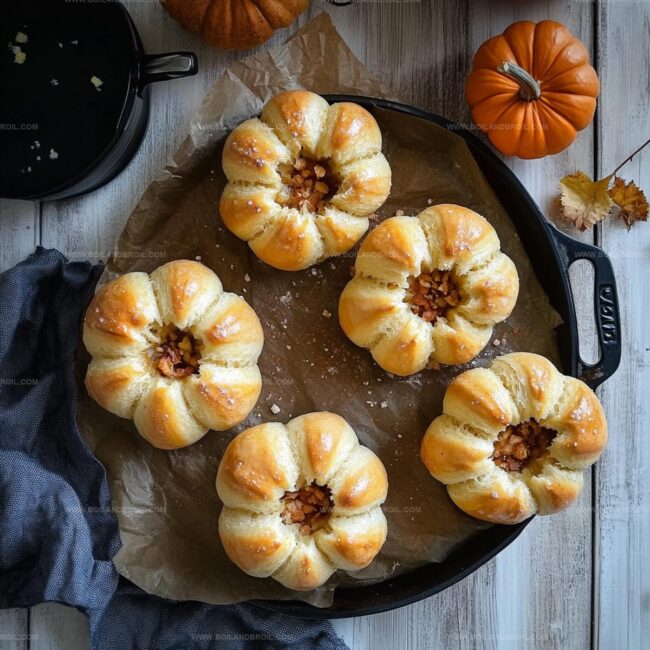
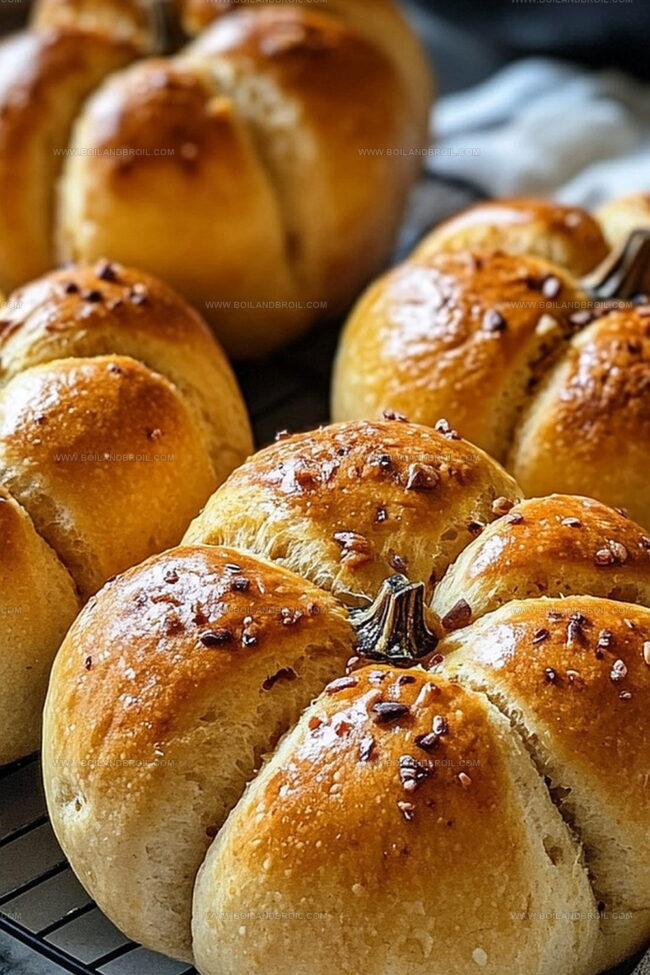
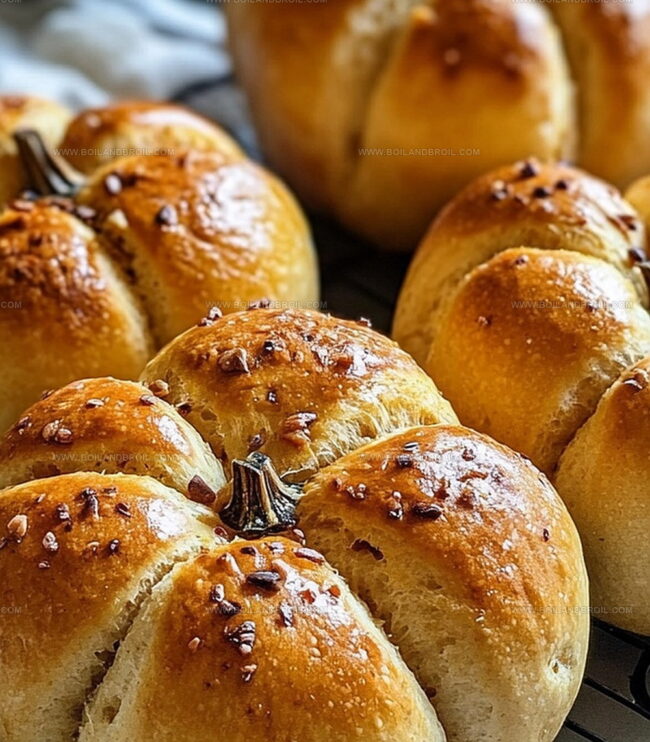
Wrap kitchen twine around each dough ball, creating eight distinct sections to mimic a pumpkin’s unique shape.
Be gentle and avoid pulling the twine too tightly to maintain the bread’s delicate structure.
Step 3: Prepare for Baking
Place the twine-wrapped dough balls on a parchment-lined baking sheet.
Cover with a damp towel and allow them to rise for an additional 30 minutes.
This second rise helps develop a light, airy texture.
Step 4: Bake to Golden Perfection
Heat the oven to 375F (190C).
Brush each dough ball with egg wash to create a beautiful golden sheen.
Bake until the bread turns a rich, warm brown color, approximately 20-25 minutes.
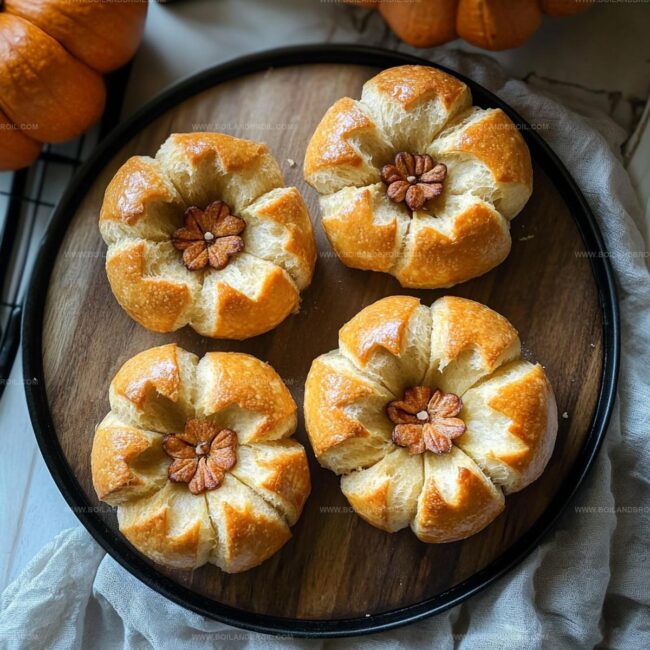
Step 5: Add Charming Stems
After baking, let the bread bowls cool slightly.
Carefully remove the kitchen twine.
Insert a pretzel stick into the center of each bread bowl to create a whimsical pumpkin stem.
For an extra touch of creativity, dip the pretzel sticks in green food coloring to enhance the pumpkin-like appearance.
Step 6: Serve and Enjoy
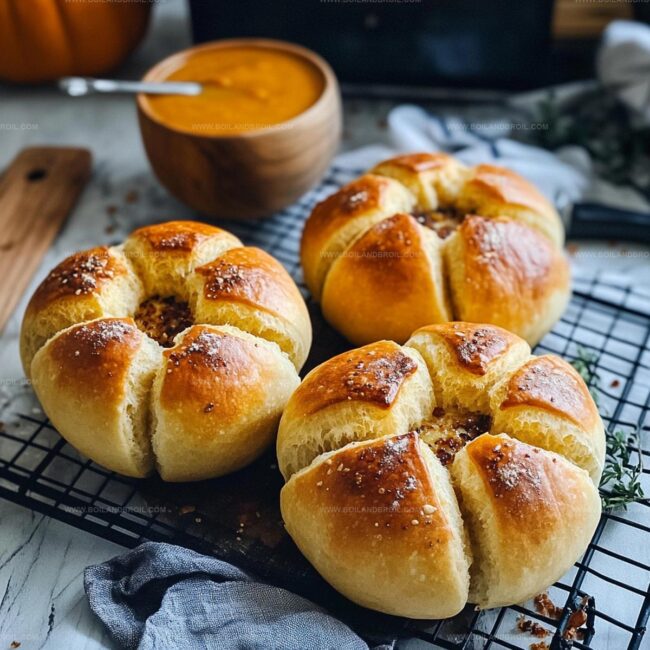
Slice off the top of each bread bowl and hollow out the center.
Fill with your favorite soup, chili, or dip.
These edible pumpkin vessels are perfect for autumn gatherings and will delight guests with their playful design and delicious flavor.
Tips for Pumpkin Bread Bowl Perfection
Ensure water is lukewarm (not hot) to prevent killing yeast, creating perfect frothy base for soft, fluffy bread bowls.
Knead consistently for 7-10 minutes to develop gluten, resulting in smooth, elastic texture that creates beautiful pumpkin-shaped bread.
Tie kitchen twine loosely to avoid compressing dough, allowing bread to maintain its distinctive rounded pumpkin silhouette during baking.
Use pretzel sticks for authentic pumpkin stems, optionally adding green food coloring for a more festive, seasonal appearance.
Experiment with different soup fillings or use as decorative centerpiece for autumn-themed gatherings and dinner parties.
Reheating and Storage for Pumpkin Bread Bowls
Store cooled pumpkin bread bowls in an airtight container for 3-4 days. Wrap individually in plastic wrap to maintain moisture and prevent drying out.
Place completely cooled bread bowls in freezer-safe bags, removing excess air. Freeze up to 2 months. Thaw at room temperature for 1-2 hours before serving.
Warm bread bowls at 300F (150C) for 5-7 minutes. Wrap in aluminum foil to prevent further browning and retain softness.
Warm individual bread bowls for 15-20 seconds on medium power. Check frequently to avoid toughening the bread’s texture.
Pairing Suggestions for Pumpkin Bread Bowls
Pair with Creamy Autumn Soup: Ladle rich, velvety butternut squash or creamy tomato bisque inside these adorable pumpkin bread bowls for a cozy, comforting meal that celebrates seasonal flavors.
Complement with Spiced Mulled Cider: Serve a warm, fragrant apple cider infused with cinnamon sticks, cloves, and orange zest that perfectly matches the rustic, hearty bread bowls and enhances the autumnal spirit.
Match with Harvest Salad: Create a crisp side salad featuring mixed greens, roasted pecans, crumbled goat cheese, and a light maple vinaigrette to balance the bread’s richness and add fresh, bright notes to the plate.
Enhance with Craft Beer Pairing: Select a malty amber ale or pumpkin-spiced craft beer that echoes the bread’s warm, slightly sweet character and provides a robust drinking companion to the meal.
Fun Styles for Pumpkin Bread Bowls
Gluten-Free Pumpkin Bread Bowls: Replace wheat flour with a gluten-free blend of rice flour, almond flour, and xanthan gum for a celiac-friendly version.
Whole Wheat Hearty Option: Substitute half the all-purpose flour with whole wheat flour to boost fiber and create a more nutritious bread bowl.
Vegan Pumpkin Vessel: Use plant-based milk instead of water, swap olive oil for coconut oil, and replace egg wash with plant milk mixed with maple syrup for a dairy-free alternative.
Low-Carb Cauliflower Bread Bowl: Create the structure using cauliflower-based dough with almond flour, eggs, and cheese as a keto-friendly replacement for traditional bread bowls.
FAQs
Why use kitchen twine for shaping the dough?
Kitchen twine helps create the distinctive pumpkin-like ridges and sections on the bread, giving it an authentic pumpkin appearance without affecting the bread’s internal structure or texture.
Can I make the dough ahead of time?
Yes, you can prepare the dough a day in advance. After the first rise, cover and refrigerate overnight. Remove from the refrigerator 30 minutes before shaping to let it come to room temperature.
How do I know the dough has risen properly?
The dough should double in size and feel light and airy when touched. When you gently press the dough with a finger, it should slowly spring back, leaving a slight indentation.
Is there a substitute for pretzel sticks for the stem?
You can use cinnamon sticks, small pieces of dried rosemary stems, or even a short piece of brown breadstick as an alternative to pretzel sticks for creating the pumpkin stem.
Developing accessible single-serving recipes, Food writing and content creation, Plant-based and allergen-friendly cooking, Culinary education and workshop facilitation
Education
Oregon Culinary Institute (Portland, OR) Diploma in Culinary Arts
Specialized in plant-based cooking and sustainable kitchen practices.
Portland Community College Certificate in Food Writing and Media
Focused on recipe writing, food photography, and digital content creation.
Clara’s food journey began with a curiosity for color, texture, and ingredients pulled straight from the garden. Her background in plant-forward cooking and creative writing gives her a unique edge – she makes healthy, flavorful food feel inviting, not intimidating.
She specializes in meals that work for busy lives and different diets, all without sacrificing taste. Clara’s voice comes through in every recipe she writes – clear, kind, and encouraging.
Clara Thompson
Recipe Developer & Culinary Educator
Expertise
Developing accessible single-serving recipes, Food writing and content creation, Plant-based and allergen-friendly cooking, Culinary education and workshop facilitation
Education
Oregon Culinary Institute (Portland, OR)
Diploma in Culinary Arts
Specialized in plant-based cooking and sustainable kitchen practices.
Portland Community College
Certificate in Food Writing and Media
Focused on recipe writing, food photography, and digital content creation.
Clara’s food journey began with a curiosity for color, texture, and ingredients pulled straight from the garden. Her background in plant-forward cooking and creative writing gives her a unique edge – she makes healthy, flavorful food feel inviting, not intimidating.
She specializes in meals that work for busy lives and different diets, all without sacrificing taste. Clara’s voice comes through in every recipe she writes – clear, kind, and encouraging.