
The Ultimate Rainbow Oreo Cheesecake Drip Cake Recipe
Crafting a jaw-dropping rainbow Oreo cheesecake drip cake can turn any ordinary afternoon into a spectacular celebration of color and flavor.
Sweet layers shimmer with vibrant hues that dance across each delectable slice.
Creamy textures blend seamlessly with crunchy Oreo cookie bits, creating a dessert that looks almost too beautiful to devour.
Pastel and bright tones swirl together in a mesmerizing pattern that will make guests stop and stare.
Baking this masterpiece requires patience and a playful spirit, but the result is absolutely worth every moment of effort.
Imagine the delighted gasps when you unveil this stunning confection at your next gathering.
You cannot wait to start mixing, layering, and decorating this incredible dessert that promises to be the ultimate showstopper.
Rainbow Oreo Cheesecake Delight Guide
Ingredients for Rainbow Oreo Cheesecake Delight
Crust Ingredients:Cheesecake Filling Ingredients:Decoration and Coloring Ingredients:Baking Rainbow Oreo Cheesecake Delight
Step 1: Craft the Delectable Base
Warm up your oven to 350F.
Crush Oreo cookies into fine crumbs and blend with melted butter until perfectly combined.
Press this delightful mixture into the bottom of a springform pan, creating a solid foundation.
Bake for 10 minutes, then set aside to cool completely.
Step 2: Whip Up Creamy Goodness
Beat cream cheese until silky smooth in a large mixing bowl.
Gradually incorporate powdered sugar and vanilla extract, blending until wonderfully combined.
In a separate bowl, whip heavy cream until it forms luxurious stiff peaks.
Gently fold the whipped cream into the cream cheese mixture, creating a cloud-like filling.
Step 3: Paint with Vibrant Colors
Divide the cheesecake mixture into six separate bowls.
Add a few drops of food coloring to each bowl:Stir each bowl until the colors are rich and even throughout.
Step 4: Create Colorful Layers
Carefully spoon the colored cheesecake mixtures into the pan, starting with purple and ending with red.
Use a spatula to spread each layer evenly, creating a stunning rainbow effect.
Step 5: Chill and Set
Cover the cheesecake with plastic wrap and refrigerate for at least 4 hours.
The cake needs to become firm and set completely.
Step 6: Prepare Luxurious Drizzle
Melt white chocolate chips with a touch of vegetable oil in the microwave.
Heat in 30-second intervals, stirring between each interval until smooth and glossy.
Allow the mixture to cool slightly.
Step 7: Unveil and Drip
Carefully remove the cheesecake from the springform pan.
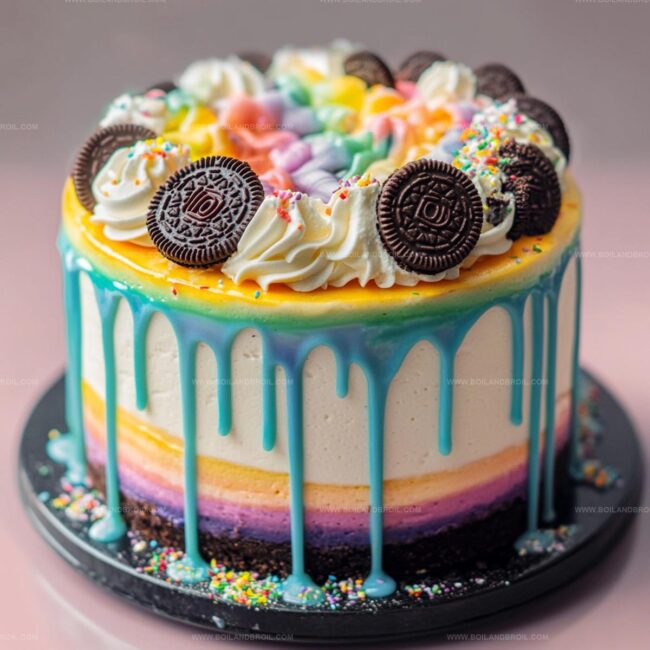
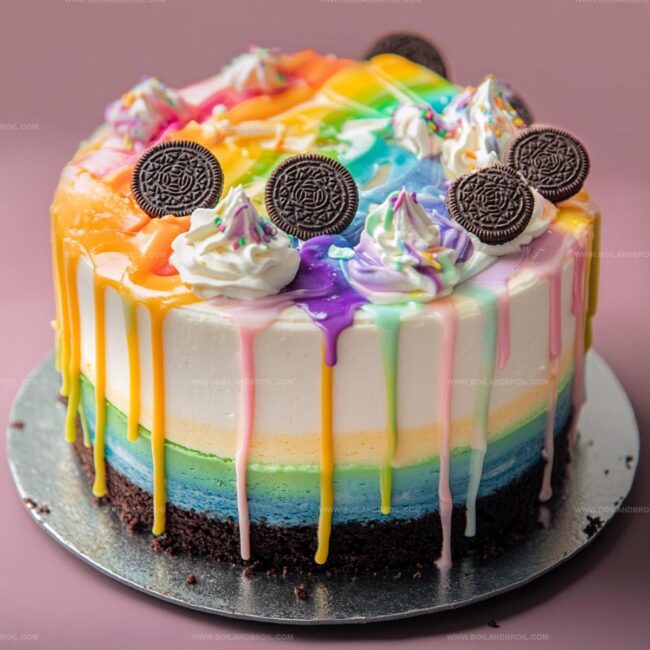
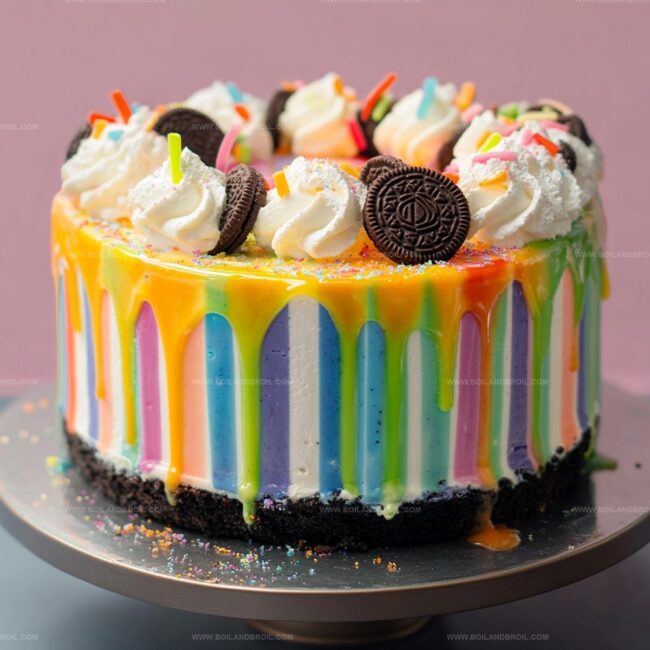
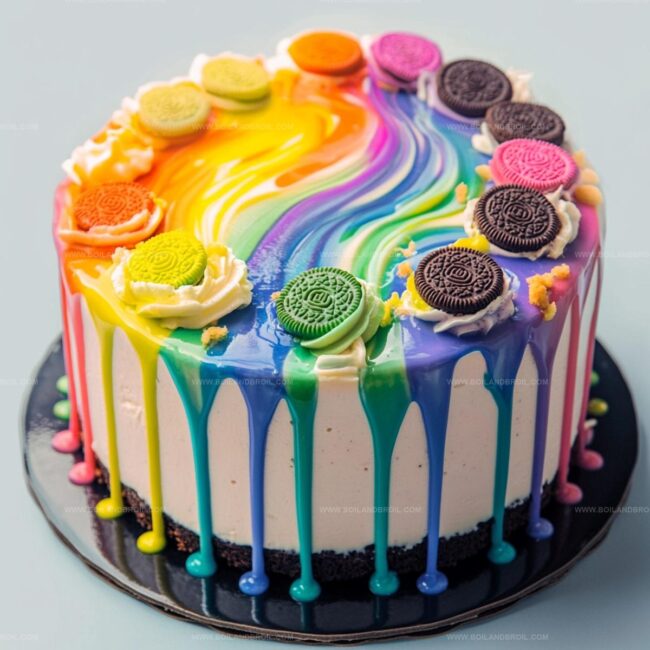
Pour the melted white chocolate over the top, letting it cascade beautifully down the sides.
Step 8: Add Festive Touches
Garnish the cake with:Step 9: Slice and Celebrate
Cut into the masterpiece and serve your spectacular Rainbow Oreo Cheesecake Drip Cake.
Watch as your guests marvel at the stunning rainbow layers and delicious design!
Recipe Tips for Oreo Cheesecake Delight

Keep Rainbow Oreo Cheesecake Fresh
What to Serve with Oreo Cheesecake Delight
Fun Variations for Rainbow Oreo Cheesecake Delight
FAQs
This rainbow cheesecake looks fancy but is actually quite simple. With basic baking skills and patience for layering, anyone can create this colorful dessert. The key is carefully adding each colored layer and letting it set properly.
Gel food coloring is recommended because it provides intense, vibrant colors without changing the cheesecake’s texture. Liquid food coloring can make the mixture too runny, so stick with gel colors for the brightest rainbow effect.
Absolutely! This cheesecake actually tastes better when prepared a day in advance. Refrigerating overnight allows the flavors to blend and the layers to set perfectly. Just add the white chocolate drip and decorations right before serving.
You’ll need a springform pan, electric mixer, and food processor or blender to crush Oreos. A spatula helps create smooth layers. No fancy baking tools are required, making this recipe accessible for home bakers.
Print
Rainbow Oreo Cheesecake Drip Cake Recipe
- Total Time: 30 minutes
- Yield: 12 1x
Description
Creamy rainbow oreo cheesecake drip cake brings whimsical color and indulgent flavor to dessert tables. Sweet layers and playful design invite celebration, promising delightful moments that spark joy for friends and family.
Ingredients
Main Ingredients:
- 2 cups oreo cookie crumbs
- 1 cup cream cheese, softened
- 1 cup heavy whipping cream
- 1 cup white chocolate chips
- 1 cup powdered sugar
Binding and Liquid Ingredients:
- 1/2 cup unsalted butter, melted
- 2 tablespoons vegetable oil
- 1 teaspoon vanilla extract
Decorative Ingredients:
- Food coloring (red, orange, yellow, green, blue, purple)
- Whipped cream
- Rainbow sprinkles
- Additional oreo cookies
Instructions
- Craft the foundation by blending Oreo cookie crumbs with melted butter, creating a uniform mixture. Press firmly into a springform pan, ensuring an even base. Bake at 350F (175C) for 10 minutes, then allow to cool completely.
- Whip cream cheese until silky smooth, gradually incorporating powdered sugar and vanilla extract. In a separate vessel, whip heavy cream to stiff peak consistency, then delicately fold into the cream cheese mixture.
- Separate the cheesecake blend into six distinct containers. Introduce vibrant food coloring to each portion, stirring until achieving rich, saturated hues ranging from purple to red.
- Meticulously layer the colored cheesecake mixtures onto the cooled crust, beginning with purple and concluding with red. Use a spatula to spread each layer uniformly, creating a seamless rainbow effect.
- Refrigerate the assembled cheesecake for a minimum of 4 hours, allowing it to set and develop a firm texture.
- Melt white chocolate chips with vegetable oil in a microwave, using 30-second intervals and stirring between each cycle. Allow the mixture to cool slightly before application.
- Carefully release the cheesecake from the springform pan. Drizzle the prepared white chocolate over the top, encouraging elegant drips along the sides.
- Embellish with billowy whipped cream, crushed Oreo fragments, and a sprinkle of colorful rainbow confetti.
- Slice and present this stunning dessert, revealing the spectacular rainbow layers within.
Notes
- Swap out regular Oreos for gluten-free varieties to make this dessert celiac-friendly and inclusive for those with wheat sensitivities.
- Reduce sugar content by using low-fat cream cheese and replacing some powdered sugar with stevia or monk fruit sweetener for a lighter version.
- Ensure food coloring is evenly distributed by using gel colors instead of liquid, which provides more vibrant and consistent rainbow layers without affecting batter consistency.
- Prevent cracking by allowing cream cheese to reach room temperature before mixing and avoiding overmixing, which can incorporate excess air and cause structural issues during baking.
- Prep Time: 20 minutes
- Cook Time: 10 minutes
- Category: Desserts
- Method: Baking
- Cuisine: American
Nutrition
- Serving Size: 12
- Calories: 350
- Sugar: 26 g
- Sodium: 150 mg
- Fat: 24 g
- Saturated Fat: 14 g
- Unsaturated Fat: 8 g
- Trans Fat: 0 g
- Carbohydrates: 30 g
- Fiber: 1 g
- Protein: 3 g
- Cholesterol: 50 mg
Clara Thompson
Recipe Developer & Culinary Educator
Expertise
Developing accessible single-serving recipes, Food writing and content creation, Plant-based and allergen-friendly cooking, Culinary education and workshop facilitation
Education
Oregon Culinary Institute (Portland, OR)
Diploma in Culinary Arts
Specialized in plant-based cooking and sustainable kitchen practices.
Portland Community College
Certificate in Food Writing and Media
Focused on recipe writing, food photography, and digital content creation.
Clara’s food journey began with a curiosity for color, texture, and ingredients pulled straight from the garden. Her background in plant-forward cooking and creative writing gives her a unique edge – she makes healthy, flavorful food feel inviting, not intimidating.
She specializes in meals that work for busy lives and different diets, all without sacrificing taste. Clara’s voice comes through in every recipe she writes – clear, kind, and encouraging.