
Irresistible Red Velvet Brownies Recipe: Bake Joy Today
Chocolate lovers unite over these decadent red velvet brownies that bring a luxurious twist to your dessert game.
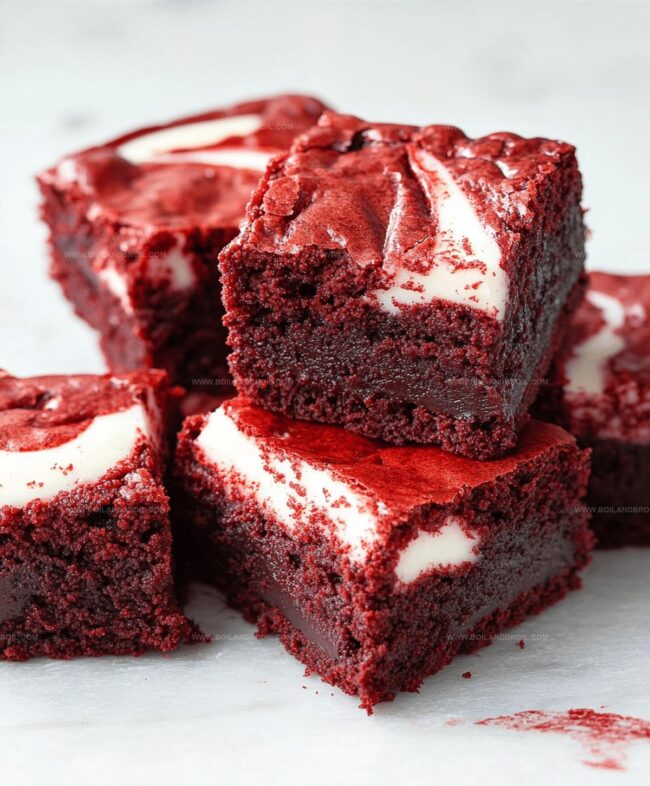
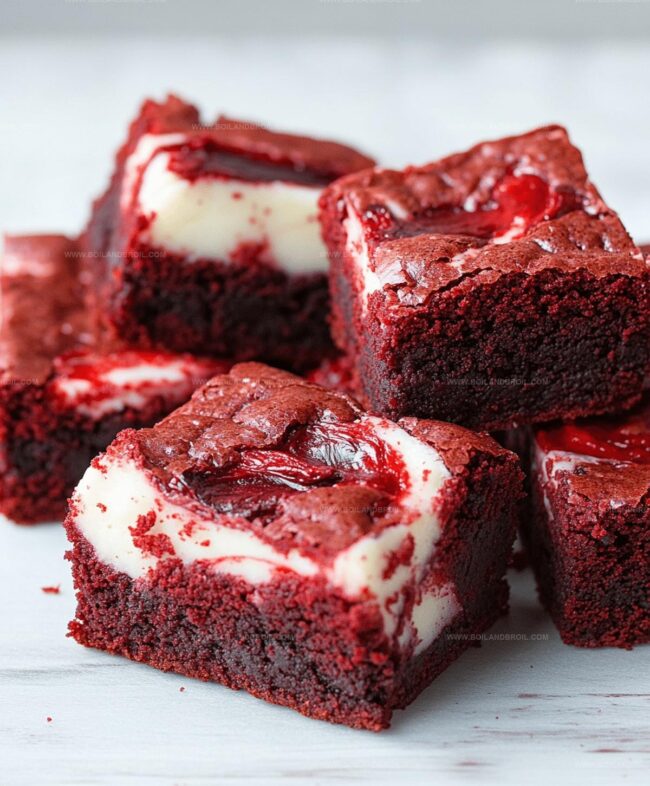
Marrying rich cocoa with vibrant red color, this red velvet brownies recipe promises pure indulgence in every bite.
The deep crimson hue hints at the intense flavor waiting to tantalize your taste buds.
Velvety smooth and sinfully delicious, these brownies blend classic comfort with elegant charm.
Cream cheese frosting adds a dreamy layer of creamy decadence that elevates the entire experience.
Each square delivers a perfect balance of moist texture and bold chocolate notes.
These irresistible brownies will become your new go-to dessert for any celebration or sweet craving.
What Makes Red Velvet Brownies Pop
Ingredients for Red Velvet Brownies
Main Ingredients:Wet Ingredients:Frosting Ingredients:Leavening and Seasoning:How to Bake Red Velvet Brownies

Step 1: Prepare the Oven
Crank up your oven to 350°F.
Grab an 8×8-inch baking dish and give it a good coating of grease or line it with parchment paper for super easy cleanup.
Step 2: Melt the Butter
Zap the butter in the microwave or gently melt it on the stovetop.
Let it cool down a bit to prevent accidentally cooking the eggs when mixing.
Step 3: Create Dry Ingredient Blend
In a medium bowl, whisk together:Set this magical mixture aside for now.
Step 4: Whip Up Wet Ingredients
In a large bowl, start by whisking the eggs.
Then toss in:Mix everything until it’s smooth and vibrant.
Slowly pour in the melted butter, stirring continuously.
Step 5: Combine Mixtures
Gently fold the dry ingredient blend into the wet mixture.
Mix on low speed until just combined.
Don’t go crazy with mixing – a few tiny lumps are totally fine.
Step 6: Bake to Perfection
Spread the batter evenly in the prepared pan, smoothing the top with a spatula.
Pop it in the oven and bake for 28 minutes.
You’ll know it’s done when a toothpick comes out clean or with just a few moist crumbs.
Let the brownies cool completely in the pan.
Step 7: Craft the Creamy Frosting
In a mixing bowl, beat cream cheese and butter until silky smooth.
Add powdered sugar and mix on low, then crank up the speed to medium-high until it’s light and fluffy.
Splash in some vanilla and a pinch of salt for extra flavor.
Step 8: Frost and Devour
Once the brownies are totally cool, slather on that dreamy cream cheese frosting.
Slice into squares and get ready to experience brownie heaven!
Tips for Red Velvet Brownies
Keep Red Velvet Brownies Fresh
Pairings for Red Velvet Brownies
Red Velvet Brownie Twists to Explore
FAQs
The vibrant red color comes from red food coloring added to the batter. Traditional red velvet recipes use a small amount of cocoa powder and food coloring to create the distinctive deep red hue.
Vinegar helps activate the cocoa powder and creates a subtle tangy flavor characteristic of red velvet desserts. It also helps make the brownies more tender and moist by reacting with the baking powder.
Yes, the brownies are delicious on their own. If you prefer, you can dust them with powdered sugar or enjoy them plain. The cream cheese frosting adds extra richness but isn’t essential to the recipe.
Look for a toothpick that comes out with a few moist crumbs when inserted into the center. The edges should be slightly pulled away from the pan, and the top should look set but not completely dry.
Print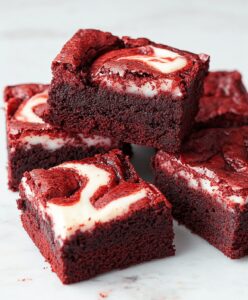
Red Velvet Brownies Recipe
- Total Time: 43 minutes
- Yield: 16 1x
Description
Indulgent red velvet brownies combine rich chocolate and velvety crimson layers for a luxurious dessert experience. Creamy cream cheese frosting crowns these irresistible squares, promising a delightful treat you’ll savor with pure chocolate bliss.
Ingredients
Main Ingredients:
- 1 cup all-purpose flour
- 2 large eggs
- 1 cup granulated sugar
- 1 (8-ounce) package cream cheese
Red Velvet Components:
- 2/3 cup unsalted butter
- 2 tablespoons cocoa powder
- 1 tablespoon red food coloring
- 1 teaspoon white vinegar
- 1 teaspoon pure vanilla extract
Seasoning and Stabilizers:
- 1 teaspoon baking powder
- 1/2 teaspoon fine sea salt
- 1/2 cup powdered sugar
- 1/3 cup unsalted butter
- 1 teaspoon pure vanilla extract
- Pinch of fine sea salt
Instructions
- Prepare the oven environment by heating to 350°F and preparing an 8×8-inch baking dish with grease or parchment paper for easy extraction.
- Carefully melt butter using microwave or stovetop, allowing slight cooling to prevent egg curdling during mixture.
- Combine dry ingredients by whisking flour, cocoa powder, baking powder, and salt in a medium bowl, setting mixture aside for later integration.
- Create wet ingredient foundation by whisking eggs, then incorporating sugar, vanilla, vinegar, and red food coloring until achieving a smooth, uniform consistency.
- Gradually introduce melted butter into wet ingredients, stirring continuously to maintain smooth texture.
- Gently fold dry ingredients into wet mixture, mixing on low speed until just combined, avoiding overmixing while accepting minimal lumps.
- Transfer batter evenly into prepared pan, using spatula to create uniform surface and smooth edges.
- Bake for approximately 28 minutes, monitoring until toothpick inserted emerges with minimal moist crumbs, indicating perfect doneness.
- Allow brownies to cool completely within pan placed on wire rack, ensuring proper temperature reduction.
- Prepare cream cheese frosting by beating cream cheese and butter until achieving silky smooth texture.
- Gradually integrate powdered sugar, initially mixing on low speed, then increasing to medium-high for fluffy consistency.
- Enhance frosting with vanilla and salt, mixing thoroughly for balanced flavor profile.
- Once brownies have reached room temperature, generously spread cream cheese frosting across entire surface.
- Slice into precise squares, presenting a delectable dessert ready for immediate enjoyment.
Notes
- Ensure butter is cooled before mixing to prevent egg curdling and maintain smooth batter texture.
- Use gel food coloring for more vibrant red color without altering liquid consistency.
- Check brownies early to prevent overbaking, which can lead to dry, crumbly texture.
- Chill brownies before cutting for cleaner, more precise slices and easier frosting application.
- Prep Time: 15 minutes
- Cook Time: 28 minutes
- Category: Desserts, Snacks
- Method: Baking
- Cuisine: American
Nutrition
- Serving Size: 16
- Calories: 190
- Sugar: 14 g
- Sodium: 150 mg
- Fat: 9 g
- Saturated Fat: 5 g
- Unsaturated Fat: 3 g
- Trans Fat: 0 g
- Carbohydrates: 25 g
- Fiber: 1 g
- Protein: 2 g
- Cholesterol: 40 mg
Clara Thompson
Recipe Developer & Culinary Educator
Expertise
Developing accessible single-serving recipes, Food writing and content creation, Plant-based and allergen-friendly cooking, Culinary education and workshop facilitation
Education
Oregon Culinary Institute (Portland, OR)
Diploma in Culinary Arts
Specialized in plant-based cooking and sustainable kitchen practices.
Portland Community College
Certificate in Food Writing and Media
Focused on recipe writing, food photography, and digital content creation.
Clara’s food journey began with a curiosity for color, texture, and ingredients pulled straight from the garden. Her background in plant-forward cooking and creative writing gives her a unique edge – she makes healthy, flavorful food feel inviting, not intimidating.
She specializes in meals that work for busy lives and different diets, all without sacrificing taste. Clara’s voice comes through in every recipe she writes – clear, kind, and encouraging.