The Best Red Velvet Cheesecake Recipe for Dreamy Desserts
Sweet dreams come alive with this decadent red velvet cheesecake that blends rich cream cheese and velvety cocoa into pure magic.
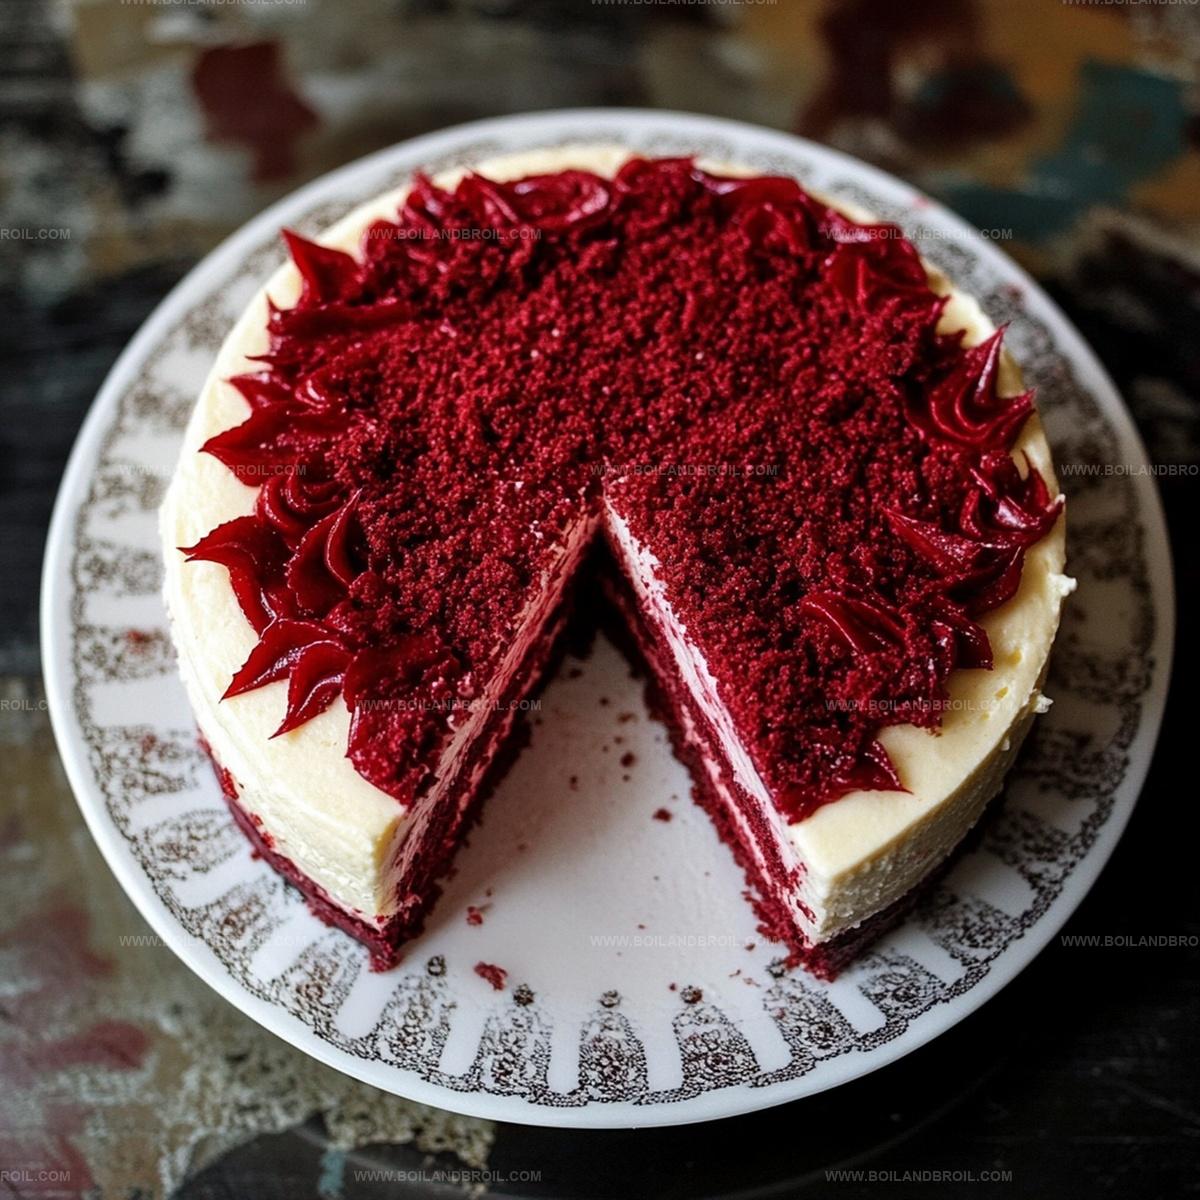
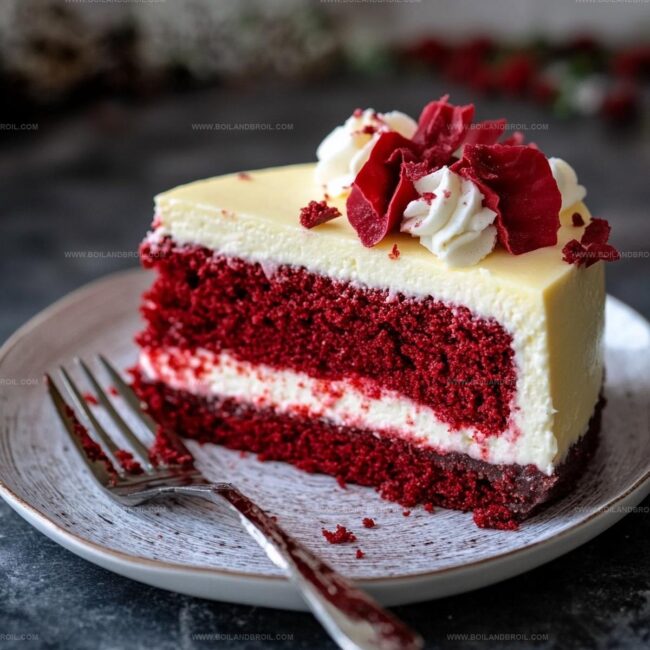
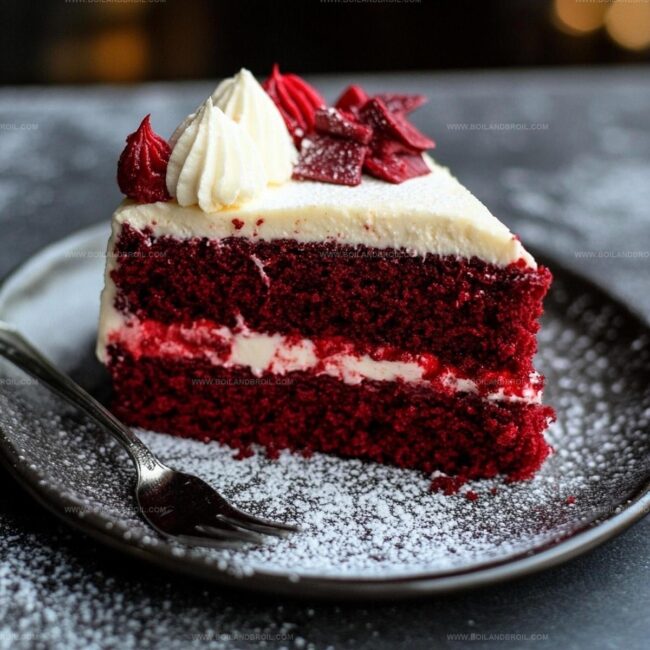
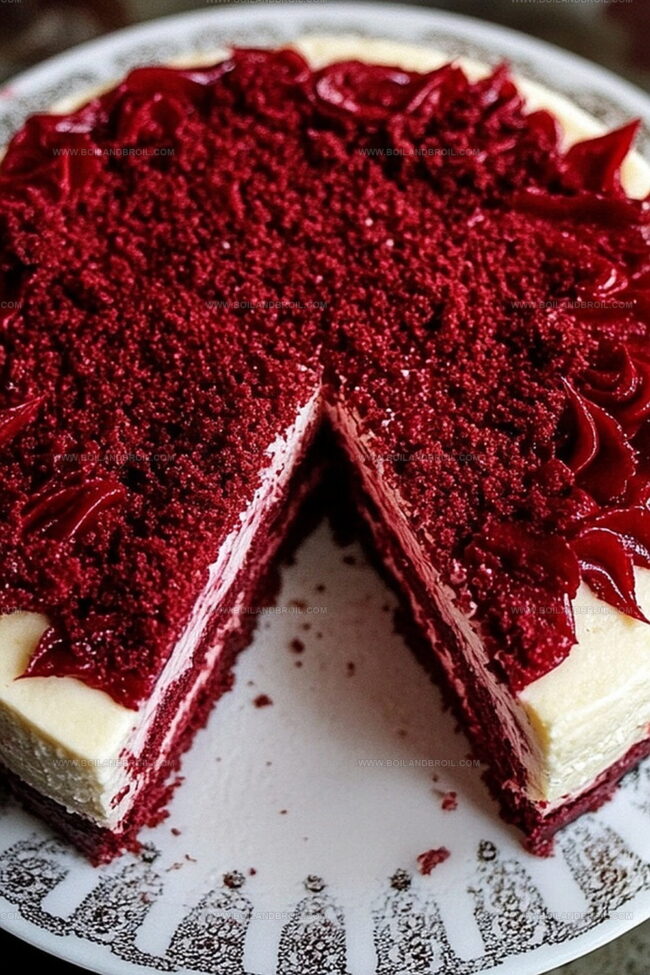
Layers of crimson-hued cake mingle with smooth, silky filling for an irresistible dessert experience.
Chocolate lovers will swoon over the delicate balance of flavors dancing across each creamy bite.
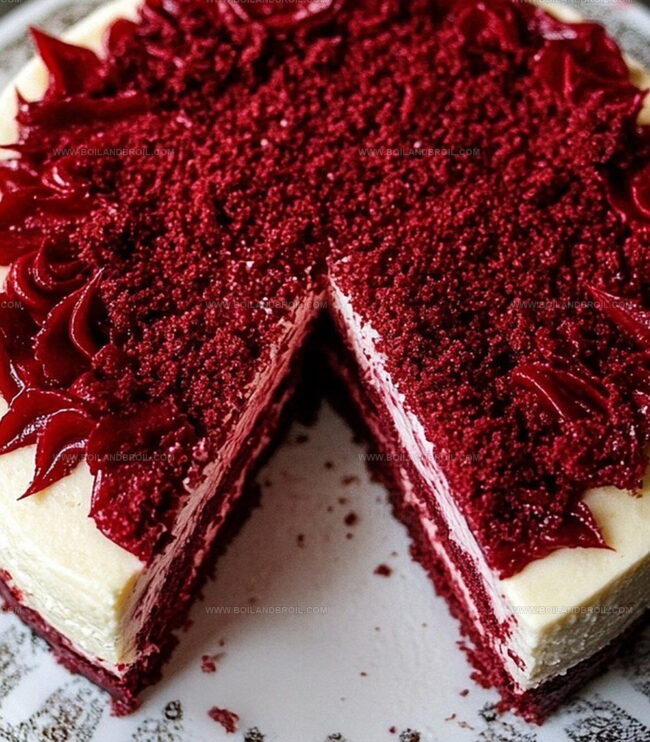
Nothing compares to the moment you slice through this gorgeous creation, revealing its stunning deep red interior.
Indulgent yet surprisingly light, this cheesecake brings restaurant-quality elegance to your home kitchen.
Imagine impressing guests with a dessert that looks as incredible as it tastes.
Take a deep breath and get ready to create something truly spectacular.
Inside the Red Velvet Cheesecake Experience
What You’ll Need for Red Velvet Cheesecake
Crust Ingredients:Cheesecake Filling Ingredients:Topping Ingredients:Making Red Velvet Cheesecake at Home
Step 1: Craft the Chocolatey Base
Warm up your oven to 325F (160C).
Grab a mixing bowl and combine these ingredients:Press the mixture firmly into the bottom of a 9-inch springform pan.
Pop it in the oven and bake for 8-10 minutes.
Let it cool down completely.
Step 2: Whip Up the Creamy Filling
In a large mixing bowl, cream together cream cheese and sugar until silky smooth.
This should take about 3 minutes of mixing.
Gently add vanilla extract and eggs one by one, beating thoroughly after each addition.
Scrape down the bowl’s sides to ensure everything mixes perfectly.
Blend in sour cream, flour, and red food coloring until you achieve a uniform, vibrant red batter.
Step 3: Bake to Perfection
Pour the luscious cheesecake batter over the cooled crust, smoothing the top with a spatula.
Create a water bath by placing the springform pan in a larger baking dish and filling it with 1 inch of hot water.
This magical technique prevents unsightly cracks from forming.
Bake for 60-70 minutes until the center sets but still has a gentle jiggle.
Turn off the oven and crack the door open, allowing the cheesecake to cool gradually for about an hour.
Step 4: Chill and Indulge
After cooling, refrigerate the cheesecake for at least 4 hours or overnight for the most decadent texture.
When ready to serve, crown your masterpiece with a dollop of whipped cream and sprinkle of chocolate shavings.
Get ready to dive into a slice of pure bliss!
Smart Tips for Red Velvet Cheesecake Perfection
How to Store and Reheat Red Velvet Cheesecake
Pairing Red Velvet Cheesecake with the Right Treats
Creative Variations on Red Velvet Cheesecake
FAQs
The red color comes from adding red food coloring directly into both the crust and cheesecake batter, creating a vibrant red appearance that’s signature to red velvet desserts.
The water bath helps prevent cracking by creating a moist, even baking environment and allows the cheesecake to cook more gently, resulting in a smoother, creamier texture.
For the best results, use chocolate cookie crumbs. If unavailable, graham crackers can work, but they’ll slightly change the flavor profile of the crust.
The cheesecake is done when the center is set but still slightly jiggly. It should not look liquid, but should have a gentle wobble when you nudge the pan.
Print
Red Velvet Cheesecake Recipe
- Total Time: 1 hour 40 minutes
- Yield: 12 1x
Description
Indulgent red velvet cheesecake brings together rich chocolate and creamy cheesecake in a dessert that celebrates decadent Southern comfort. Silky layers and crimson hues promise a luxurious experience you’ll savor with pure delight.
Ingredients
Cake Base:
- 1 1/2 cups chocolate cookie crumbs
- 1/4 cup (57 grams) unsalted butter, melted
- 1 tablespoon granulated sugar
- 1 tablespoon cocoa powder
Cheesecake Filling:
- 24 ounces (680 grams) cream cheese, softened
- 1 cup granulated sugar
- 4 large eggs
- 1/2 cup (120 milliliters) sour cream
- 2 tablespoons all-purpose flour
- 1 teaspoon vanilla extract
Decoration and Color:
- 1 tablespoon red food coloring
- Whipped cream
- Chocolate shavings or sprinkles
Instructions
- Create a rich, decadent base by combining chocolate cookie crumbs with melted butter, sugar, cocoa powder, and red food coloring. Press the mixture compactly into a 9-inch springform pan, ensuring an even layer.
- Preheat the oven to 325F (160C) and bake the crust for 8-10 minutes until slightly set. Allow the crust to cool completely while preparing the filling.
- In a large mixing bowl, whip cream cheese and sugar until silky smooth, approximately 3 minutes, creating a luxurious foundation for the cheesecake.
- Incorporate vanilla extract, then add eggs one at a time, mixing thoroughly after each addition to maintain a consistent texture.
- Gently fold in sour cream, flour, and additional red food coloring, stirring until the batter achieves a uniform, vibrant red hue.
- Pour the crimson cheesecake mixture over the cooled crust, using a spatula to create an even surface.
- Place the springform pan inside a larger baking dish and fill with hot water, creating a gentle water bath to prevent surface cracking.
- Bake for 60-70 minutes until the center is set but retains a subtle jiggle. Turn off the oven, crack the door open, and allow the cheesecake to cool gradually for one hour.
- Refrigerate the cheesecake for a minimum of 4 hours or overnight to achieve the perfect dense, creamy consistency.
- Before serving, garnish with delicate whipped cream and elegant chocolate shavings for a stunning presentation.
Notes
- Achieve a perfectly smooth crust by pressing the mixture firmly and evenly into the springform pan, ensuring no loose crumbs remain.
- Use room temperature cream cheese and eggs to prevent lumps and create a silky, uniform cheesecake filling that blends seamlessly.
- Control the intensity of the red color by adjusting the amount of food coloring, keeping in mind that natural alternatives like beetroot powder can provide a subtle, elegant hue.
- Prevent water bath leakage by wrapping the springform pan’s exterior with multiple layers of heavy-duty aluminum foil, creating a watertight seal to protect the delicate cheesecake.
- Prep Time: 20 minutes
- Cook Time: 80 minutes
- Category: Desserts
- Method: Baking
- Cuisine: American
Nutrition
- Serving Size: 12
- Calories: 450
- Sugar: 34 g
- Sodium: 320 mg
- Fat: 30 g
- Saturated Fat: 18 g
- Unsaturated Fat: 8 g
- Trans Fat: 0 g
- Carbohydrates: 38 g
- Fiber: 1 g
- Protein: 7 g
- Cholesterol: 100 mg
Clara Thompson
Recipe Developer & Culinary Educator
Expertise
Developing accessible single-serving recipes, Food writing and content creation, Plant-based and allergen-friendly cooking, Culinary education and workshop facilitation
Education
Oregon Culinary Institute (Portland, OR)
Diploma in Culinary Arts
Specialized in plant-based cooking and sustainable kitchen practices.
Portland Community College
Certificate in Food Writing and Media
Focused on recipe writing, food photography, and digital content creation.
Clara’s food journey began with a curiosity for color, texture, and ingredients pulled straight from the garden. Her background in plant-forward cooking and creative writing gives her a unique edge – she makes healthy, flavorful food feel inviting, not intimidating.
She specializes in meals that work for busy lives and different diets, all without sacrificing taste. Clara’s voice comes through in every recipe she writes – clear, kind, and encouraging.