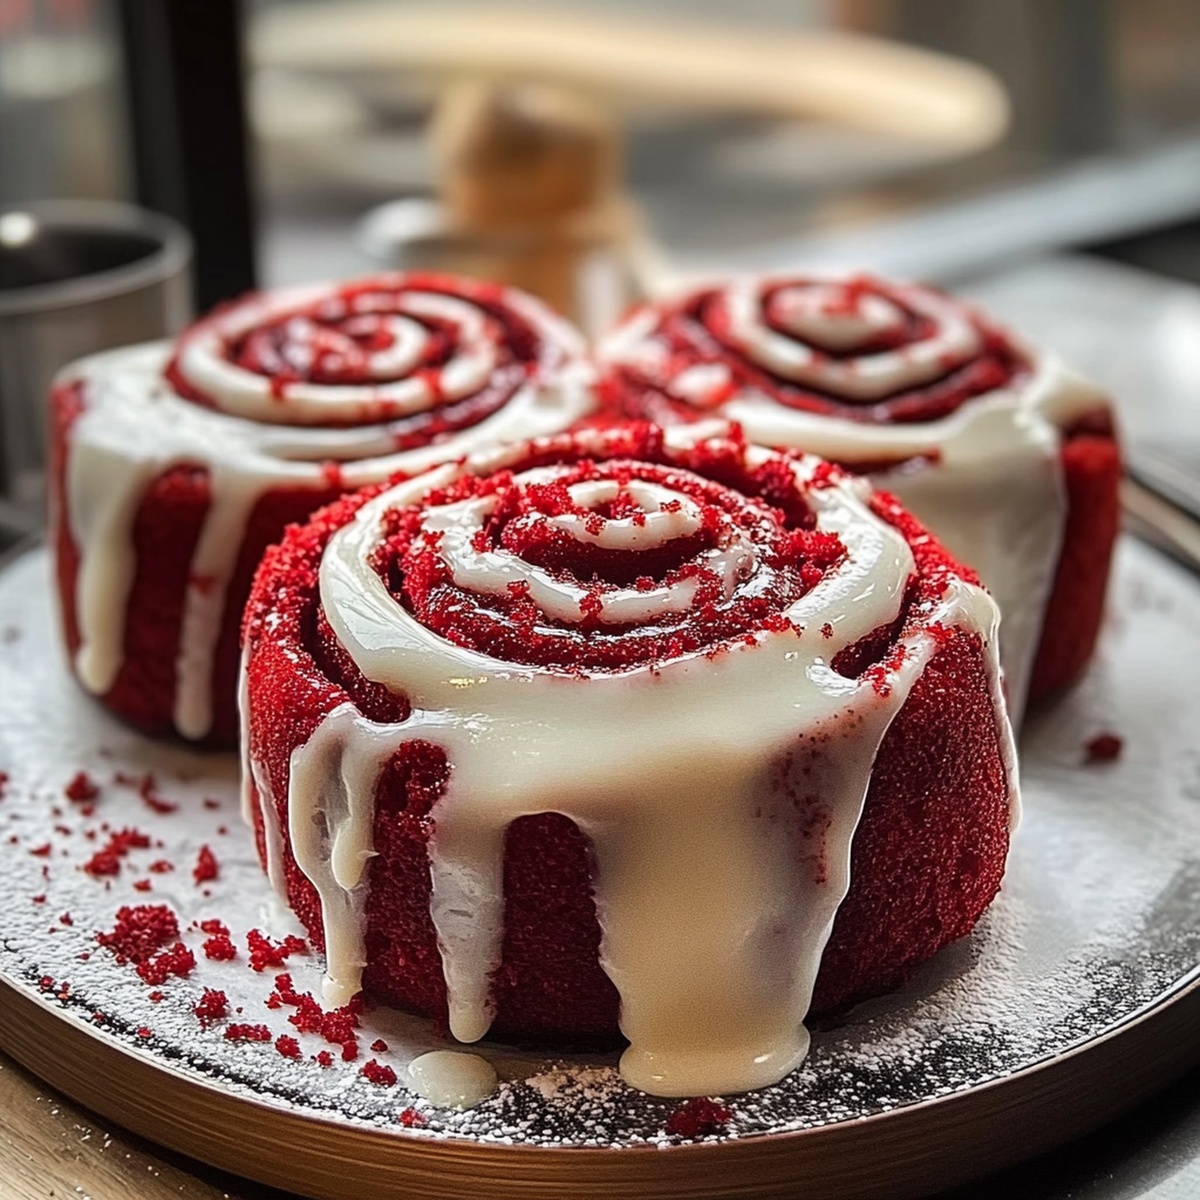
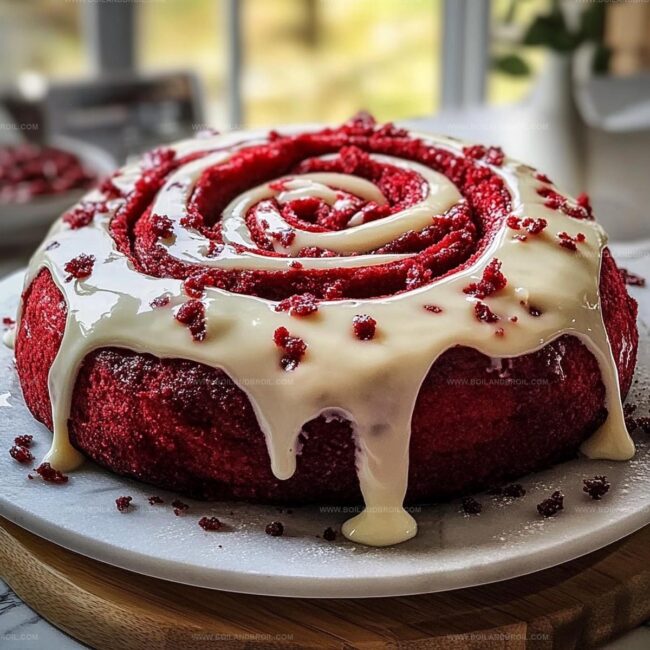
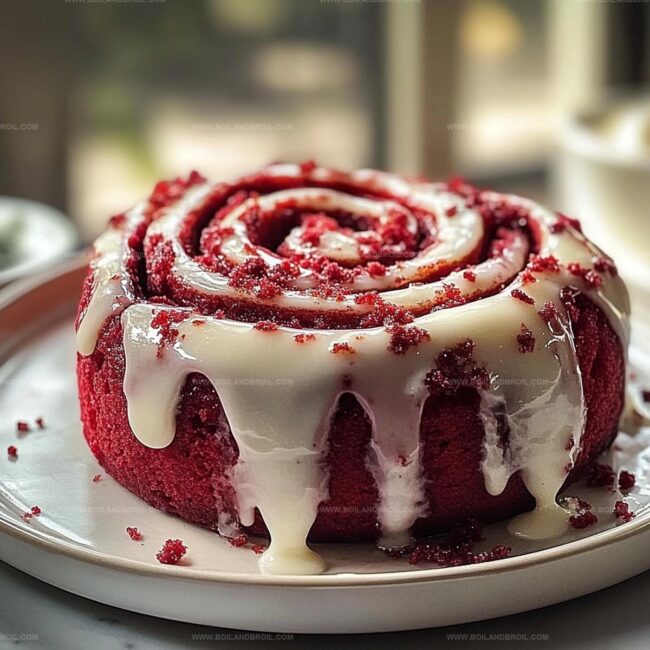
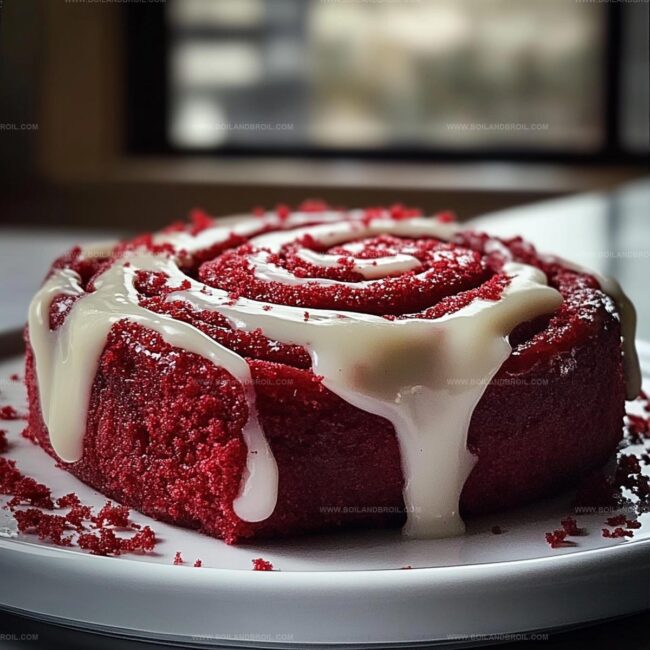
Sweet Red Velvet Cinnamon Rolls: Irresistible Homemade Recipe
Indulging in red velvet cinnamon rolls brings a delightful surprise to your morning routine.
Sweet aromas will dance through your kitchen with this unexpected treat.
Soft, velvety dough wrapped around swirls of warm spices creates an irresistible experience.
Traditional breakfast pastries never looked this glamorous or tasted so incredible.
Chocolate undertones blend seamlessly with rich cream cheese frosting, making each bite pure magic.
Bakers seeking something extraordinary will fall in love with this unique recipe.
You simply must try these rolls that promise to revolutionize your breakfast game.
Red Velvet Cinnamon Rolls: Luxurious Breakfast
Elevate your baking skills with this gourmet twist on classic cinnamon rolls, combining the rich flavor of red velvet with traditional comfort.
Perfect for family gatherings, weekend brunches, or special celebrations where you want to impress without spending hours in the kitchen.
Surprisingly easy to make with straightforward steps, this recipe guides even novice bakers through creating a professional-looking dessert that tastes like a bakery masterpiece.
Flexible recipe allows for personal touches like adjusting sweetness or adding extra spices, making it a versatile option for different taste preferences and dietary needs.
Red Velvet Roll Ingredients Unwrapped
Dry Ingredients:
All-Purpose Flour: A key component that provides the structure for the soft and tender cinnamon rolls.
Cocoa Powder: Gives the red velvet rolls their distinctive chocolate undertone and deep color.
Salt: Enhances the overall flavor and balances the sweetness of the rolls.
Wet Ingredients:
Milk, Water: Activate the yeast and help create a soft, moist dough.
Eggs: Bind the ingredients together and add richness to the rolls.
Butter: Contributes to the tender texture and adds a rich, smooth flavor.
Vanilla Extract: Provides a warm, sweet aromatic flavor to the dough.
Food Coloring: Creates the signature red velvet color of the rolls.
Filling and Topping Ingredients:
Brown Sugar, Cinnamon: Create a sweet and warm filling that adds depth to the rolls.
Cream Cheese, Powdered Sugar, Butter: Combine to make a smooth, creamy frosting that complements the rolls.
Leavening Agent:
Yeast: Helps the dough rise and creates a light, fluffy texture for the cinnamon rolls.
Rolling the Ultimate Red Velvet Cinnamon Rolls
Step 1: Activate the Yeast
Combine warm milk, water, and sugar in a small bowl.
Sprinkle yeast over the mixture and let it sit for 5-10 minutes until it becomes frothy and bubbly.
In a separate large bowl, whisk together flour, salt, and cocoa powder to create a rich red velvet base.
Step 2: Create the Dough
Add the activated yeast mixture to the dry ingredients.
Incorporate:
Eggs
Melted butter
Red food coloring
Vanilla extract
Mix until a soft, cohesive dough forms.
Transfer the dough to a floured surface and knead for 6-8 minutes until smooth and elastic.
Place the dough in a greased bowl, cover with a clean kitchen towel, and let it rise in a warm spot for 1 hour.
Step 3: Prepare the Filling
Blend together:
Softened butter
Brown sugar
Ground cinnamon
Pinch of salt
Mix until the ingredients create a smooth, spreadable filling.
Step 4: Shape the Rolls
Punch down the risen dough and roll it into a 12×18-inch rectangle.
Spread the cinnamon filling evenly across the surface.
Carefully roll the dough tightly from the long side, creating a log.
Slice the log into 12 equal pieces.
Arrange the rolls in a greased 9×13-inch baking dish.
Allow them to rise for an additional 30 minutes.
Step 5: Bake to Perfection
Preheat the oven to 350°F (175°C).
Bake the rolls for 20-25 minutes until they turn golden brown and sound hollow when tapped.
Remove from the oven and let cool for 5 minutes.
Step 6: Whip Up the Cream Cheese Frosting
Beat together:
Cream cheese
Butter
Powdered sugar
Vanilla extract
Pinch of salt
Blend until the frosting becomes smooth and creamy.
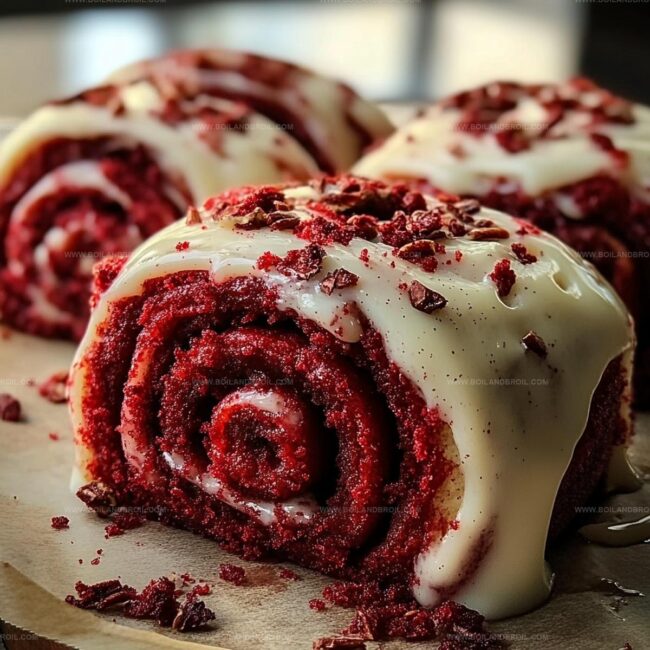
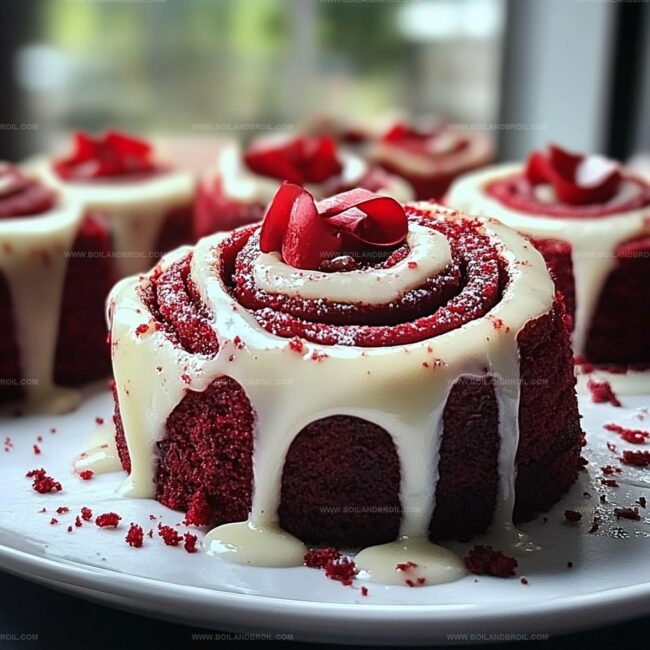
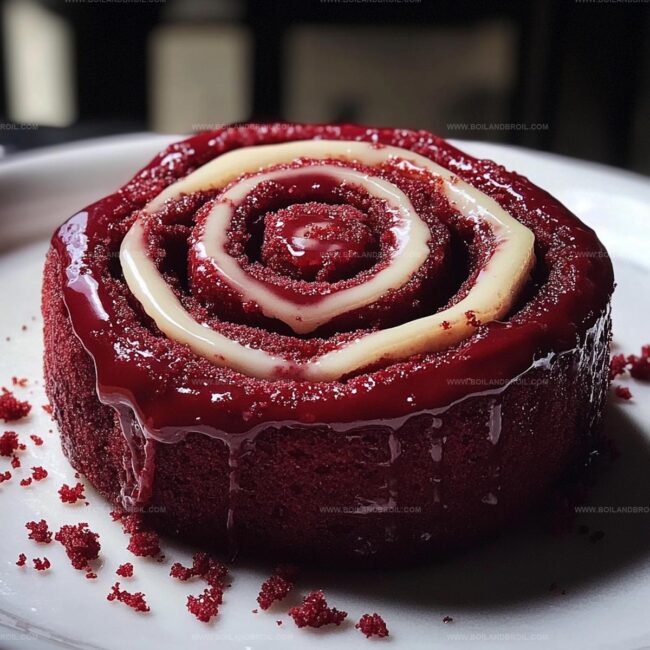
Generously spread the frosting over the warm rolls and serve immediately.
Pro Secrets for Rich Red Velvet Dough
Ensure milk is warm (not hot) around 110°F to activate yeast without killing it, creating a soft, fluffy texture.
Add food coloring gradually to control the deep red color, preventing an artificial look while maintaining the classic red velvet appearance.
Develop gluten by kneading dough thoroughly, creating a smooth, elastic texture that helps rolls rise beautifully and stay tender.
Use a sharp knife or dental floss to cut rolls evenly, preventing squishing and maintaining their perfect circular shape.
Apply cream cheese frosting when rolls are slightly warm, allowing it to melt slightly and create a luxurious, creamy coating that seeps into every delicious crevice.
Storing and Reheating Cinnamon Roll Treats
Store cooled rolls in an airtight container and keep in the refrigerator for up to 4 days. Wrap individually in plastic wrap to maintain moisture and prevent drying out.
Place completely cooled rolls in a freezer-safe container or ziplock bag. Freeze for up to 2 months. Separate layers with parchment paper to prevent sticking.
Warm individual rolls in the microwave for 15-20 seconds. Alternatively, reheat in a preheated 300°F oven for 5-7 minutes until just warm.
Transfer frozen rolls to the refrigerator overnight. Warm in the oven at 300°F for 10 minutes or microwave for 30-45 seconds until heated through. Add fresh frosting if desired for extra flavor.
Ideal Accompaniments for Cinnamon Rolls
Pair Creamy Cream Cheese Frosting with Bold Red Wine: A rich, slightly tangy Merlot complements the sweet cream cheese frosting, enhancing the dessert's complex flavor profile.
Brew Robust Coffee to Contrast Sweetness: A strong espresso or dark roast coffee cuts through the rolls' richness, providing a perfect bitter balance to the sugary treat.
Serve with Vanilla Bean Ice Cream: Cold, smooth vanilla ice cream creates a delightful temperature and texture contrast against the warm, soft cinnamon rolls.
Enjoy with Sparkling Moscato: A light, sweet sparkling wine adds effervescence and fruity notes that dance beautifully with the red velvet's cocoa undertones.
New Flavors for Red Velvet Cinnamon Rolls
Gluten-Free Red Velvet Rolls: Replace all-purpose flour with a gluten-free flour blend and add xanthan gum for better texture and binding.
Dairy-Free Friendly Version: Swap milk with almond milk, use coconut cream instead of butter, and replace cream cheese frosting with dairy-free cream cheese alternative.
Vegan Red Velvet Rolls: Substitute eggs with flax eggs, use plant-based milk, replace butter with coconut oil, and create vegan cream cheese frosting using cashew cream or store-bought vegan cream cheese.
Low-Sugar Option: Replace regular sugar with monk fruit sweetener, reduce brown sugar in filling, and use a sugar-free powdered sweetener for the frosting to create a diabetic-friendly version.
FAQs
What gives these cinnamon rolls their red color?
The vibrant red color comes from red food coloring added directly to the dough, which creates the signature red velvet appearance while maintaining the traditional cinnamon roll texture.
Can I make the dough ahead of time?
Yes, you can prepare the dough the night before. After kneading, cover and refrigerate overnight. In the morning, let the dough come to room temperature, then proceed with rolling and filling.
How do I know the dough has risen properly?
The dough should double in size and feel puffy when gently pressed. If you poke it with a finger, the indentation should slowly spring back but remain slightly visible.
Is it important to use cocoa powder in the dough?
Cocoa powder is crucial for achieving the classic red velvet flavor and helping to create the deep red color. It adds a subtle chocolate undertone that makes these cinnamon rolls unique.
Single-recipe development with a narrative approach, Culinary storytelling and food history, Seasonal and regional ingredient utilization, Home cooking techniques adapted for modern kitchens
Education
New England Culinary Institute (Montpelier, VT) Certificate in Culinary Arts
Focused on farm-to-table cooking, sustainable practices, and modern plating techniques.
Asheville-Buncombe Technical Community College Associate Degree in Culinary Arts
Emphasized Southern Appalachian cuisine and local ingredient sourcing.
Jack grew up surrounded by smoky skillets and handwritten recipes in the mountains of North Carolina. His roots in Appalachian cooking shaped the way he sees food – as something that connects people, tells a story, and holds meaning.
With hands-on training and a background in sustainable, regional cooking, Jack started Boil And Broil to make meaningful meals more accessible. He’s all about one-dish recipes that are simple to follow but rich with flavor and history.

Jack Sullivan
Founder & Culinary Storyteller
Expertise
Single-recipe development with a narrative approach, Culinary storytelling and food history, Seasonal and regional ingredient utilization, Home cooking techniques adapted for modern kitchens
Education
New England Culinary Institute (Montpelier, VT)
Certificate in Culinary Arts
Focused on farm-to-table cooking, sustainable practices, and modern plating techniques.
Asheville-Buncombe Technical Community College
Associate Degree in Culinary Arts
Emphasized Southern Appalachian cuisine and local ingredient sourcing.
Jack grew up surrounded by smoky skillets and handwritten recipes in the mountains of North Carolina. His roots in Appalachian cooking shaped the way he sees food – as something that connects people, tells a story, and holds meaning.
With hands-on training and a background in sustainable, regional cooking, Jack started Boil And Broil to make meaningful meals more accessible. He’s all about one-dish recipes that are simple to follow but rich with flavor and history.