Easy Ritz Cracker Spiders: A Spooky Halloween Treat Recipe
Crafting Halloween chocolate Ritz cracker spiders can spark instant excitement for festive party treats.
Small hands love creating these creepy-cute snacks with minimal adult supervision.
Crispy crackers become delightful eight-legged creatures through simple chocolate coating techniques.
Kids adore decorating each spider with playful candy eyes and leg details.
Sweet chocolate transforms ordinary ingredients into whimsical Halloween companions.
Melted chocolate and strategic placement make these edible arachnids irresistibly fun.
Jump into this delightful recipe and watch spooky magic unfold!
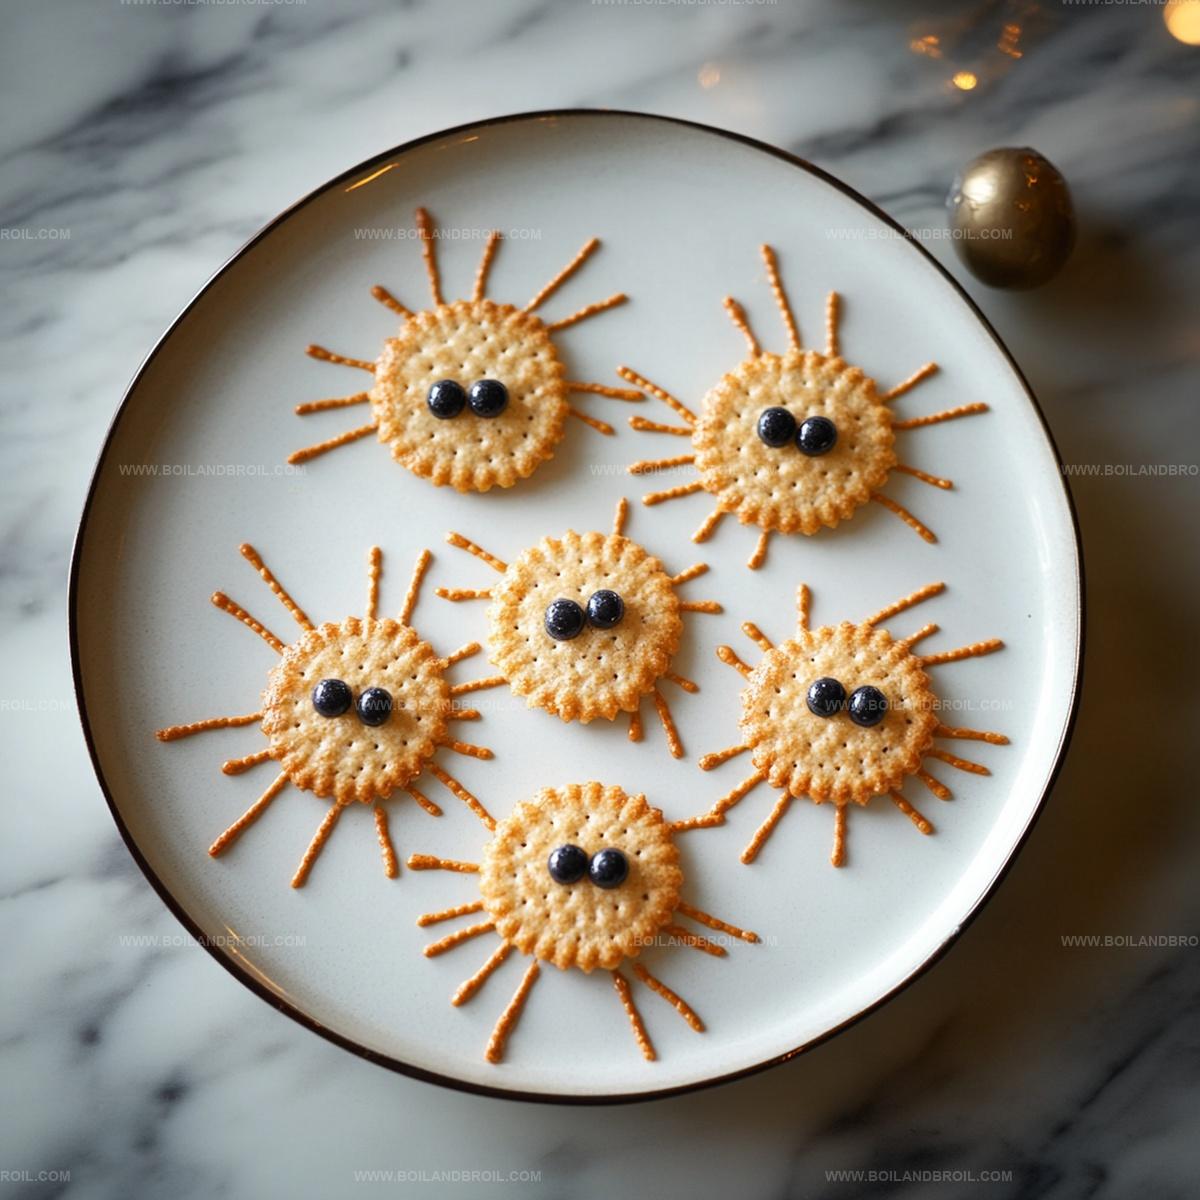
Spooky Ritz Cracker Spiders Guide
Spooky Spider Cracker Ingredient List
Base Ingredients:Spider Legs:Decoration:Instructions for Spooky Cracker Spiders
Step 1: Slather the Base
Grab your Ritz crackers and generously coat one side with a smooth layer of rich peanut butter or decadent chocolate spread.
Make sure the coverage is even and thick enough to help the crackers stick together.
Step 2: Create the Spider Body
Stack a second Ritz cracker on top of the peanut butter-covered cracker, creating a delightful sandwich.
Press gently to ensure the crackers stick together and form a solid base for your spooky treat.
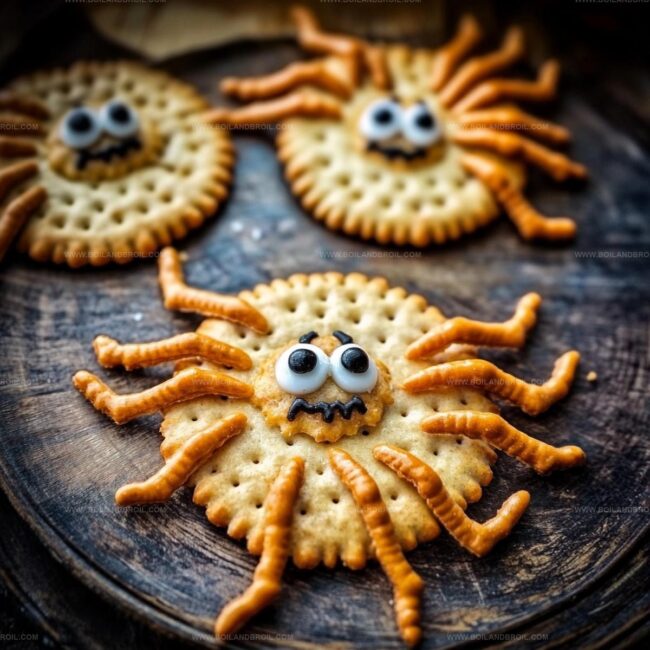
Step 3: Attach Spindly Legs
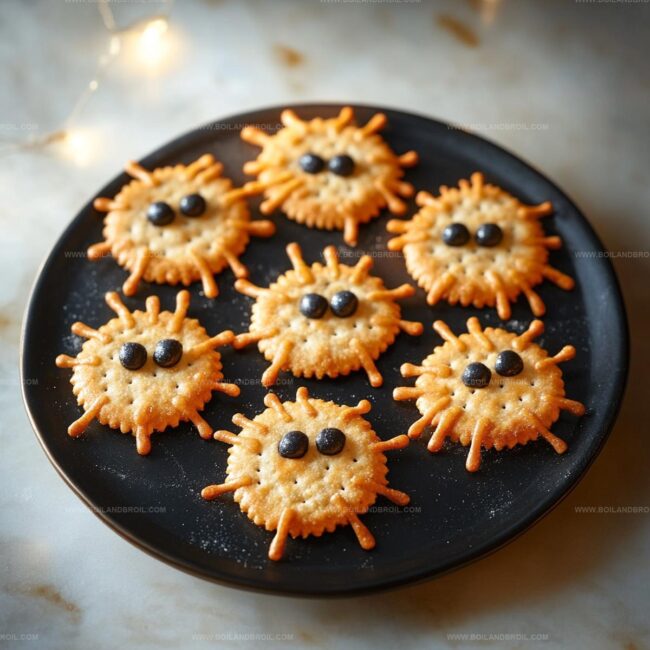
Take chocolate-covered pretzel sticks and carefully insert four on each side of the cracker sandwich.
Position them at slight angles to mimic realistic spider leg movements, ensuring they’re securely embedded in the peanut butter layer.
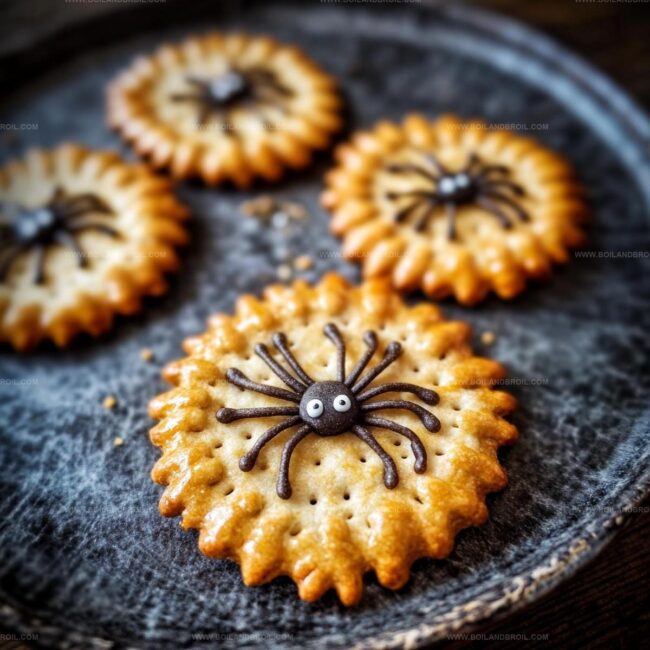
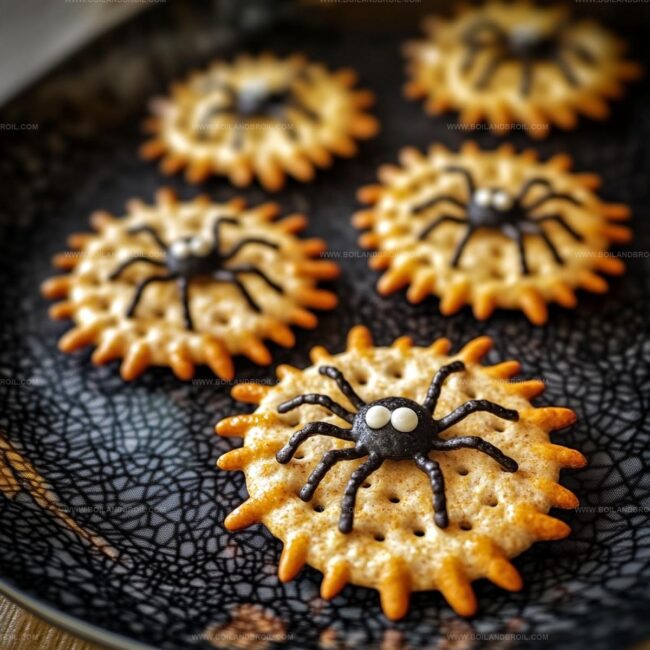
Step 4: Design Spooky Faces
Dab small dots of peanut butter or chocolate spread on the top of each cracker.
Delicately place two candy eyes onto these dots, creating an adorable and slightly creepy spider expression.
Step 5: Add Gourmet Finishing Touch
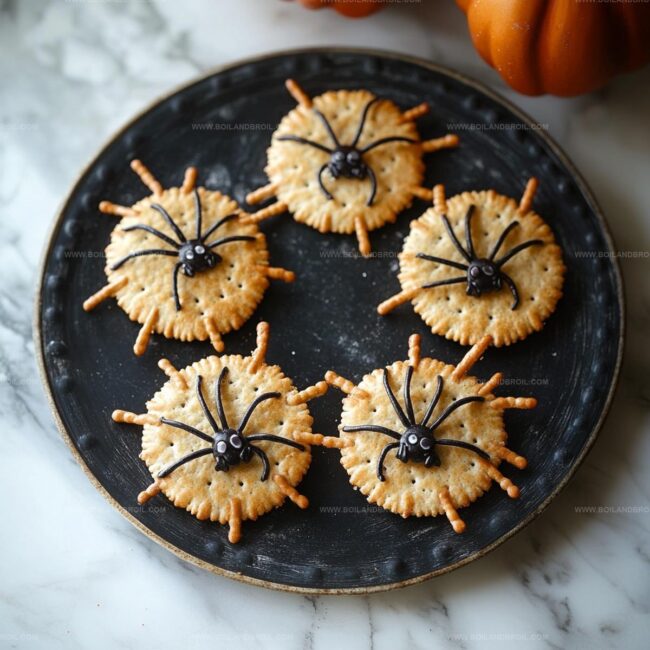
Melt chocolate chips in a microwave-safe bowl until smooth and runny.
Using a spoon or piping bag, drizzle the melted chocolate over the spider creatures for an extra layer of deliciousness and visual appeal.
Step 6: Chill and Serve
Transfer your spider treats to a serving platter and pop them in the refrigerator for 10-15 minutes.
This helps the chocolate set and keeps the treats firm.
Serve on a dark-colored plate for maximum Halloween drama!
Tips for Halloween Spider Treats
Keeping Spooky Cracker Spiders Fresh
Pairing These Halloween Treats
Pair Perfectly with Spider Snacks:Creative Spins on Spooky Cracker Spiders
FAQs
Absolutely! These Ritz Cracker Spiders are super kid-friendly. Children can help spread peanut butter, place pretzel legs, and add candy eyes with minimal adult supervision.
Yes! You can swap peanut butter with sunflower seed butter, chocolate spread, or cream cheese for a nut-free version. Always check ingredient labels to ensure total allergy safety.
These spooky treats are quick and easy, taking about 10-15 minutes total. Most of the time is spent assembling and decorating, making them perfect for last-minute Halloween snacks.
No worries! You can use mini chocolate chips, white chocolate chips, or even small dots of frosting as substitutes for spider eyes. Get creative with what you have in your kitchen.
Print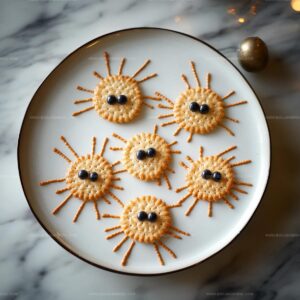
Ritz Cracker Spiders Recipe
- Total Time: 10 minutes
- Yield: 12 1x
Description
Spooky Halloween Ritz Cracker Spiders deliver creepy-cute charm with peanut butter legs and chocolate coating. Guests will love these playful treats that combine simple ingredients into wickedly delightful party snacks.
Ingredients
Main Ingredients:
- 24 Ritz crackers
- 1/2 cup (118 ml) creamy peanut butter
Decorative Ingredients:
- 24 chocolate-covered pretzel twists
- 48 candy eyes
- 1/2 cup (118 ml) chocolate chips (optional, for drizzling)
Instructions
- Prepare the base by coating half of the Ritz crackers with a smooth layer of peanut butter, ensuring even coverage across the surface.
- Create sandwich-style spiders by pressing a second cracker atop the peanut butter-covered cracker, gently securing the two halves together.
- Craft the spider’s legs by carefully inserting four chocolate-covered pretzel twists into each side of the cracker sandwich, positioning them to resemble authentic arachnid limbs.
- Design the spider’s face by dabbing a small dot of peanut butter on the top surface and delicately positioning two candy eyes to bring the creature to life.
- Enhance the presentation by melting chocolate chips in the microwave for 30 seconds, stirring until completely smooth, then drizzling the glossy chocolate over the assembled spiders for an extra decorative touch.
- Refrigerate the completed spooky treats for 5-7 minutes to allow the peanut butter and chocolate to set, ensuring a firm and stable spider structure.
- Arrange the chilled spiders on a themed Halloween platter, ready to delight and slightly terrify party guests with their creepy-cute appearance.
Notes
- Customize the spread by using almond butter or sunflower seed butter for nut-free alternatives.
- Swap chocolate-covered pretzels with licorice strings or black pipe cleaners for creative spider leg variations.
- Use dark or white chocolate drizzle to create different visual effects and enhance the Halloween theme.
- Prepare these treats ahead of time and store in an airtight container in the refrigerator for up to three days for convenient party planning.
- Prep Time: 10 minutes
- Cook Time: 0 minutes
- Category: Snacks
- Method: No-bake
- Cuisine: American
Nutrition
- Serving Size: 12
- Calories: 170
- Sugar: 6 g
- Sodium: 220 mg
- Fat: 10 g
- Saturated Fat: 3 g
- Unsaturated Fat: 7 g
- Trans Fat: 0 g
- Carbohydrates: 17 g
- Fiber: 1 g
- Protein: 4 g
- Cholesterol: 0 mg
Clara Thompson
Recipe Developer & Culinary Educator
Expertise
Developing accessible single-serving recipes, Food writing and content creation, Plant-based and allergen-friendly cooking, Culinary education and workshop facilitation
Education
Oregon Culinary Institute (Portland, OR)
Diploma in Culinary Arts
Specialized in plant-based cooking and sustainable kitchen practices.
Portland Community College
Certificate in Food Writing and Media
Focused on recipe writing, food photography, and digital content creation.
Clara’s food journey began with a curiosity for color, texture, and ingredients pulled straight from the garden. Her background in plant-forward cooking and creative writing gives her a unique edge – she makes healthy, flavorful food feel inviting, not intimidating.
She specializes in meals that work for busy lives and different diets, all without sacrificing taste. Clara’s voice comes through in every recipe she writes – clear, kind, and encouraging.