
Starbucks Cake Pops Recipe: Homemade Sweet Treats Made Simple
Craving a sweet treat that brings the coffee shop experience right to your kitchen?
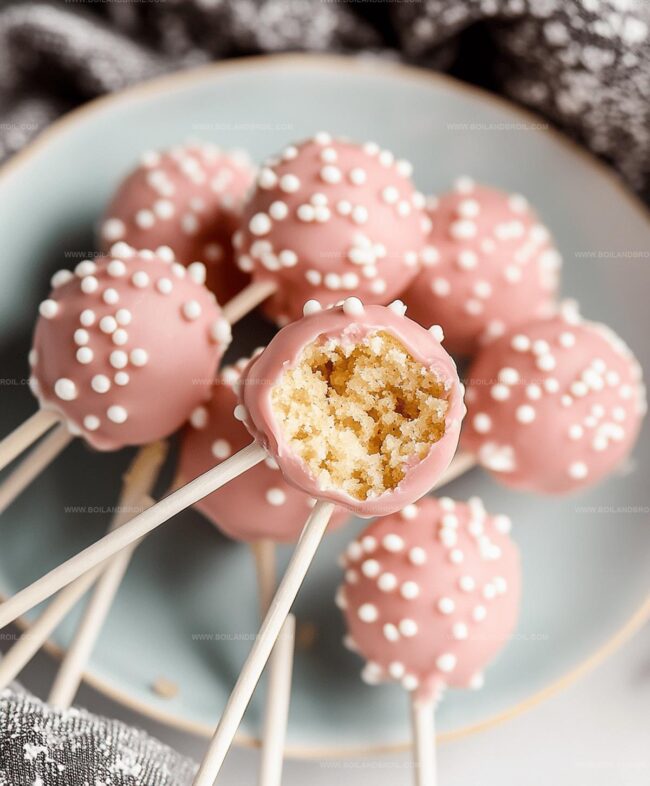
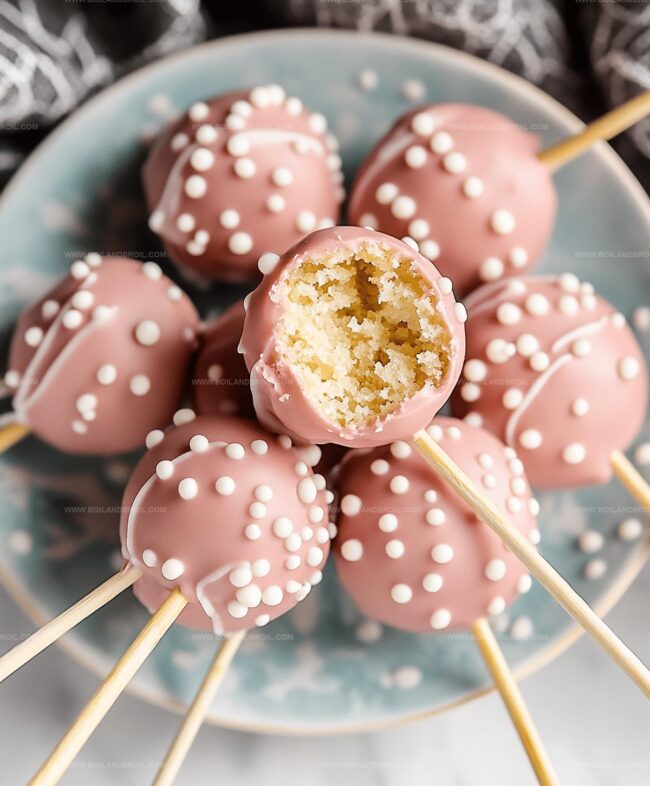
These delightful Starbucks cake pops burst with bakery-style charm and irresistible flavor.
Every bite captures the magic of those perfectly glazed, colorful confections you love.
Recreating these popular desserts is easier than you might expect, requiring just a few simple ingredients and some creative energy.
The process involves mixing, forming, and decorating cake balls that turn into adorable bite-sized delights.
You’ll master a technique that transforms basic cake into a professional-looking dessert that rivals any cafe creation.
Whip up these treats and watch friends and family marvel at your baking skills.
Why You’ll Love These Cake Pops
What You Need for Starbucks Cake Pops
Main Ingredients:Binding and Support Ingredients:Decorative Ingredients:How to Make Starbucks-Inspired Cake Pops

Step 1: Bake The Cake
Prepare the cake mix following package directions.
Allow the cake to cool completely before proceeding.
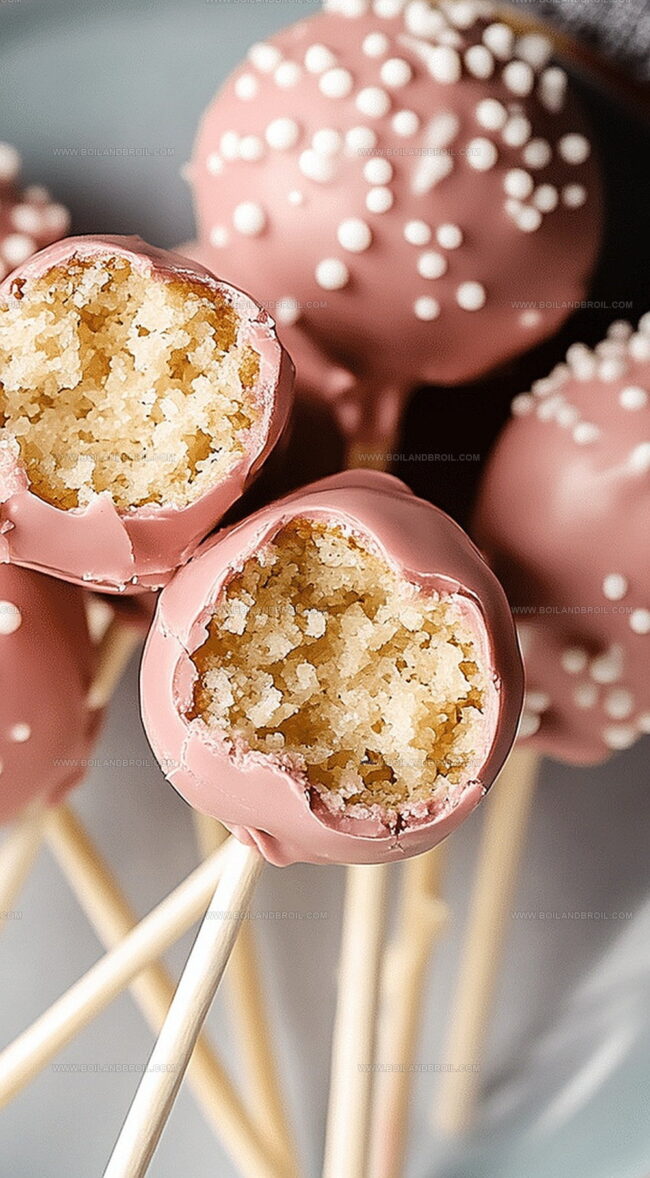
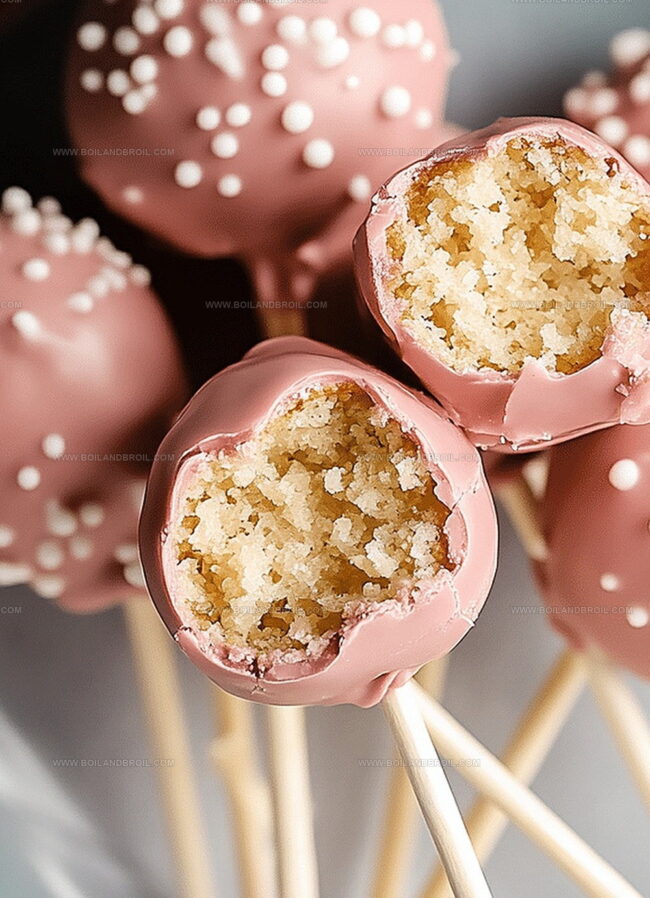
Remove any dark edges and crumble the cake into fine, smooth crumbs in a large mixing bowl.
Step 2: Create Cake Pop Mixture
Incorporate frosting into the cake crumbs.
Mix thoroughly until the mixture holds together when pressed.
The consistency should be moist but not overly sticky.
Add additional frosting if the mixture feels too dry or crumbly.
Step 3: Shape Cake Balls
Form the mixture into uniform round balls using a cookie scoop or your hands.
Each ball should be approximately one-inch in diameter.
Place the shaped balls onto a lined baking sheet.
Step 4: Prepare Cake Pop Sticks
Melt a small portion of candy melts.
Dip the tip of each stick into the melted candy coating.
Insert the stick halfway into each cake ball.
Refrigerate the tray for 10-15 minutes to stabilize the cake balls.
Step 5: Melt Candy Coating
Carefully melt the remaining candy melts in a microwave-safe bowl.
Heat in short 30-second intervals, stirring between each session.
Ensure a smooth, fluid consistency by adding a few drops of vegetable oil if needed.
Step 6: Coat Cake Pops
Remove the chilled cake balls from the refrigerator.
Dip each cake pop into the melted candy coating, ensuring complete coverage.
Allow excess coating to drip back into the bowl.
Step 7: Decorate And Set
Quickly sprinkle white decorative sprinkles on top of each freshly coated cake pop.
Place the decorated cake pops in a Styrofoam block or cake pop stand.
Allow the coating to set completely for approximately 15 minutes.
Cake Pop Success Tips
Storage and Serving for Cake Pops
Great Pairings for Cake Pops
Fun Variations for Cake Pops
FAQs
The boxed vanilla or chocolate cake mix works perfectly. Yellow cake is also a great option that provides a neutral base for decorating and delivers consistent texture.
Yes, you can use a foam block, an upside-down colander, or even a cardboard box with small holes punched in it to hold the cake pops while they set.
Dip the stick tip into melted candy coating before inserting into the cake ball. This creates a strong seal and helps the cake ball stay securely attached during dipping and decorating.
This usually happens when the cake balls are too warm or the candy coating is too thick. Ensure cake balls are well-chilled before dipping and thin out the coating with a few drops of vegetable oil if it seems too thick.
Print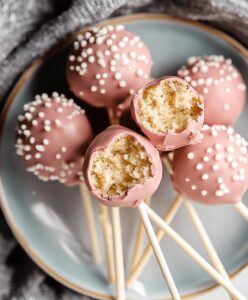
Starbucks Cake Pops Recipe
- Total Time: 1 hour
- Yield: 24 1x
Description
Sweet Starbucks cake pops deliver pure deliciousness in one perfect bite. Homemade bakery magic brings professional-quality treats directly into home kitchens with simple ingredients and easy steps you can master.
Ingredients
Main Ingredients:
- 1 box classic cake mix (according to box instructions)
- 3 tablespoons vanilla frosting
Decoration Ingredients:
- 12 ounces (340 grams) pink candy melts
- White sprinkles
Equipment:
- 24–36 cake pop sticks or lollipop sticks
Instructions
- Prepare the cake according to box instructions, ensuring complete cooling to room temperature for optimal texture and handling.
- Carefully remove cake from pan, trimming browned edges for a smoother consistency. Gently crumble cake into fine, uniform crumbs within a spacious mixing bowl.
- Incorporate frosting into cake crumbs, blending thoroughly until mixture achieves a cohesive yet not overly sticky texture. Adjust frosting quantity if mixture appears too dry or crumbly.
- Utilize a cookie scoop to form uniform cake balls approximately 1-inch in diameter. Arrange shaped balls on a parchment-lined baking sheet, maintaining consistent spacing.
- Partially melt candy coating and delicately coat stick ends. Carefully insert each stick halfway into prepared cake balls, ensuring secure attachment. Refrigerate for 10-15 minutes to stabilize structure.
- Melt remaining candy coating in microwave, heating at 30-second intervals and stirring between cycles. Achieve a smooth, fluid consistency by adding minimal vegetable oil if necessary.
- Extract chilled cake balls and immerse each completely in melted coating, allowing excess to drip away. Position coated cake pops vertically in a Styrofoam stand or specialized holder.
- While coating remains soft, quickly dust white sprinkles over each cake pop. Allow complete setting for approximately 15 minutes before serving or storing.
Notes
- Cool the cake completely before crumbling to prevent moisture buildup and ensure a perfect cake pop texture.
- Add frosting gradually to achieve the right binding – mixture should hold shape without being too wet or dry.
- Dipping stick ends in melted candy creates a secure anchor, reducing the chance of cake pops sliding off during coating.
- Adding a few drops of vegetable oil helps thin candy melts, creating a smoother, more even coverage for a professional finish.
- Prep Time: 30 minutes
- Cook Time: 30 minutes
- Category: Desserts, Snacks
- Method: Baking
- Cuisine: American
Nutrition
- Serving Size: 24
- Calories: 150
- Sugar: 10 g
- Sodium: 180 mg
- Fat: 6 g
- Saturated Fat: 3 g
- Unsaturated Fat: 2 g
- Trans Fat: 0 g
- Carbohydrates: 22 g
- Fiber: 0 g
- Protein: 1 g
- Cholesterol: 20 mg
Clara Thompson
Recipe Developer & Culinary Educator
Expertise
Developing accessible single-serving recipes, Food writing and content creation, Plant-based and allergen-friendly cooking, Culinary education and workshop facilitation
Education
Oregon Culinary Institute (Portland, OR)
Diploma in Culinary Arts
Specialized in plant-based cooking and sustainable kitchen practices.
Portland Community College
Certificate in Food Writing and Media
Focused on recipe writing, food photography, and digital content creation.
Clara’s food journey began with a curiosity for color, texture, and ingredients pulled straight from the garden. Her background in plant-forward cooking and creative writing gives her a unique edge – she makes healthy, flavorful food feel inviting, not intimidating.
She specializes in meals that work for busy lives and different diets, all without sacrificing taste. Clara’s voice comes through in every recipe she writes – clear, kind, and encouraging.