
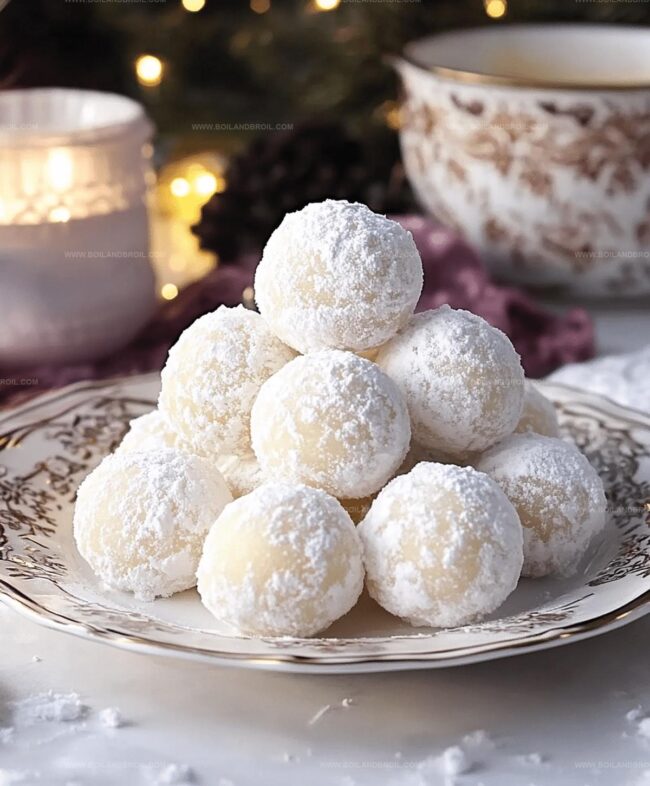
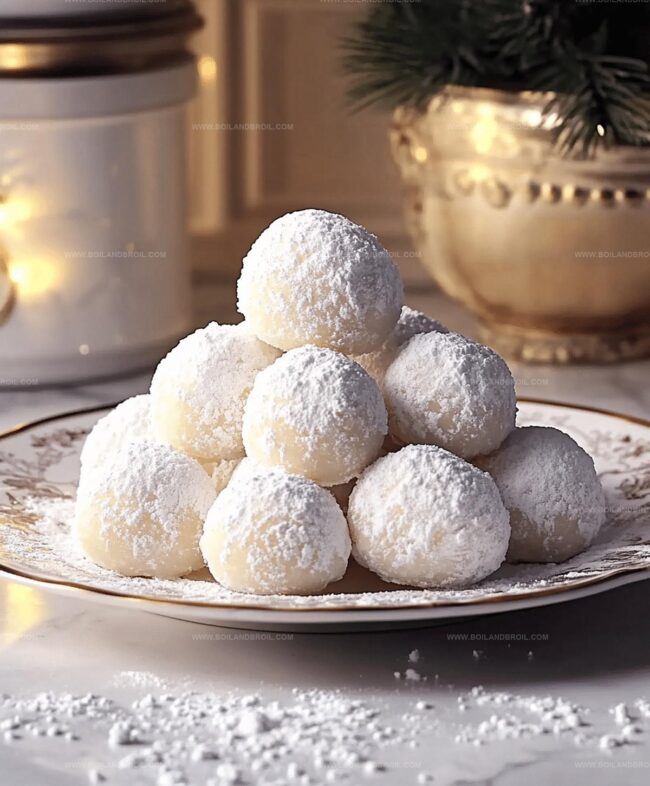
Sweet Snowball Magic: Condensed Milk Cookies Recipe
Soft, buttery cookies rolled in powdered sugar always spark joy at gatherings, and this sweetened condensed milk snowball cookies recipe delivers pure winter magic.
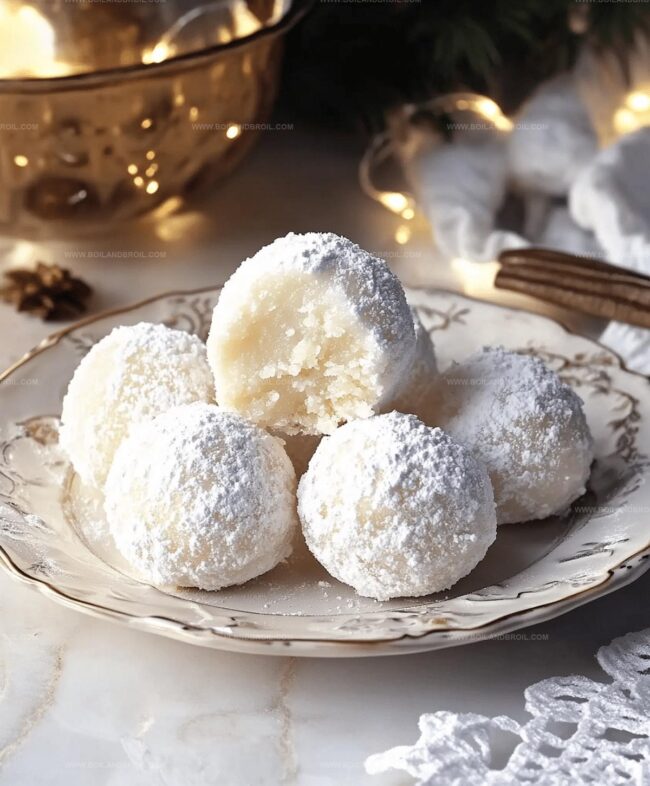
These delicate treats melt in your mouth with a delightful richness.
Creamy condensed milk adds unexpected depth to the classic snowball cookie texture.
Each bite brings a delicate crunch that gives way to a tender, sweet center.
The simple ingredients come together quickly, making these cookies a perfect last-minute dessert.
Dusted with a generous coating of powdered sugar, these snowballs will charm everyone at your holiday table.
Bake a batch and watch smiles spread like fresh snowfall.
FAQs
Sweetened condensed milk adds incredible moisture and rich sweetness, creating a softer, more tender cookie texture that melts in your mouth compared to traditional snowball cookies.
Yes, you can prepare the dough in advance and refrigerate it for up to 3 days before baking. Just make sure to let the dough come to room temperature before scooping and baking.
You can use a hand mixer or even mix by hand with a wooden spoon. The key is to ensure the butter is very soft and well-creamed before adding other ingredients.
Look for light golden-brown edges and bottoms while the tops remain pale. They might seem slightly underbaked, but they’ll firm up as they cool, creating a delicate, melt-in-your-mouth texture.
What Makes Snowball Cookies So Addictive
What You’ll Need for Snowball Cookies
Main Ingredients:
Flour and Leavening Agent:Dairy and Fat:Flavor Enhancers:Finishing Ingredient:How to Roll Snowball Cookies Easily
Step 1: Preheat and Prepare Oven
Set the oven to 325°F.
Cover a baking sheet with parchment paper.
Your kitchen is now ready for cookie magic.
Step 2: Create Dry Mixture
Combine flour and baking powder in a medium bowl.
Whisk thoroughly to ensure even distribution and create a light, airy base for your cookies.
Step 3: Whip the Butter
Use a mixer to beat butter until it becomes fluffy and light.
This process takes about 2 minutes and creates the perfect creamy foundation for your cookies.
Step 4: Blend Wet Ingredients
Mix sweetened condensed milk and vanilla extract into the whipped butter.
Blend until the mixture becomes smooth and uniform.
Ingredients:Step 5: Merge Dry and Wet Mixtures
Slowly fold dry ingredients into the wet mixture.
Mix gently until just combined.
Stop mixing as soon as no flour streaks remain to keep the cookies tender.
Step 6: Shape and Bake Cookies
Drop cookie dough onto the prepared baking sheet using a cookie scoop.
Space cookies about 2 inches apart.
Bake for 12-14 minutes until bottoms turn light brown while tops remain pale.
Step 7: Cool and Dust
Allow cookies to rest on the baking sheet for 5 minutes.
Transfer to a wire rack to cool completely.
Sprinkle generously with powdered sugar using a mesh strainer for a beautiful finish.
Tips to Make the Best Snowball Texture
Storing and Reheating Snowball Cookies Right
Snowball Cookie Pairing Recommendations
Creative Ways to Switch Up Snowball Cookies
Print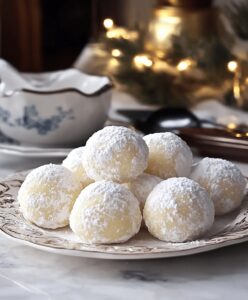
Sweetened Condensed Milk Snowball Cookies Recipe
- Total Time: 29 minutes
- Yield: 24 1x
Description
Snowball cookies embrace winter’s sweet charm with condensed milk’s creamy richness. Powdered sugar-dusted morsels melt deliciously on palates, delivering pure comfort and nostalgic holiday warmth.
Ingredients
Main Ingredients:
- 1 cup (227 grams) unsalted butter, room temperature
- 2 cups (240 grams) all-purpose flour, spooned and leveled
- 1/2 cup (120 milliliters) sweetened condensed milk
Leavening and Flavoring:
- 1 tablespoon (15 milliliters) baking powder
- 1 tablespoon (15 milliliters) pure vanilla extract
Finishing:
- 1/2 cup (60 grams) powdered sugar, for dusting cookies
Instructions
- Prepare the baking environment by heating the oven to 325°F and lining a baking sheet with parchment paper. Organize all ingredients for efficient preparation.
- Combine flour and baking powder in a medium bowl, whisking thoroughly to ensure even distribution and aerate the mixture.
- Using a mixer, whip room-temperature butter until light and fluffy, approximately 2 minutes, creating a smooth base for the cookie dough.
- Blend sweetened condensed milk and vanilla extract into the whipped butter, mixing until the mixture becomes uniformly creamy and well-integrated.
- Gradually fold dry ingredients into the wet mixture, stirring carefully to prevent overmixing. Stop mixing once flour is completely incorporated and no streaks remain.
- Portion dough using a cookie scoop, placing dollops about 2 inches apart on the prepared baking sheet. Bake for 12-14 minutes, monitoring until cookie bottoms turn light golden while tops remain pale.
- Allow cookies to rest on the baking sheet for 5 minutes, then transfer to a wire rack for complete cooling. Once cooled, generously dust with powdered sugar using a mesh strainer for an elegant finish.
Notes
- Ensure butter is genuinely room temperature for seamless mixing and optimal cookie texture.
- Use fresh, high-quality vanilla extract to enhance the overall flavor profile of the cookies.
- Chill the dough for 30 minutes before baking if you want more controlled spreading and a firmer cookie consistency.
- For gluten-free adaptation, substitute all-purpose flour with a 1:1 gluten-free baking blend to maintain the delicate snowball cookie structure.
- Prep Time: 15 minutes
- Cook Time: 14 minutes
- Category: Desserts, Snacks
- Method: Baking
- Cuisine: American
Nutrition
- Serving Size: 24
- Calories: 175
- Sugar: 6 g
- Sodium: 52 mg
- Fat: 12 g
- Saturated Fat: 7 g
- Unsaturated Fat: 4 g
- Trans Fat: 0 g
- Carbohydrates: 18 g
- Fiber: 0.5 g
- Protein: 2 g
- Cholesterol: 30 mg
Clara Thompson
Recipe Developer & Culinary Educator
Expertise
Developing accessible single-serving recipes, Food writing and content creation, Plant-based and allergen-friendly cooking, Culinary education and workshop facilitation
Education
Oregon Culinary Institute (Portland, OR)
Diploma in Culinary Arts
Specialized in plant-based cooking and sustainable kitchen practices.
Portland Community College
Certificate in Food Writing and Media
Focused on recipe writing, food photography, and digital content creation.
Clara’s food journey began with a curiosity for color, texture, and ingredients pulled straight from the garden. Her background in plant-forward cooking and creative writing gives her a unique edge – she makes healthy, flavorful food feel inviting, not intimidating.
She specializes in meals that work for busy lives and different diets, all without sacrificing taste. Clara’s voice comes through in every recipe she writes – clear, kind, and encouraging.